> ## Documentation Index
> Fetch the complete documentation index at: https://docs.condense.io/llms.txt
> Use this file to discover all available pages before exploring further.
# Deploy a Custom Transform
### Overview
A **Custom Transform** in Condense is a fully code-based processing component that you build in the built-in IDE, version-control through Git, and deploy into a workspace pipeline. Unlike prebuilt transforms, custom transforms let you implement domain-specific logic, advanced event processing, and cross-event correlation in any programming language supported by the Condense IDE.
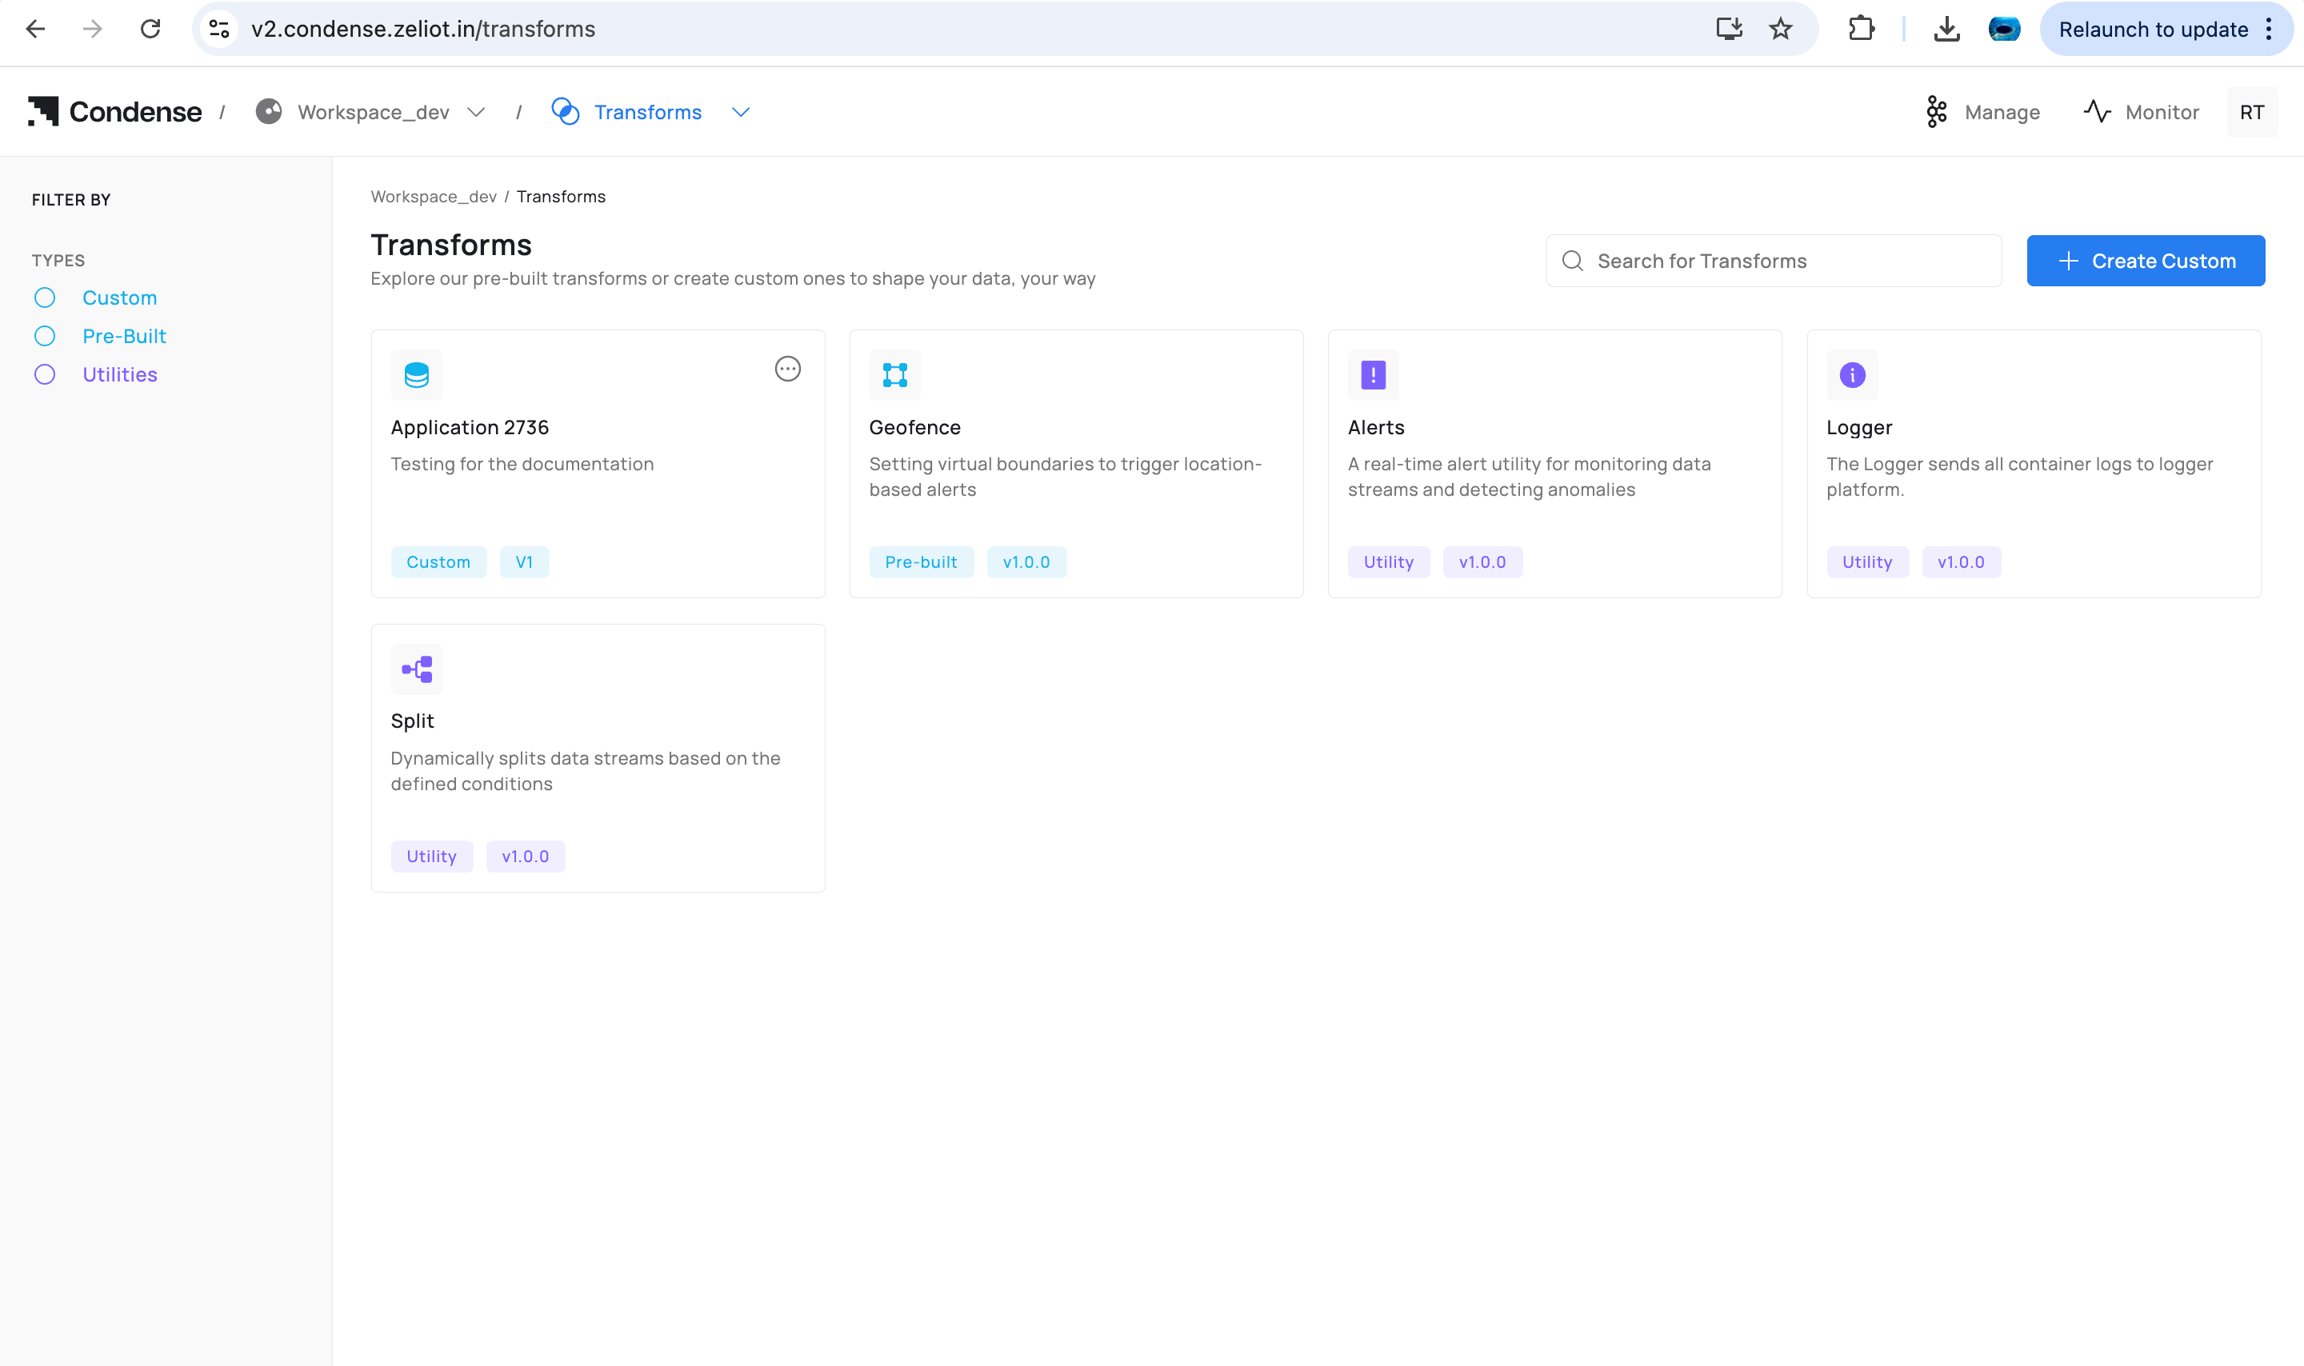
Once built and published, a custom transform appears alongside prebuilt transforms in the pipeline editor and is ready to deploy.
> Custom transforms are created through **Applications** in Condense — the built-in development environment where you write, build, and publish your logic before it becomes deployable.
***
### What You Can Do with a Custom Transform
* Implement domain-specific rules, enrichment, or routing not covered by prebuilt options.
* Write logic in any programming language supported in the Condense IDE.
* Perform advanced processing, cross-event correlation, or domain-specific analytics.
* Version-control all logic through Git, with immutable published versions.
* Roll back to earlier versions at any time from the pipeline editor.
***
### Custom Transform Lifecycle
Every custom transform follows this lifecycle:
**Create → Develop → Build → Publish → Deploy → Update/Rollback → Delete**
***
### Step 1 - Create an Application
**Who can create:** Workspace Admins, Maintainers, Developers
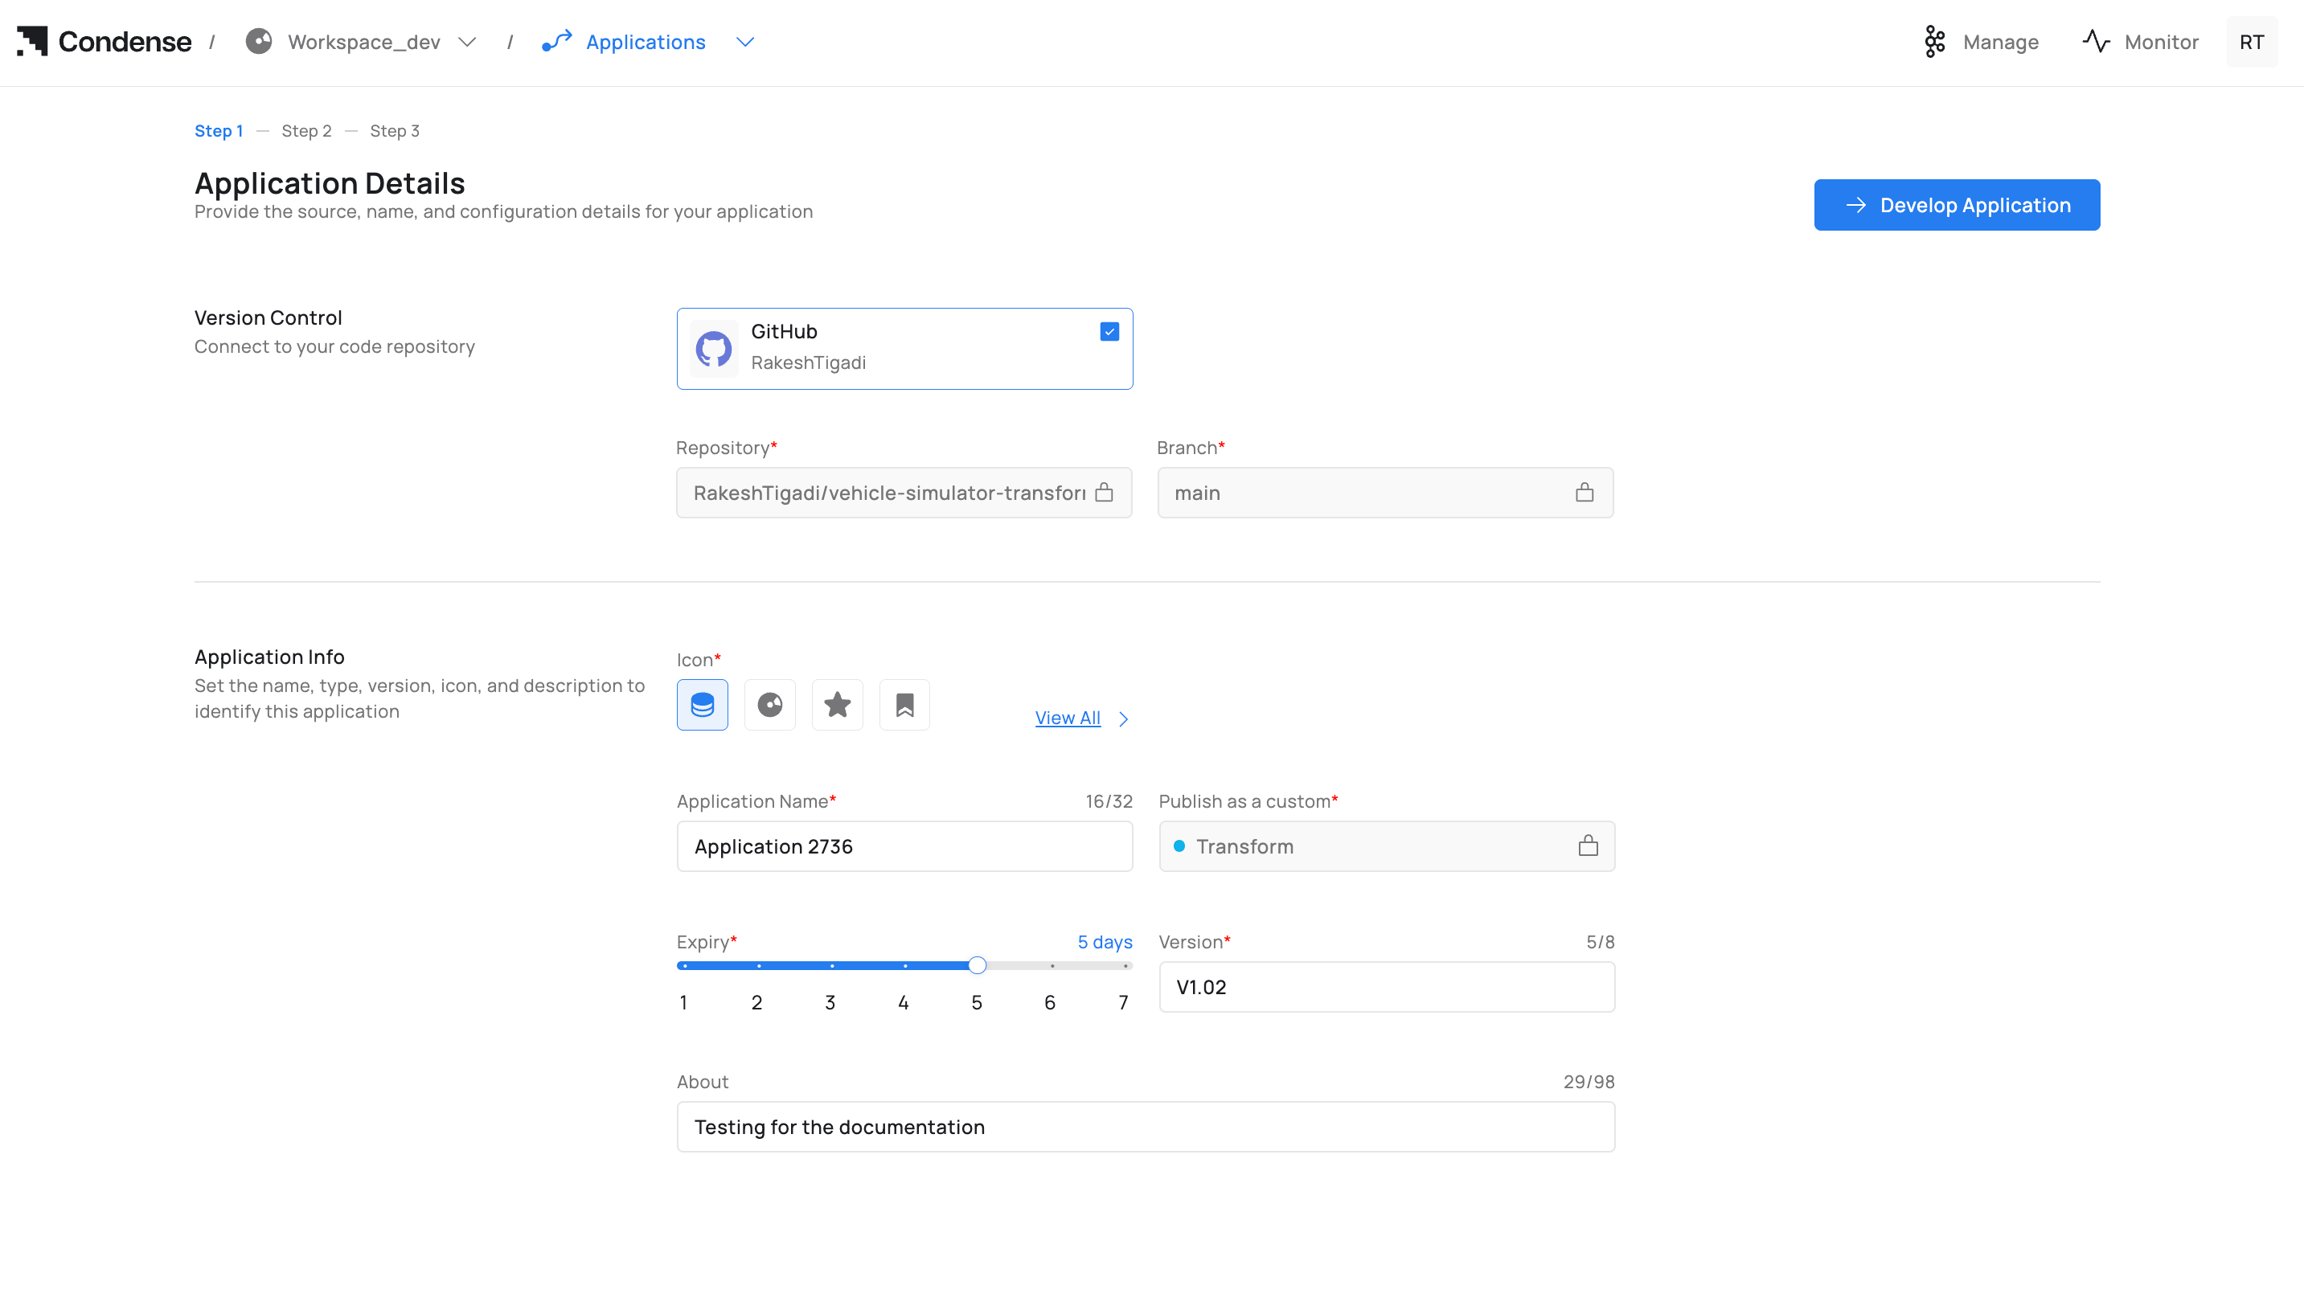
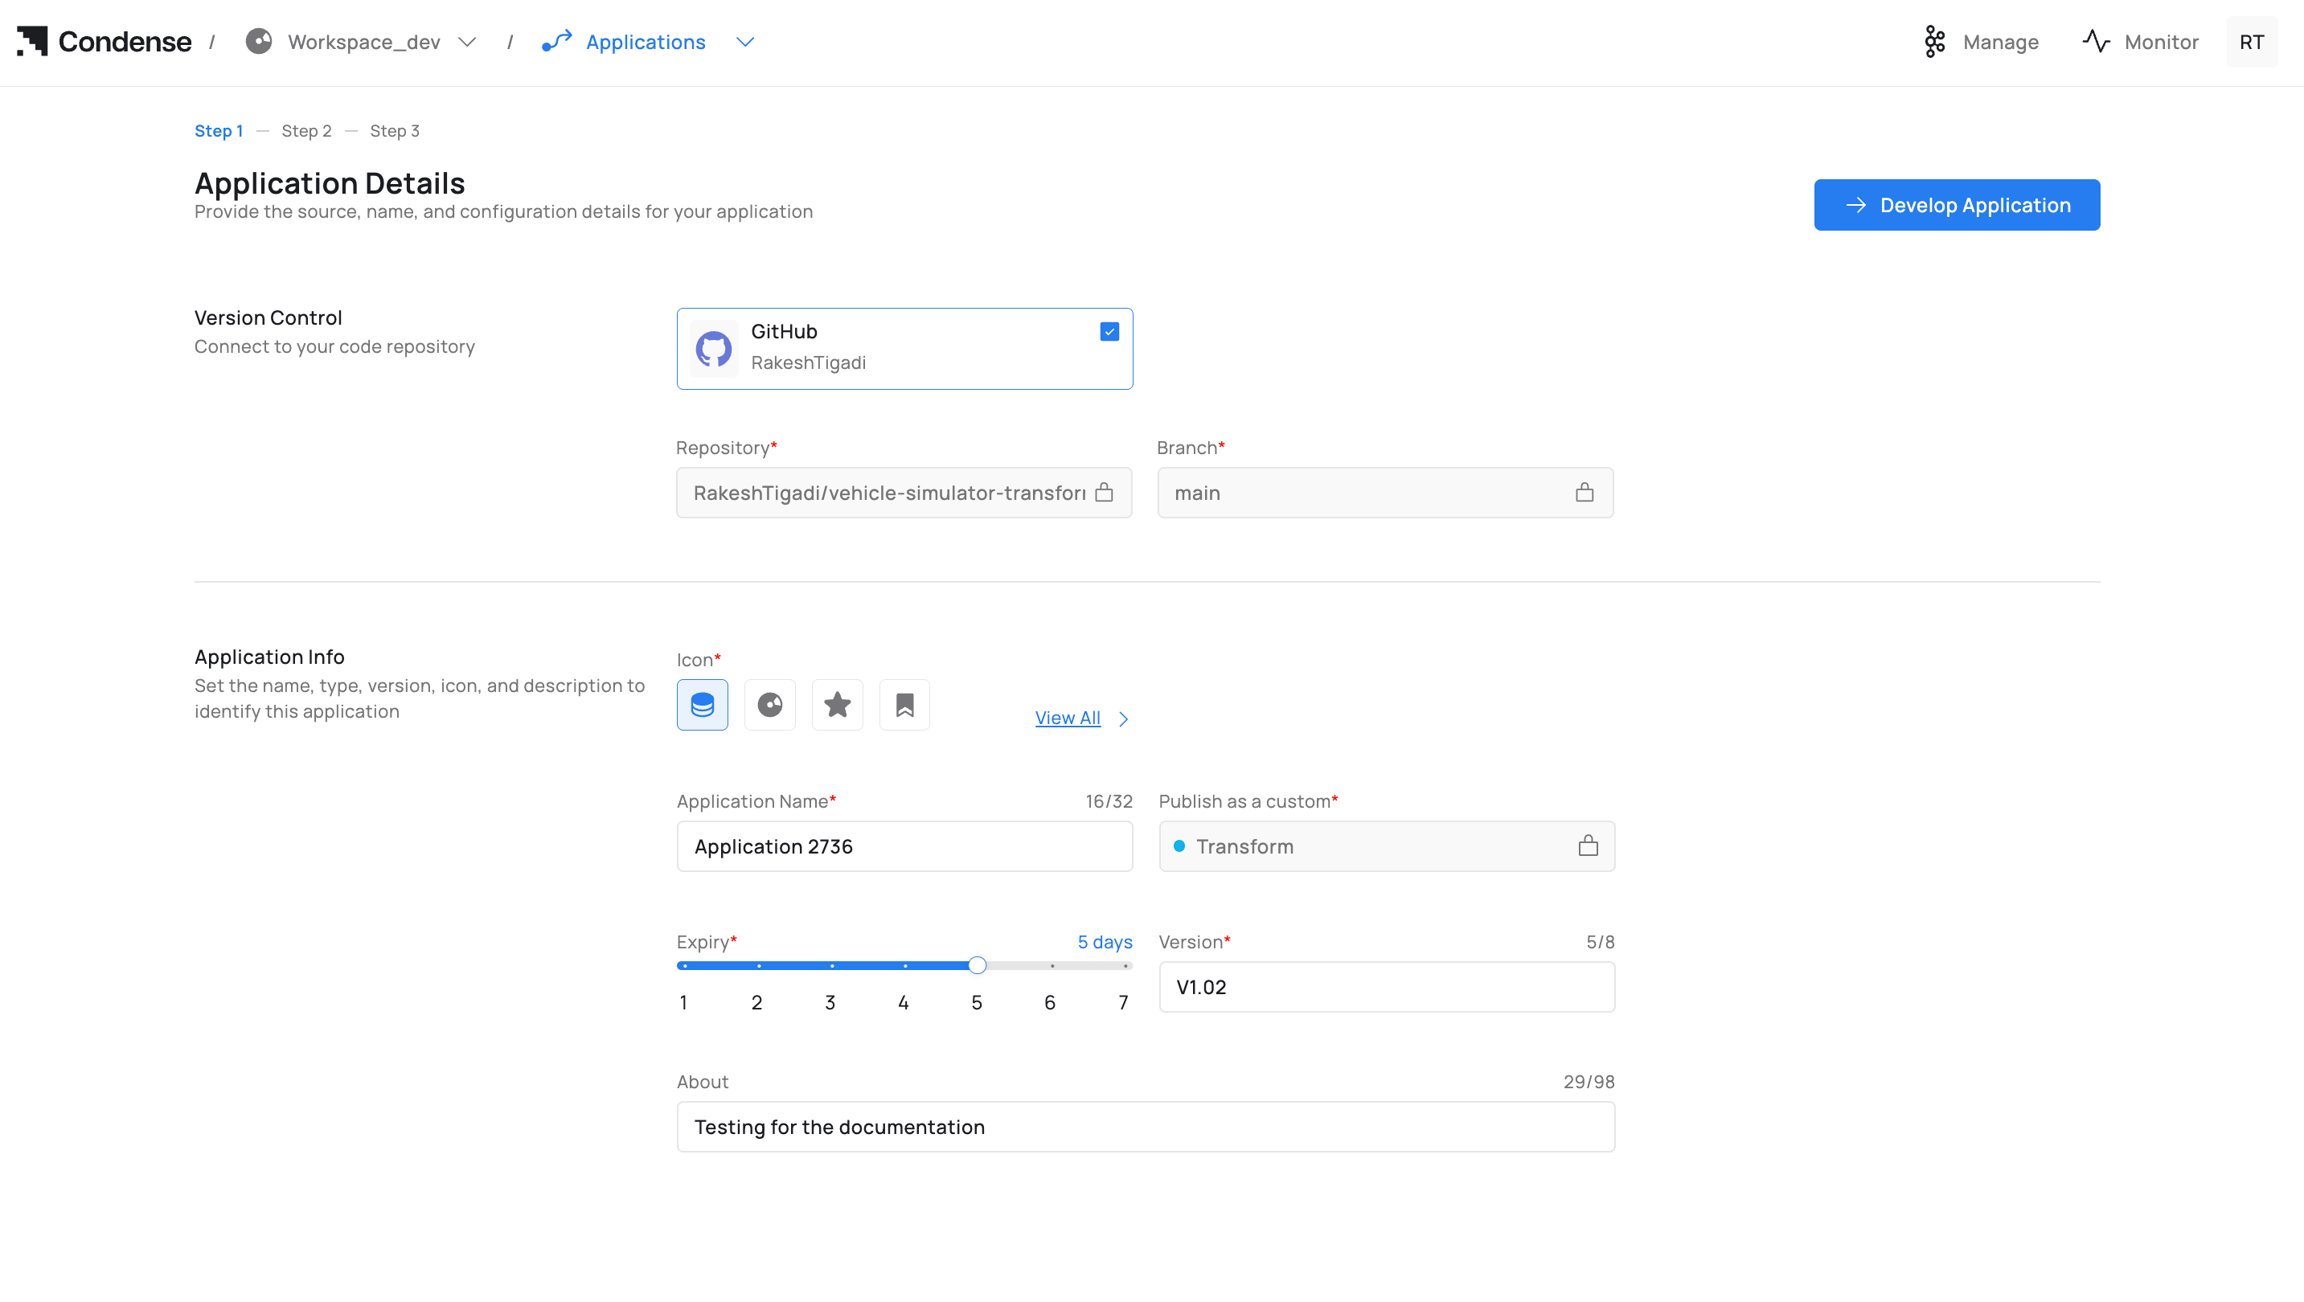
1. Go to **Applications** in your workspace → click **Create Application**.
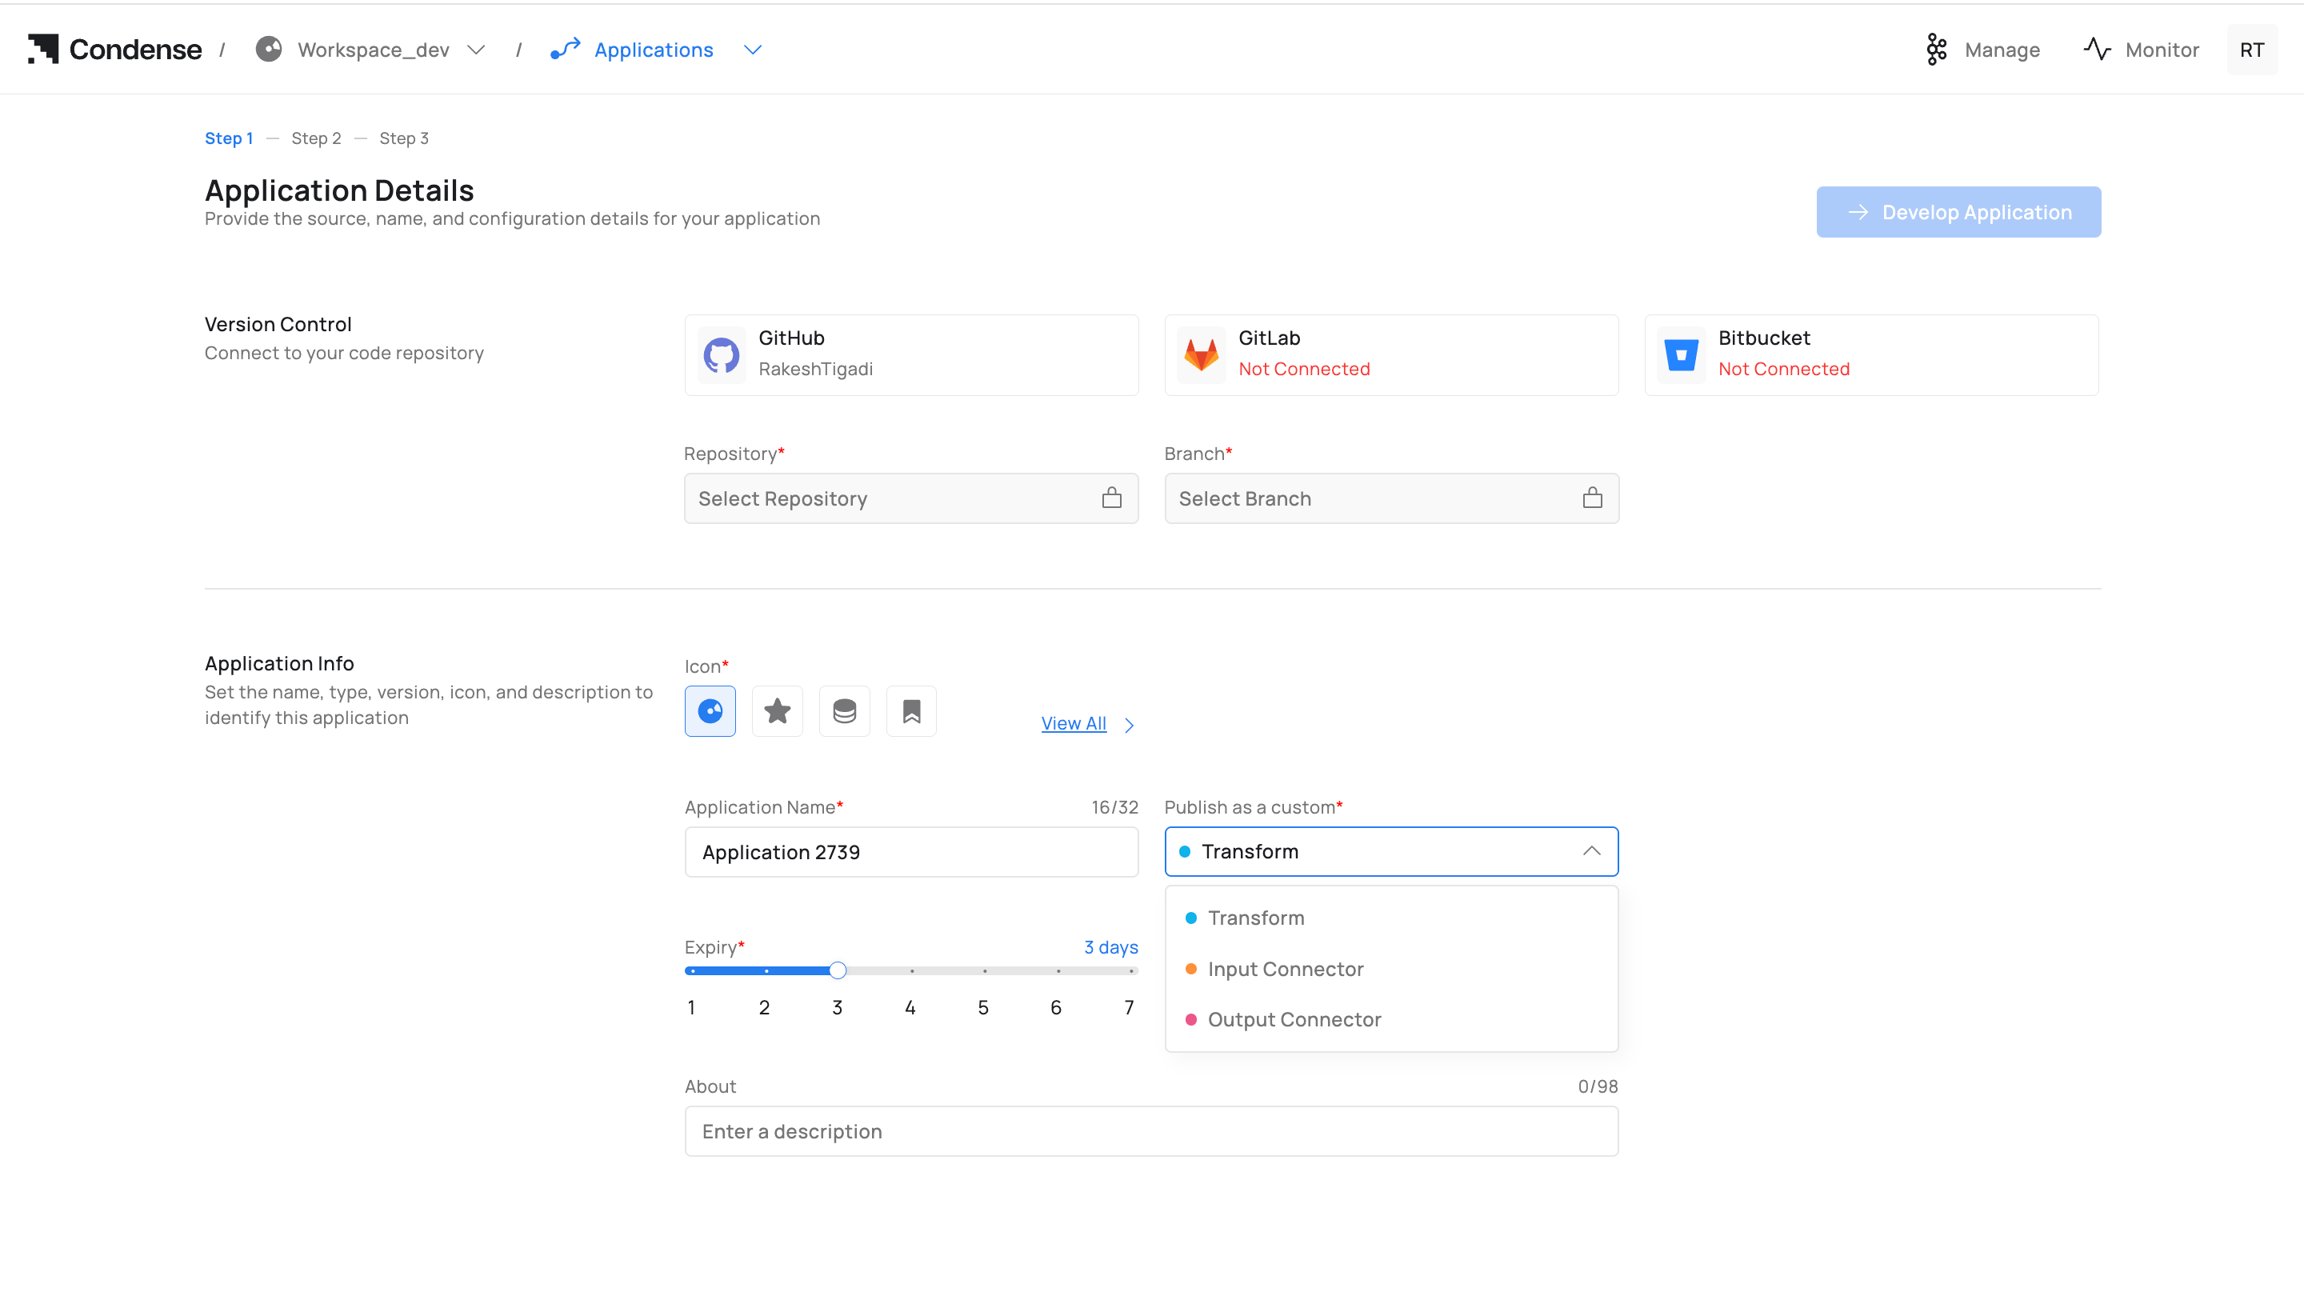
 2. **Version Control**: Connect a Git provider (GitHub / GitLab / Bitbucket), then select your **Repository** and **Branch**.
3. **Application Info**: Fill in the following fields:
| **Field** | **Description** | **Required** |
| ------------------- | -------------------------------------------------------------------------- | ------------ |
| Application Name | Unique name within the workspace (3–63 characters, lowercase letters only) | Yes |
| Publish as a custom | Select **Transform** (not Input/Output Connector) | Yes |
| Version | Human-readable version label e.g. `v1`, `v1.1.0` | Yes |
| Expiry | Draft retention period — drafts are auto-cleaned after this | Yes |
| About | Optional description shown in details and summaries | No |
2. **Version Control**: Connect a Git provider (GitHub / GitLab / Bitbucket), then select your **Repository** and **Branch**.
3. **Application Info**: Fill in the following fields:
| **Field** | **Description** | **Required** |
| ------------------- | -------------------------------------------------------------------------- | ------------ |
| Application Name | Unique name within the workspace (3–63 characters, lowercase letters only) | Yes |
| Publish as a custom | Select **Transform** (not Input/Output Connector) | Yes |
| Version | Human-readable version label e.g. `v1`, `v1.1.0` | Yes |
| Expiry | Draft retention period — drafts are auto-cleaned after this | Yes |
| About | Optional description shown in details and summaries | No |
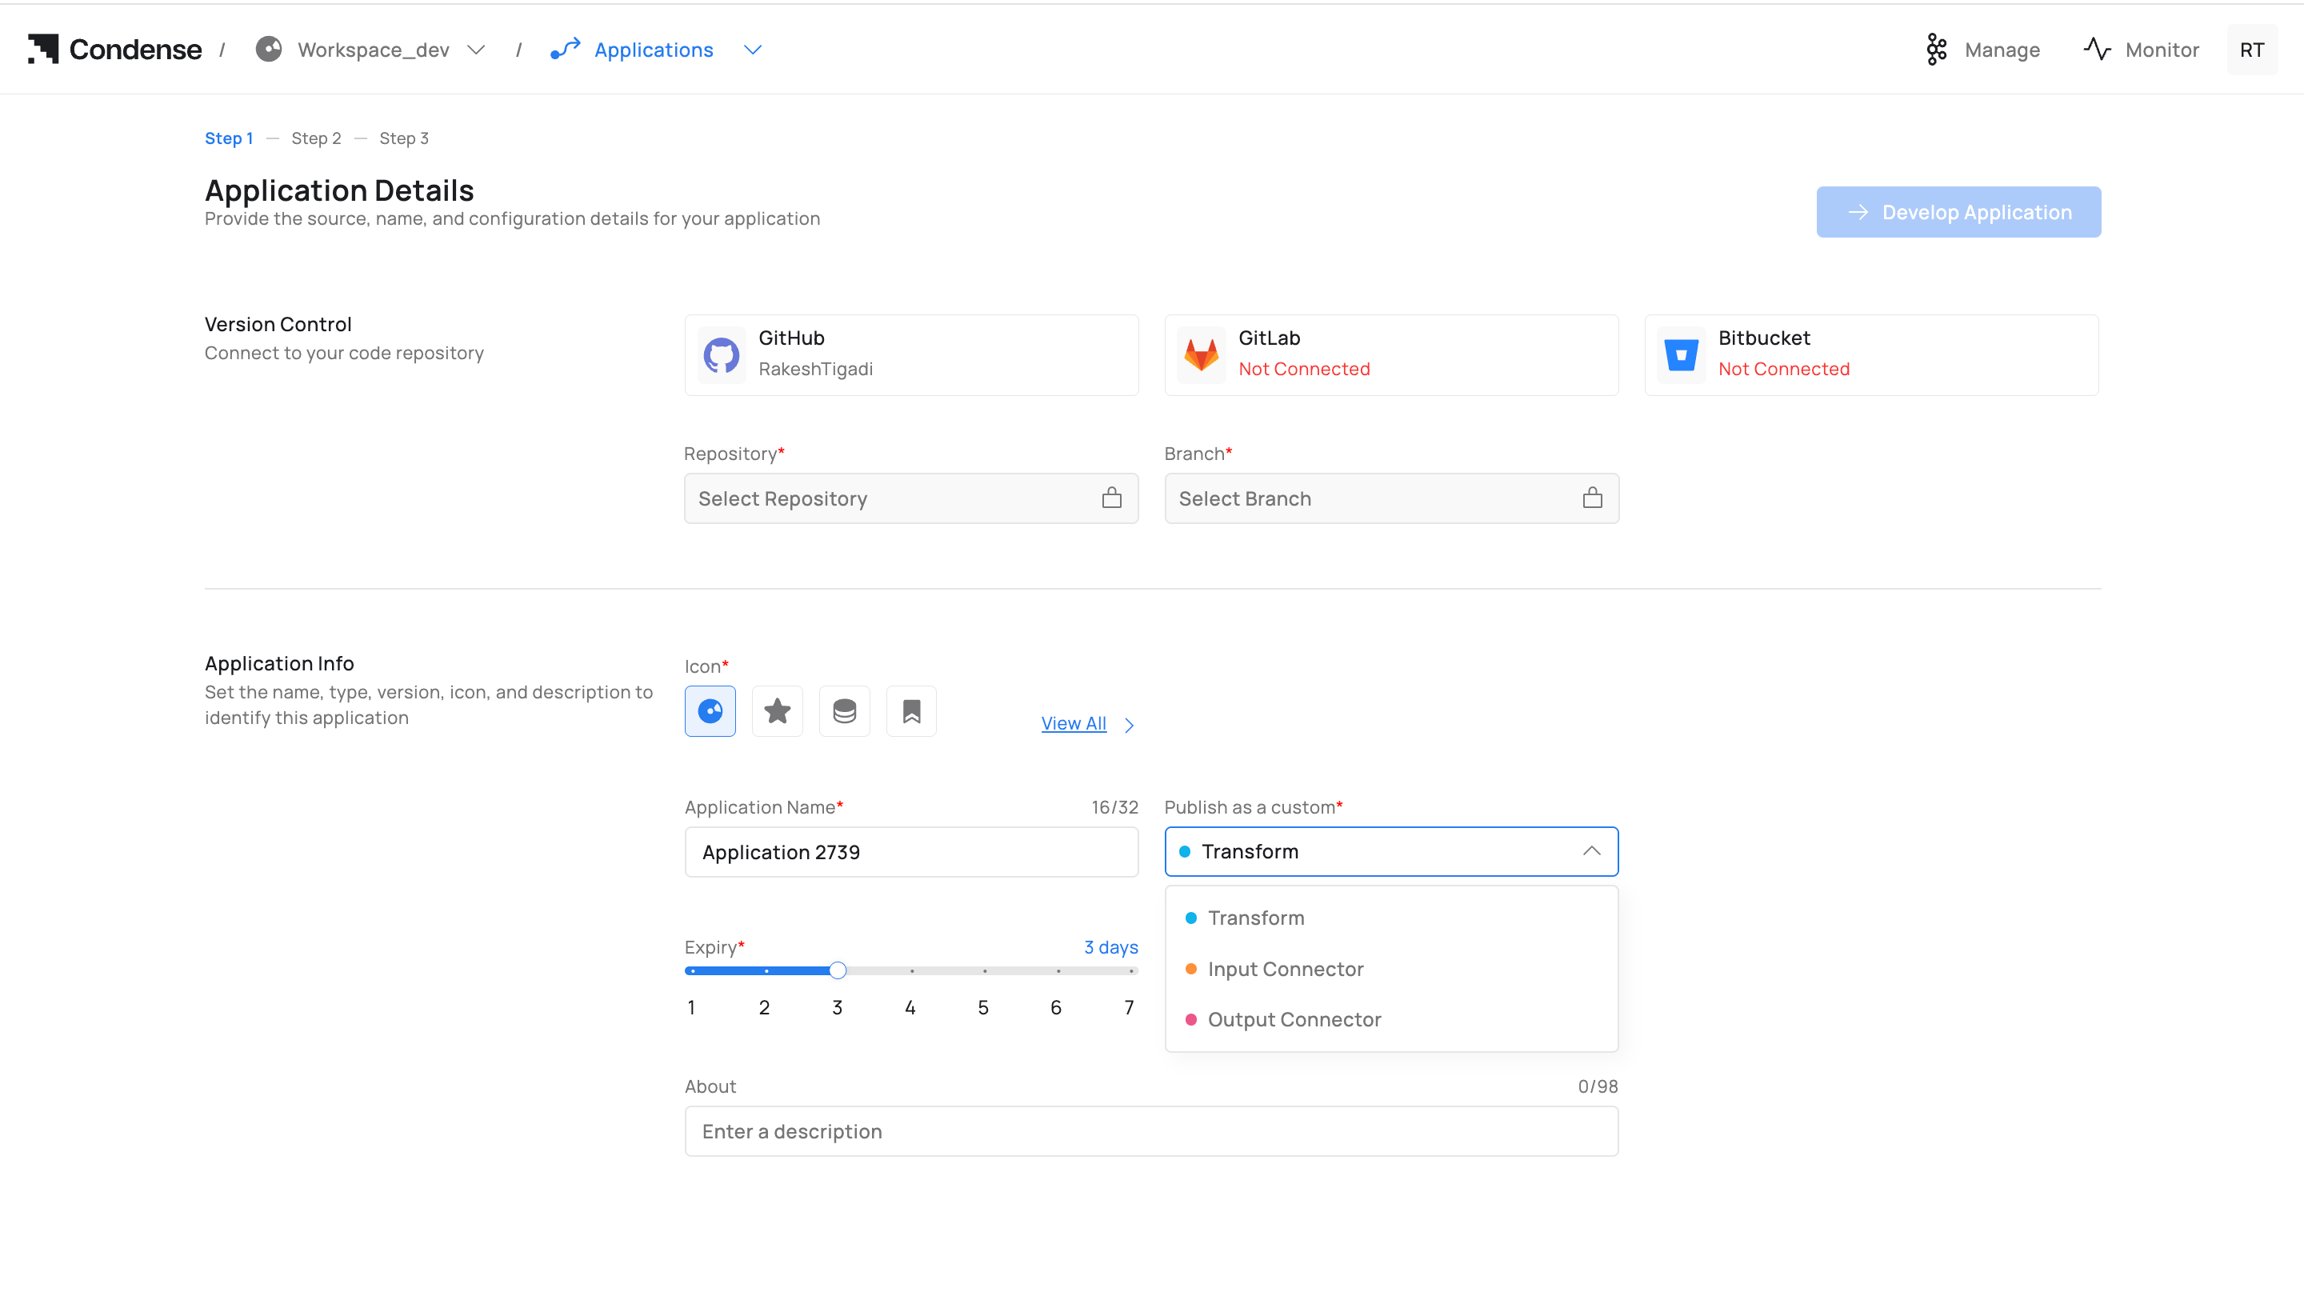 4. Click **Develop Application** to open the IDE.
***
### Step 2 - Develop in the IDE
**Who can edit drafts:** Admins, Maintainers, Developers
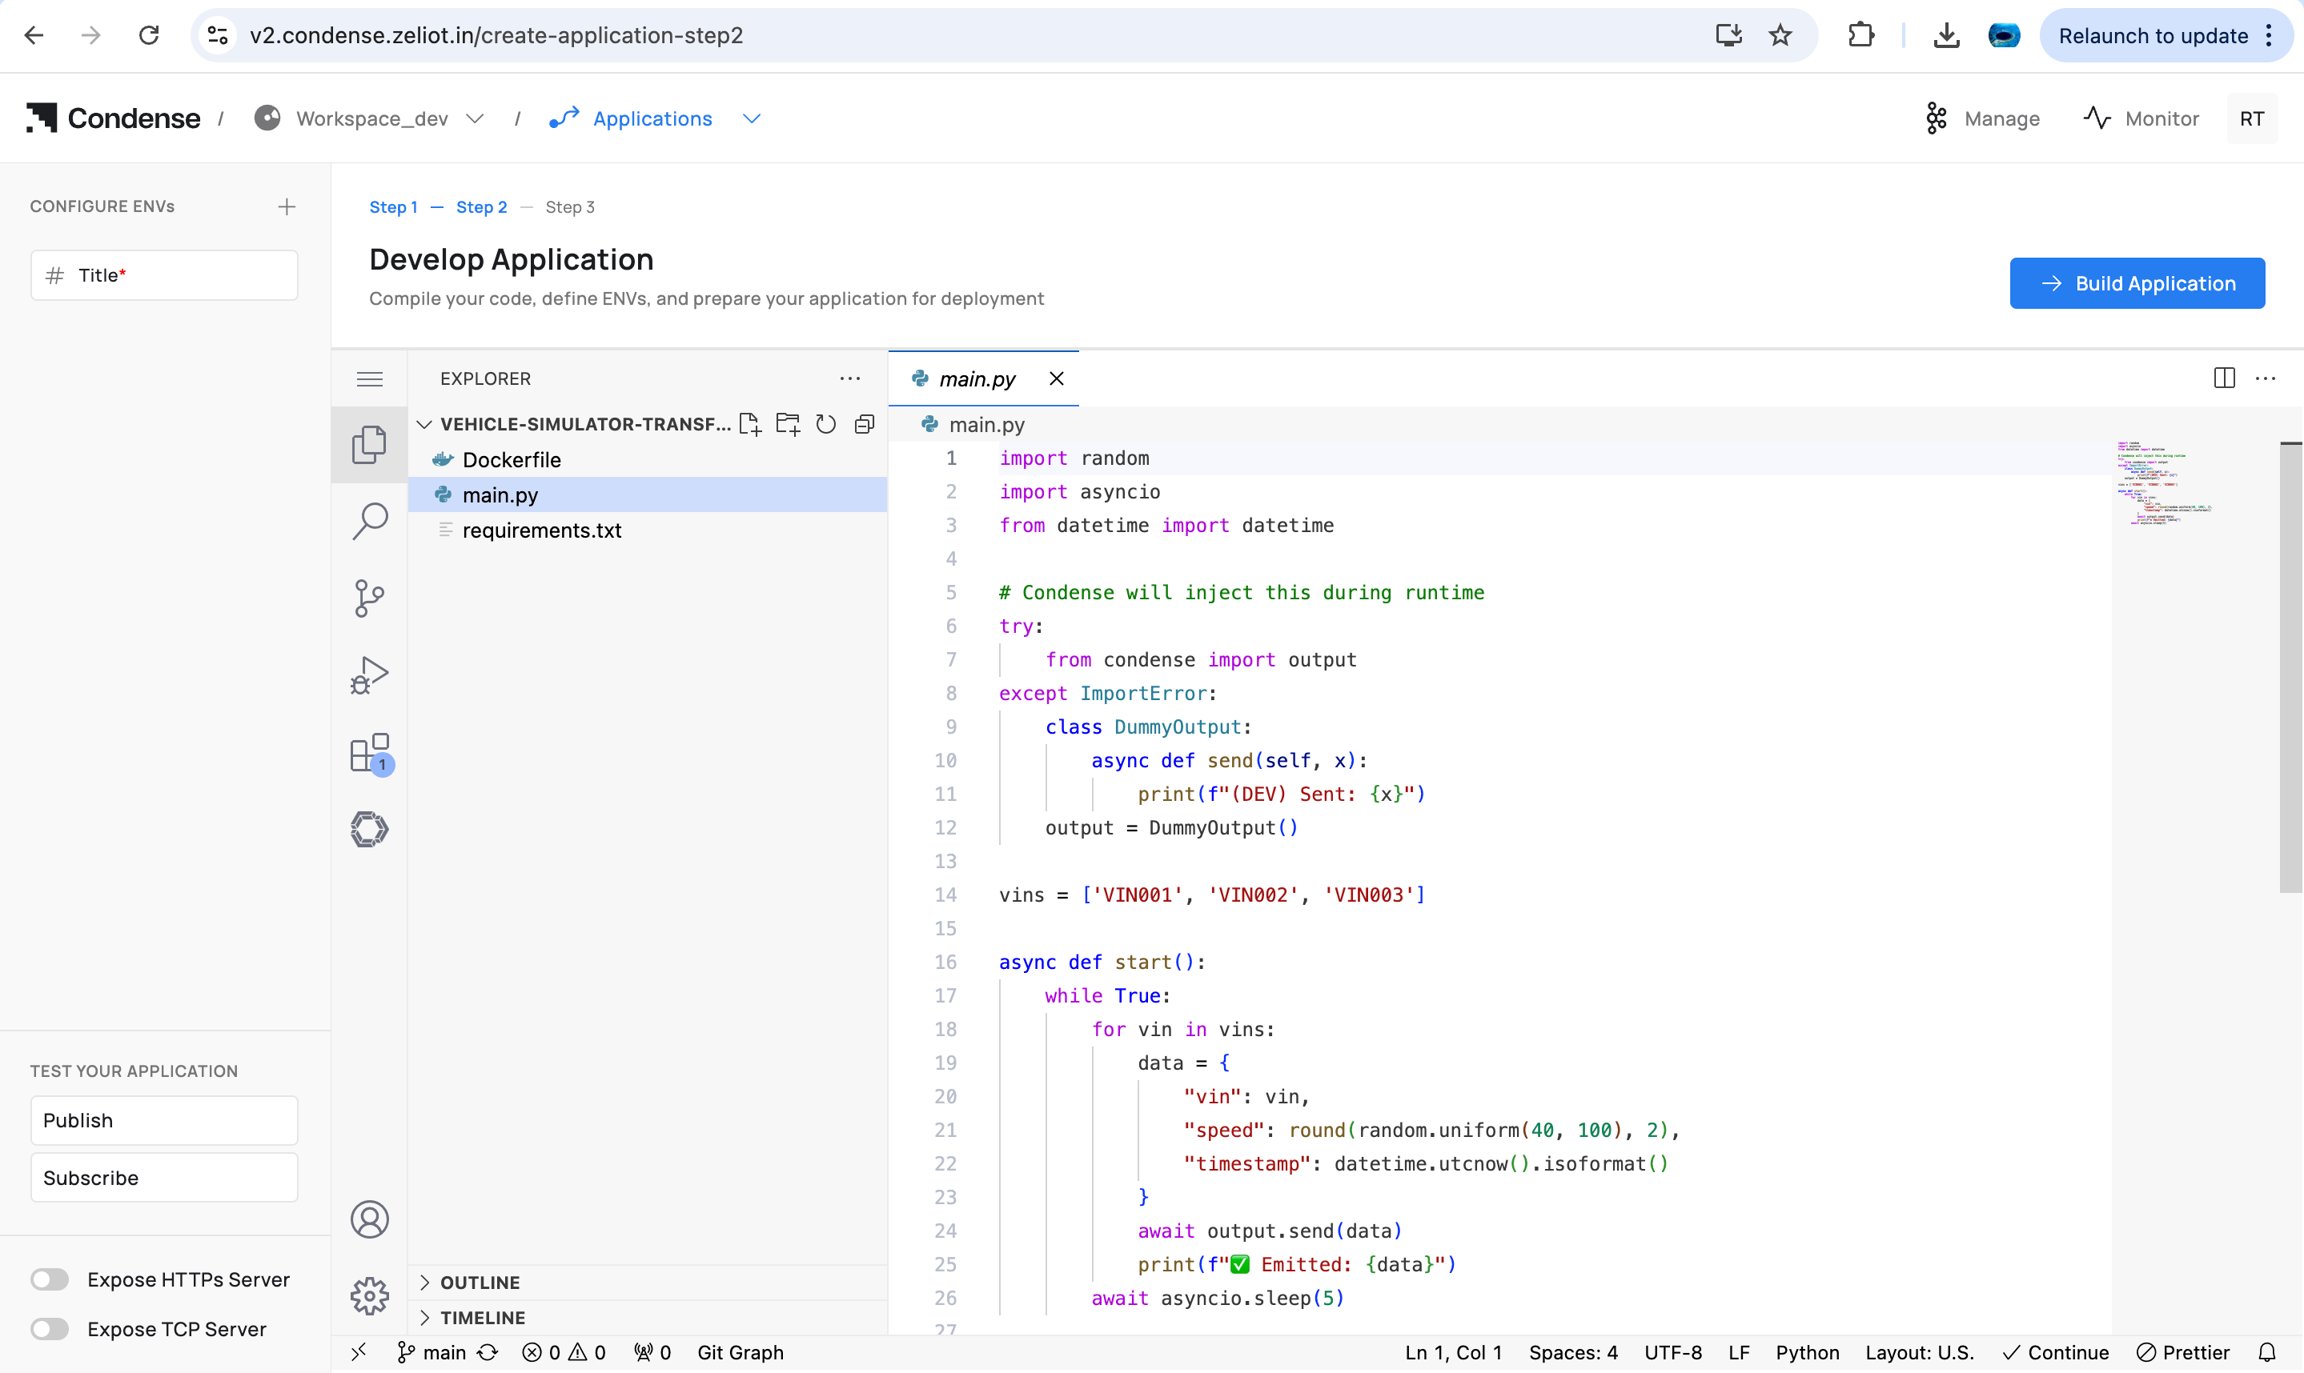
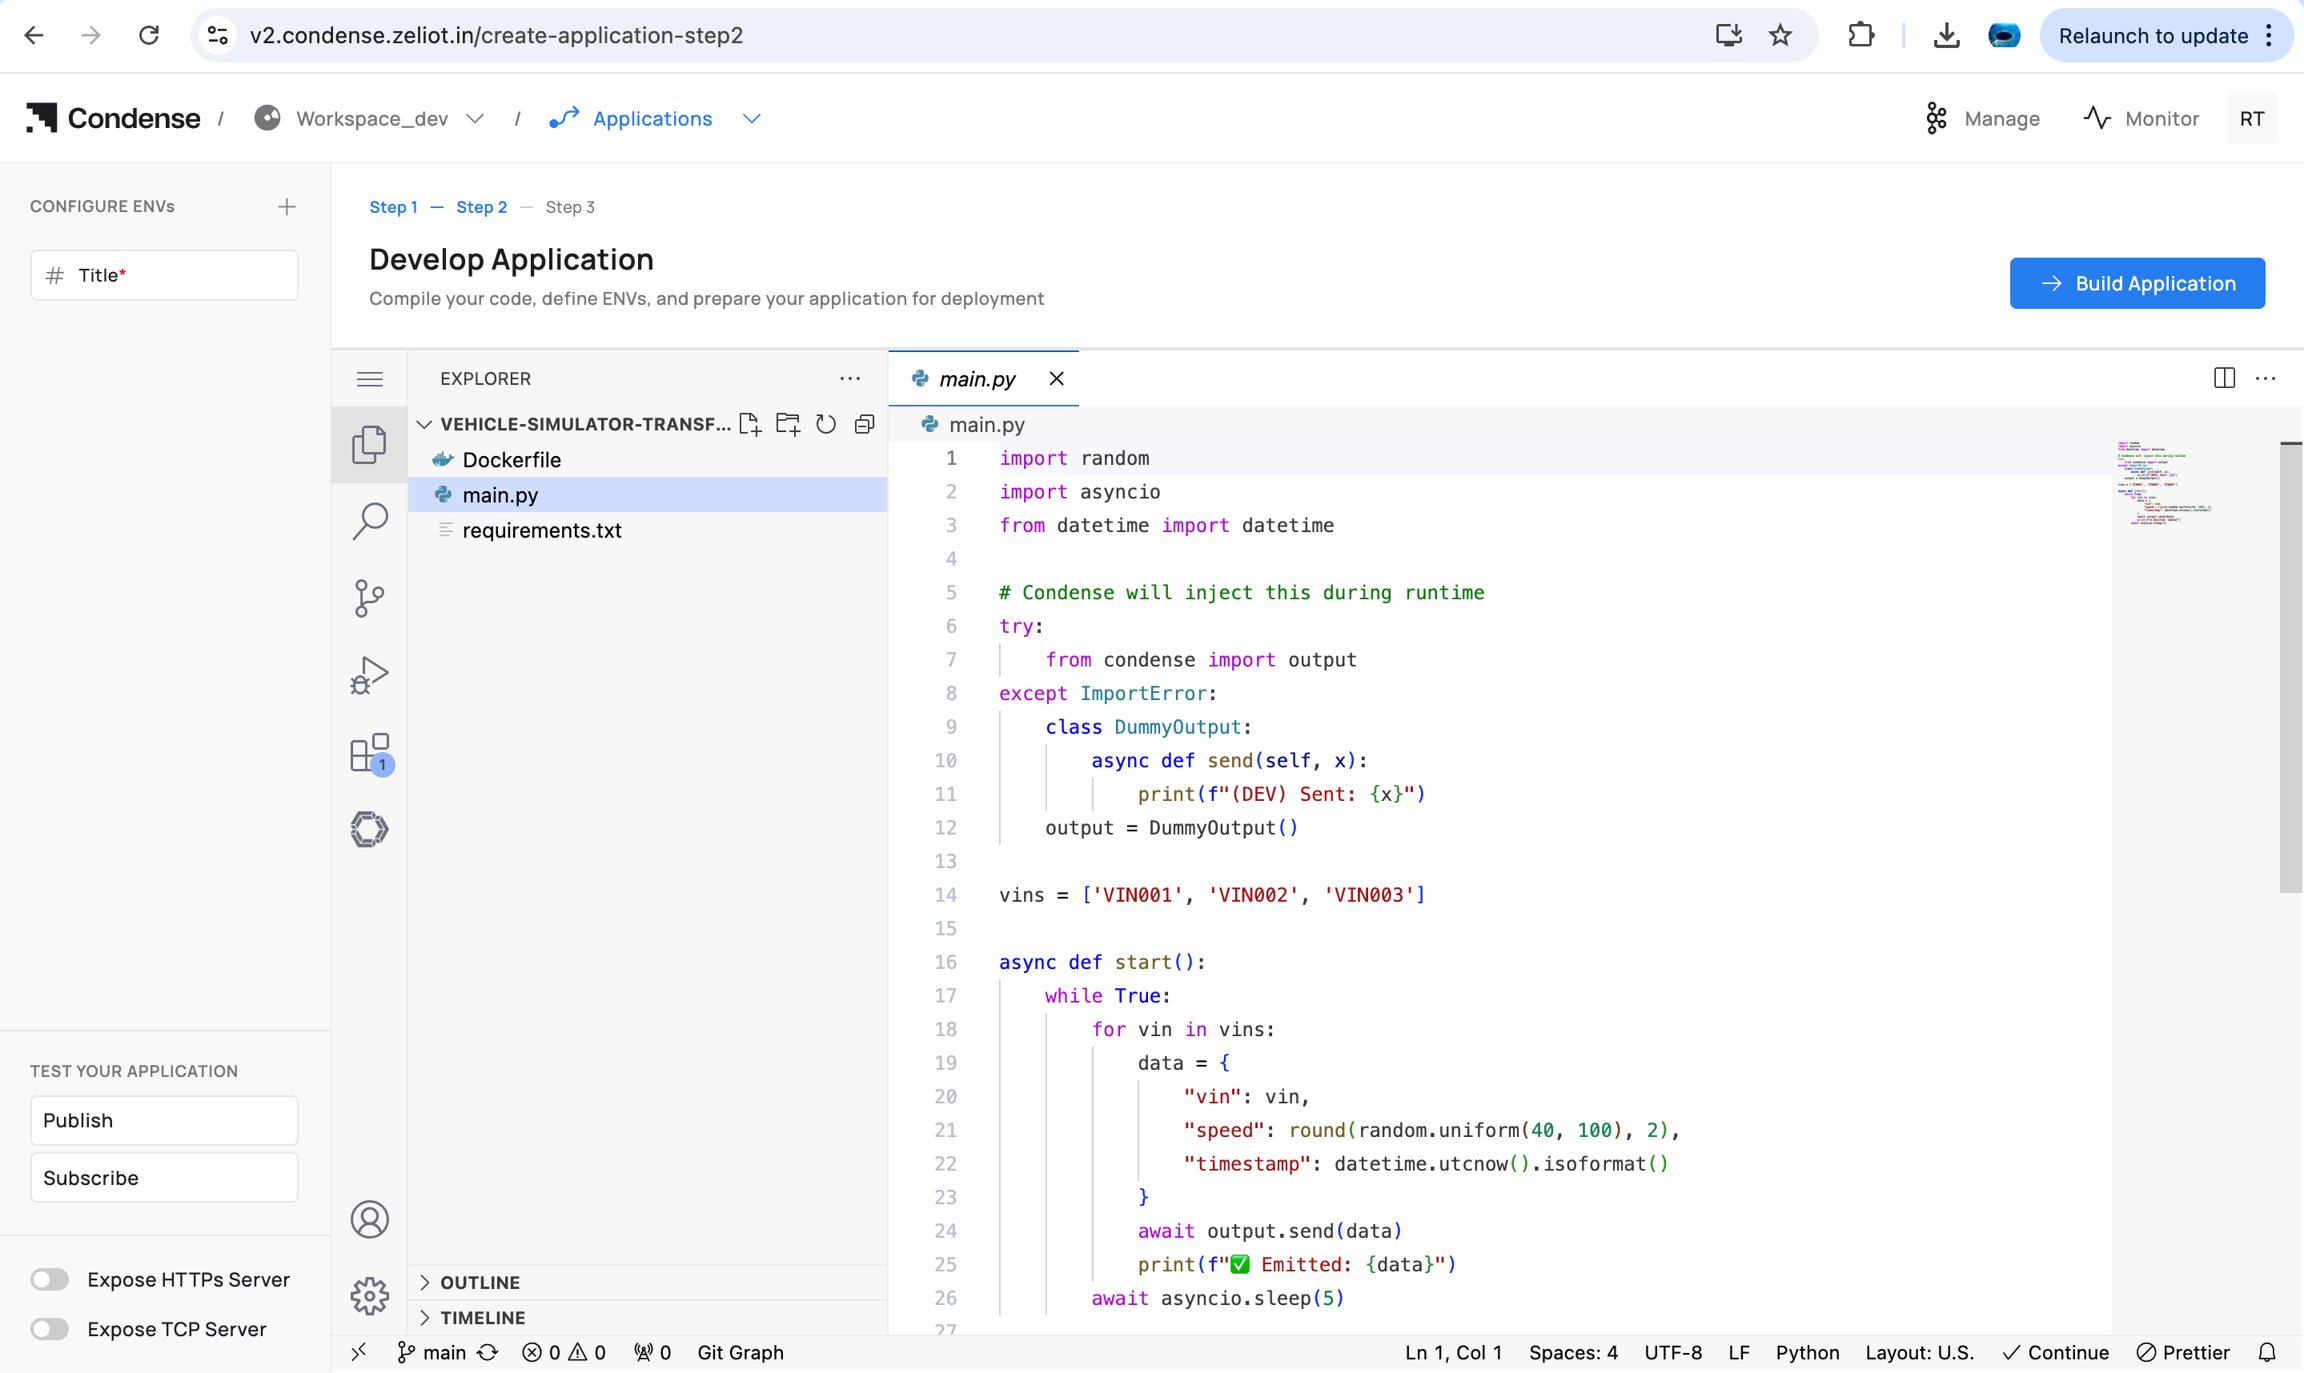
The IDE has the following structure:
| Element | Description |
| -------------------- | -------------------------------------------------------- |
| File Explorer (left) | Navigate and manage your project files |
| Code Editor (center) | Write code with inline linting and error highlighting |
| ENVs panel (side) | Set runtime configuration — secrets are masked |
| Publish tester | Send a test message to a workspace topic |
| Subscribe tester | Fetch messages from a workspace topic to validate output |
| Build Application | Opens the image name and tag dialog |
**In the IDE, you can:**
* Navigate and edit code via File Explorer and Code Editor.
* Configure ENVs (environment variables) for build/runtime.
* Optionally enable **Expose HTTP(s) Server** or **Expose TCP Server** for local testing.
* Validate topic flow with **Publish** and **Subscribe** testers.
* Commit and push to the connected Git repository.
4. Click **Develop Application** to open the IDE.
***
### Step 2 - Develop in the IDE
**Who can edit drafts:** Admins, Maintainers, Developers
The IDE has the following structure:
| Element | Description |
| -------------------- | -------------------------------------------------------- |
| File Explorer (left) | Navigate and manage your project files |
| Code Editor (center) | Write code with inline linting and error highlighting |
| ENVs panel (side) | Set runtime configuration — secrets are masked |
| Publish tester | Send a test message to a workspace topic |
| Subscribe tester | Fetch messages from a workspace topic to validate output |
| Build Application | Opens the image name and tag dialog |
**In the IDE, you can:**
* Navigate and edit code via File Explorer and Code Editor.
* Configure ENVs (environment variables) for build/runtime.
* Optionally enable **Expose HTTP(s) Server** or **Expose TCP Server** for local testing.
* Validate topic flow with **Publish** and **Subscribe** testers.
* Commit and push to the connected Git repository.
 **Best practice:** Use Publish/Subscribe testers before building to catch schema or mapping issues early.
***
### Step 3 - Build the Application
**Who can build:** Admins, Maintainers, Developers
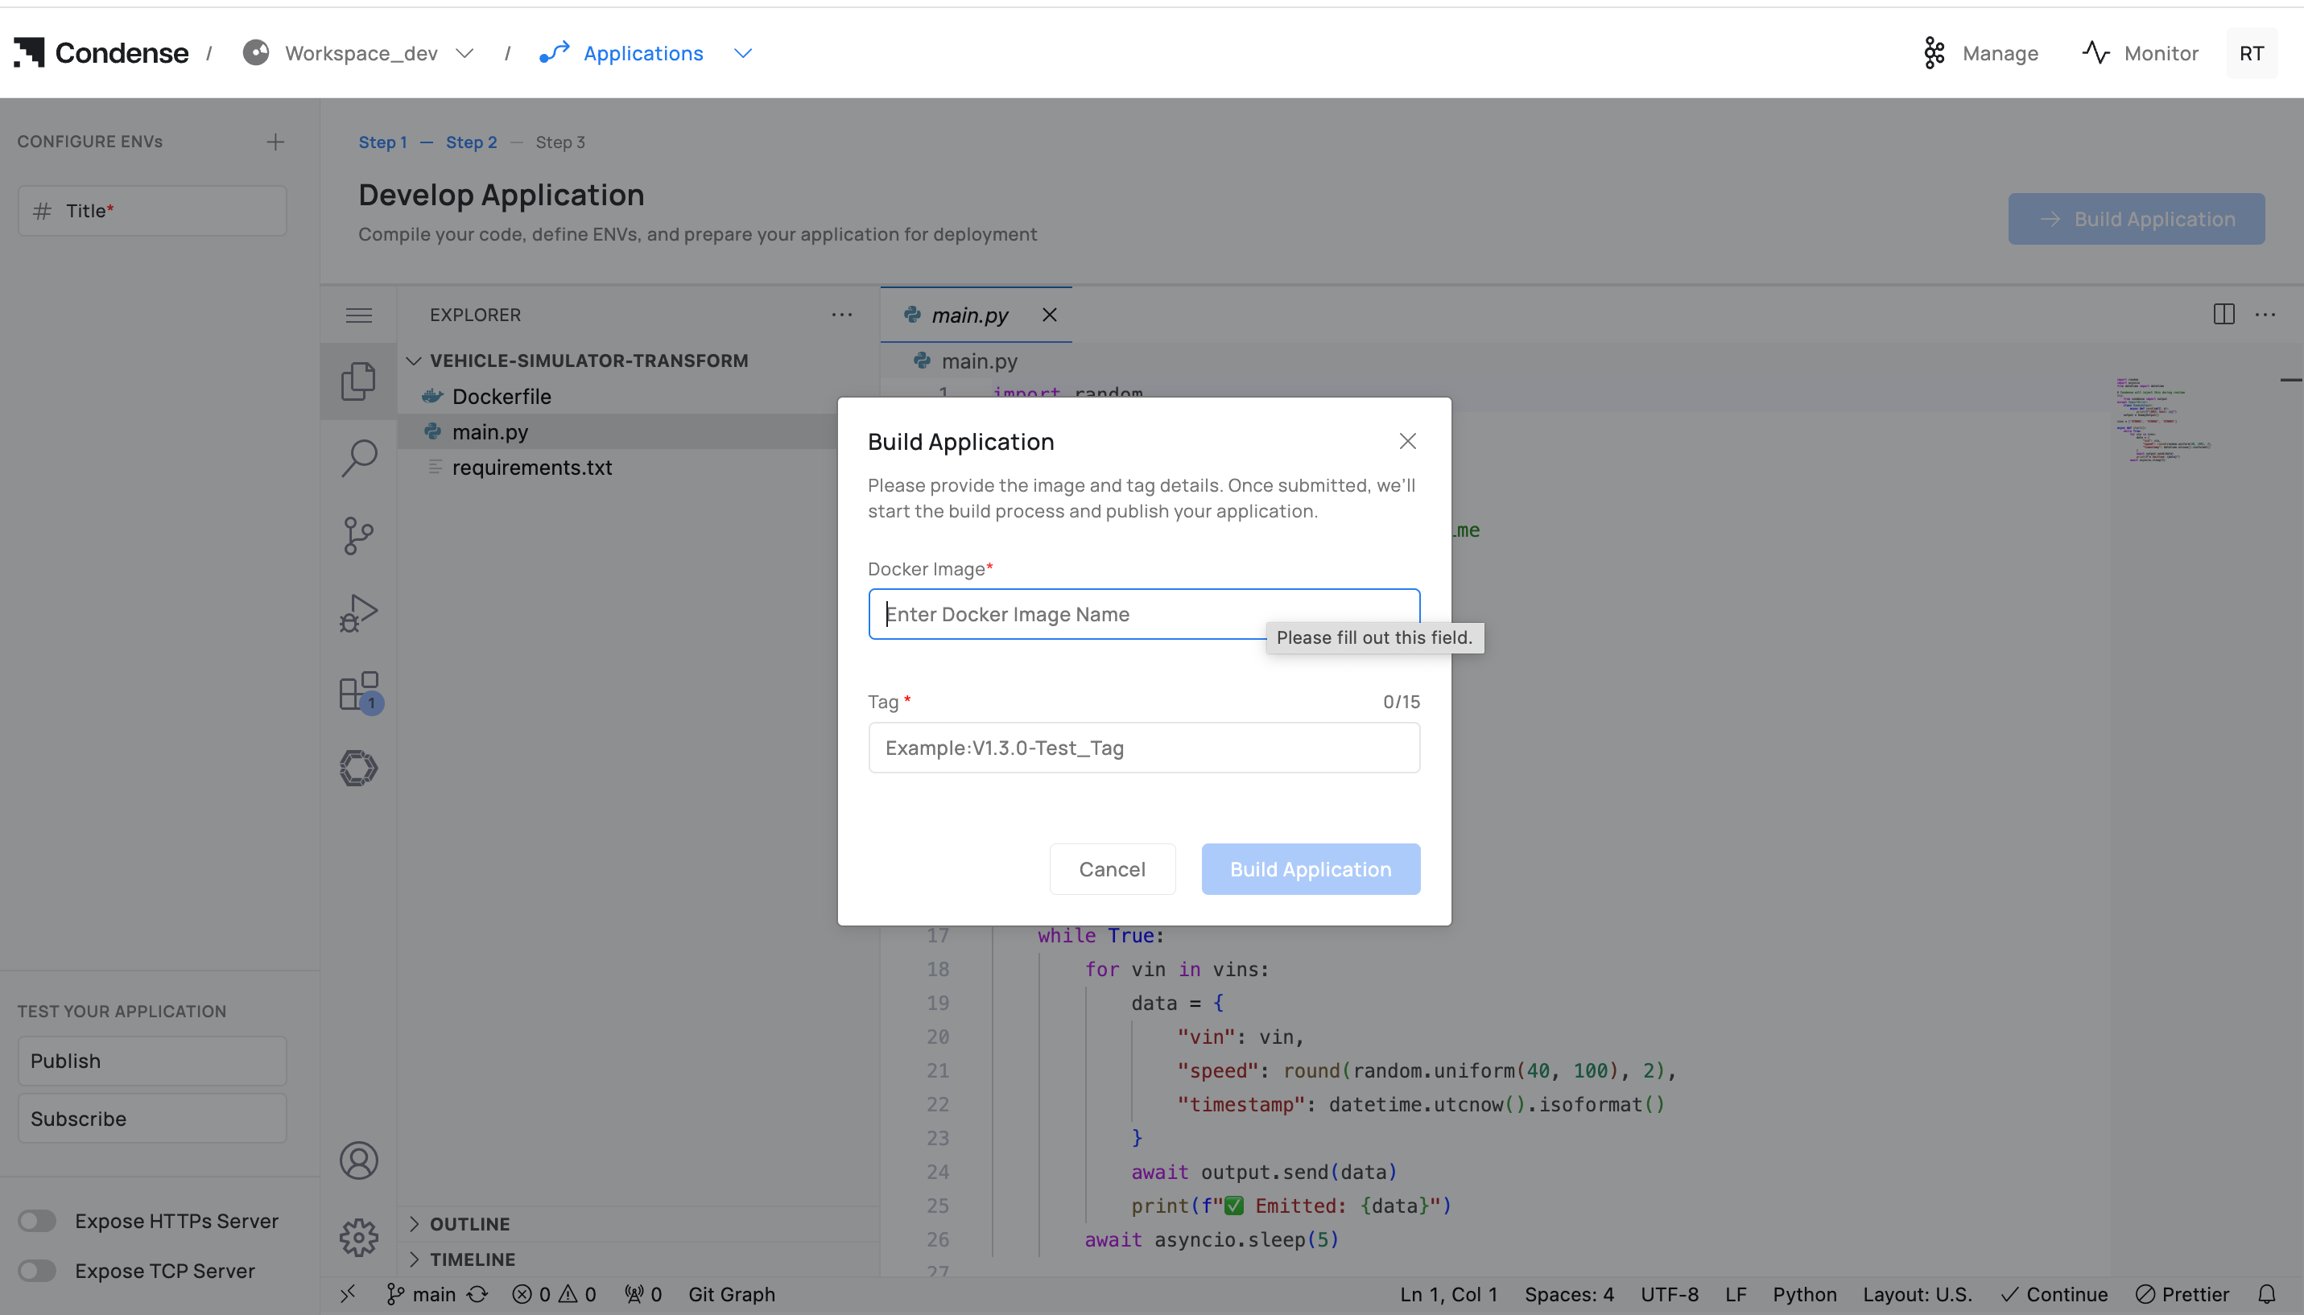
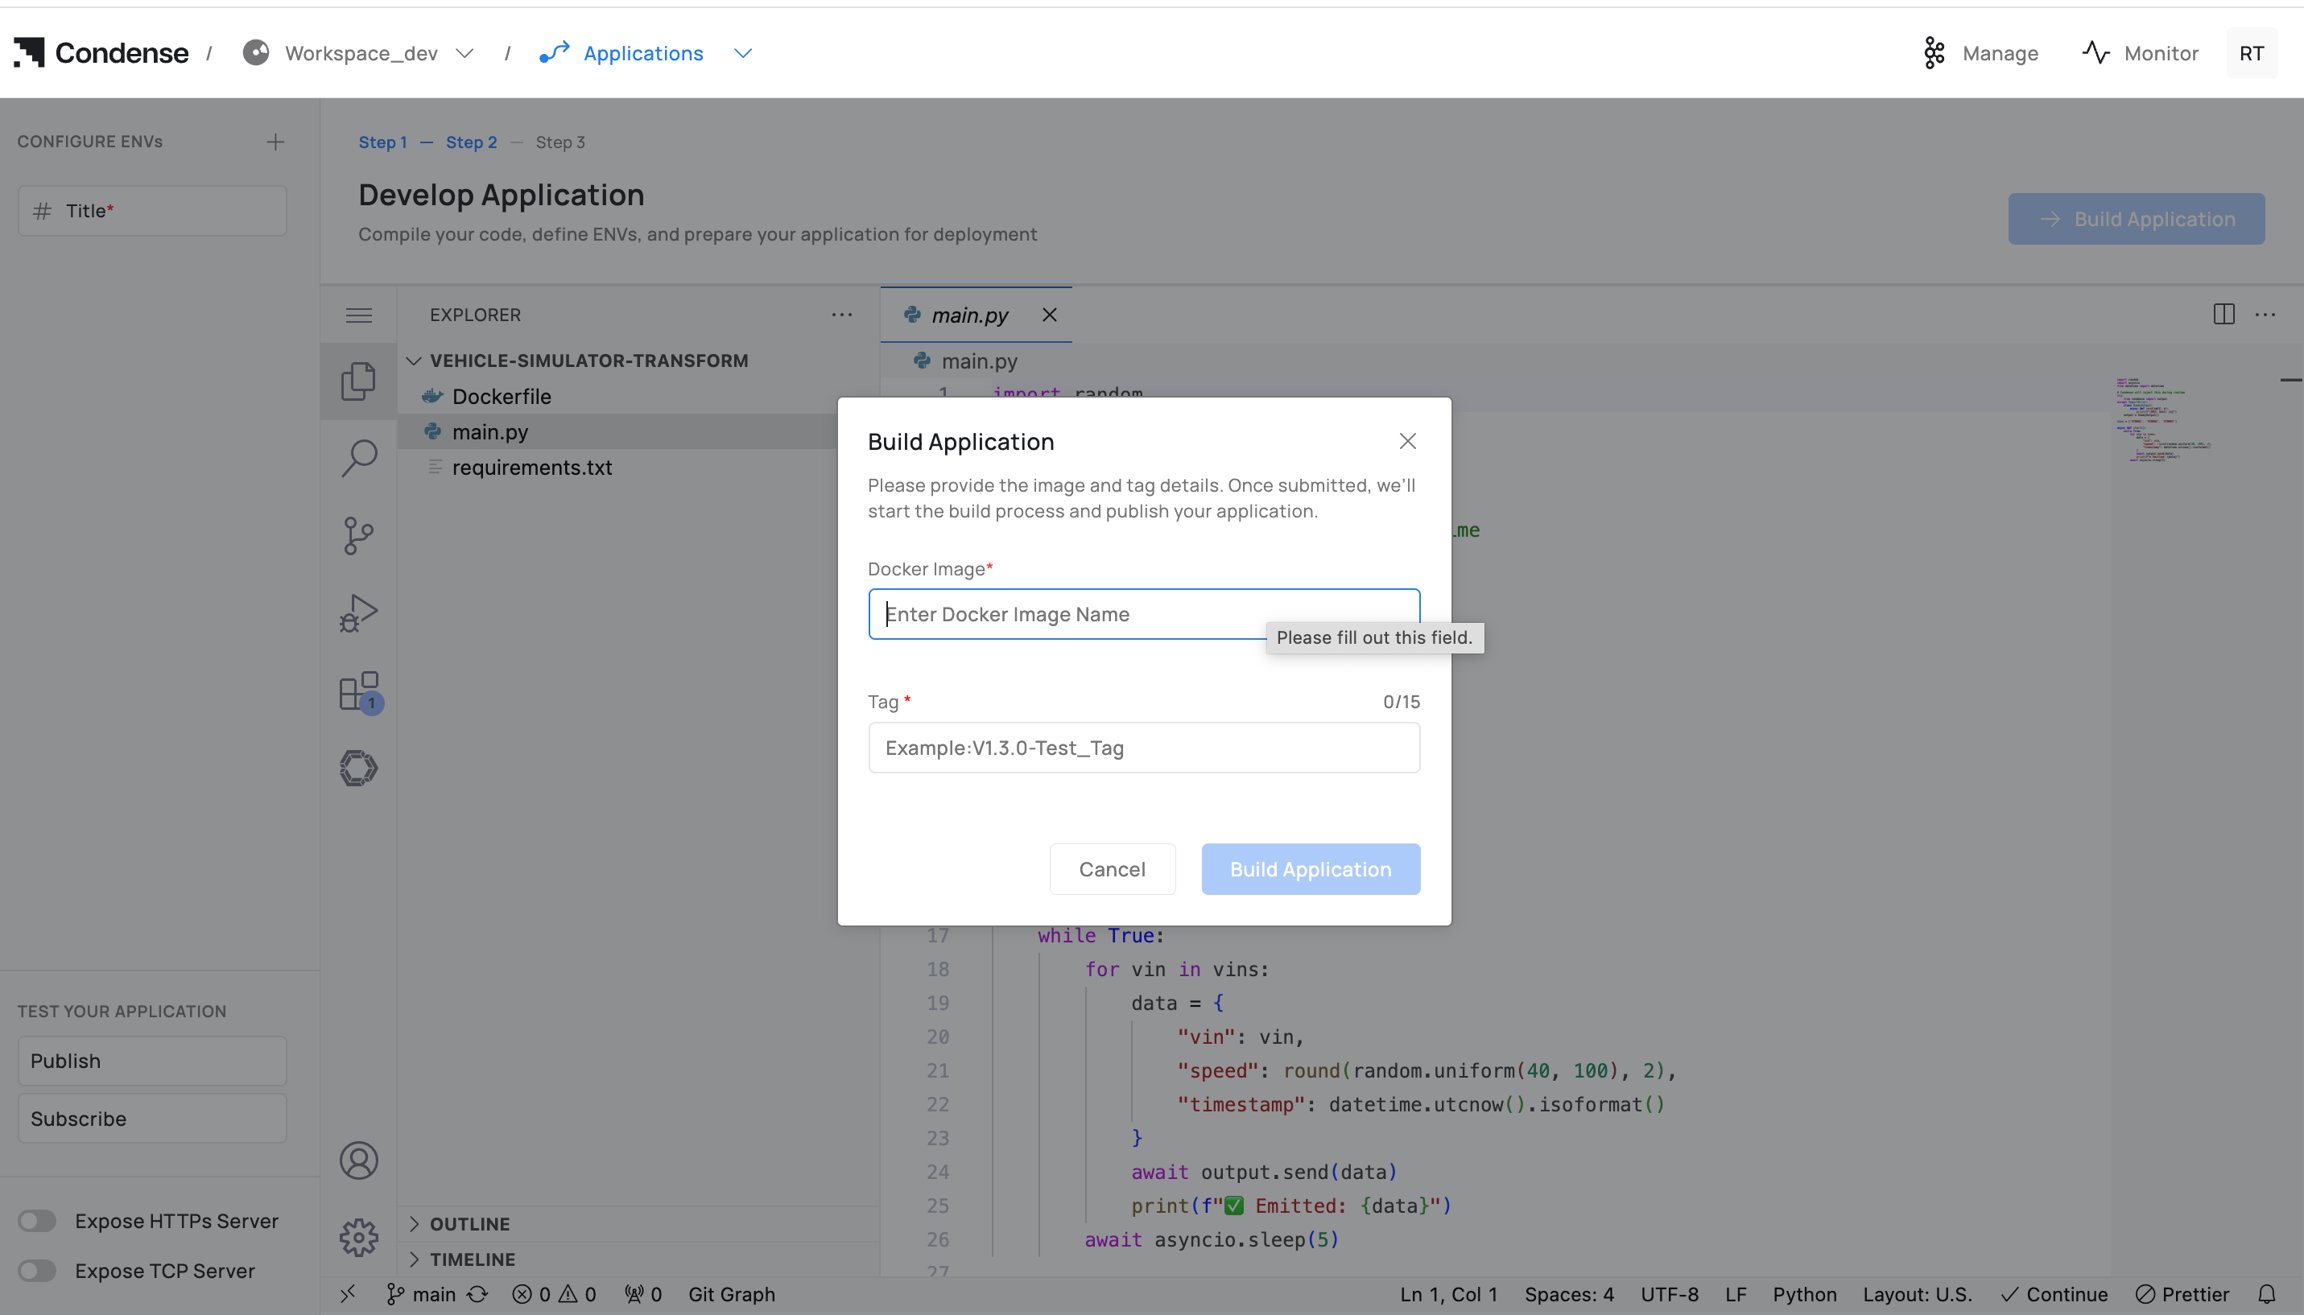
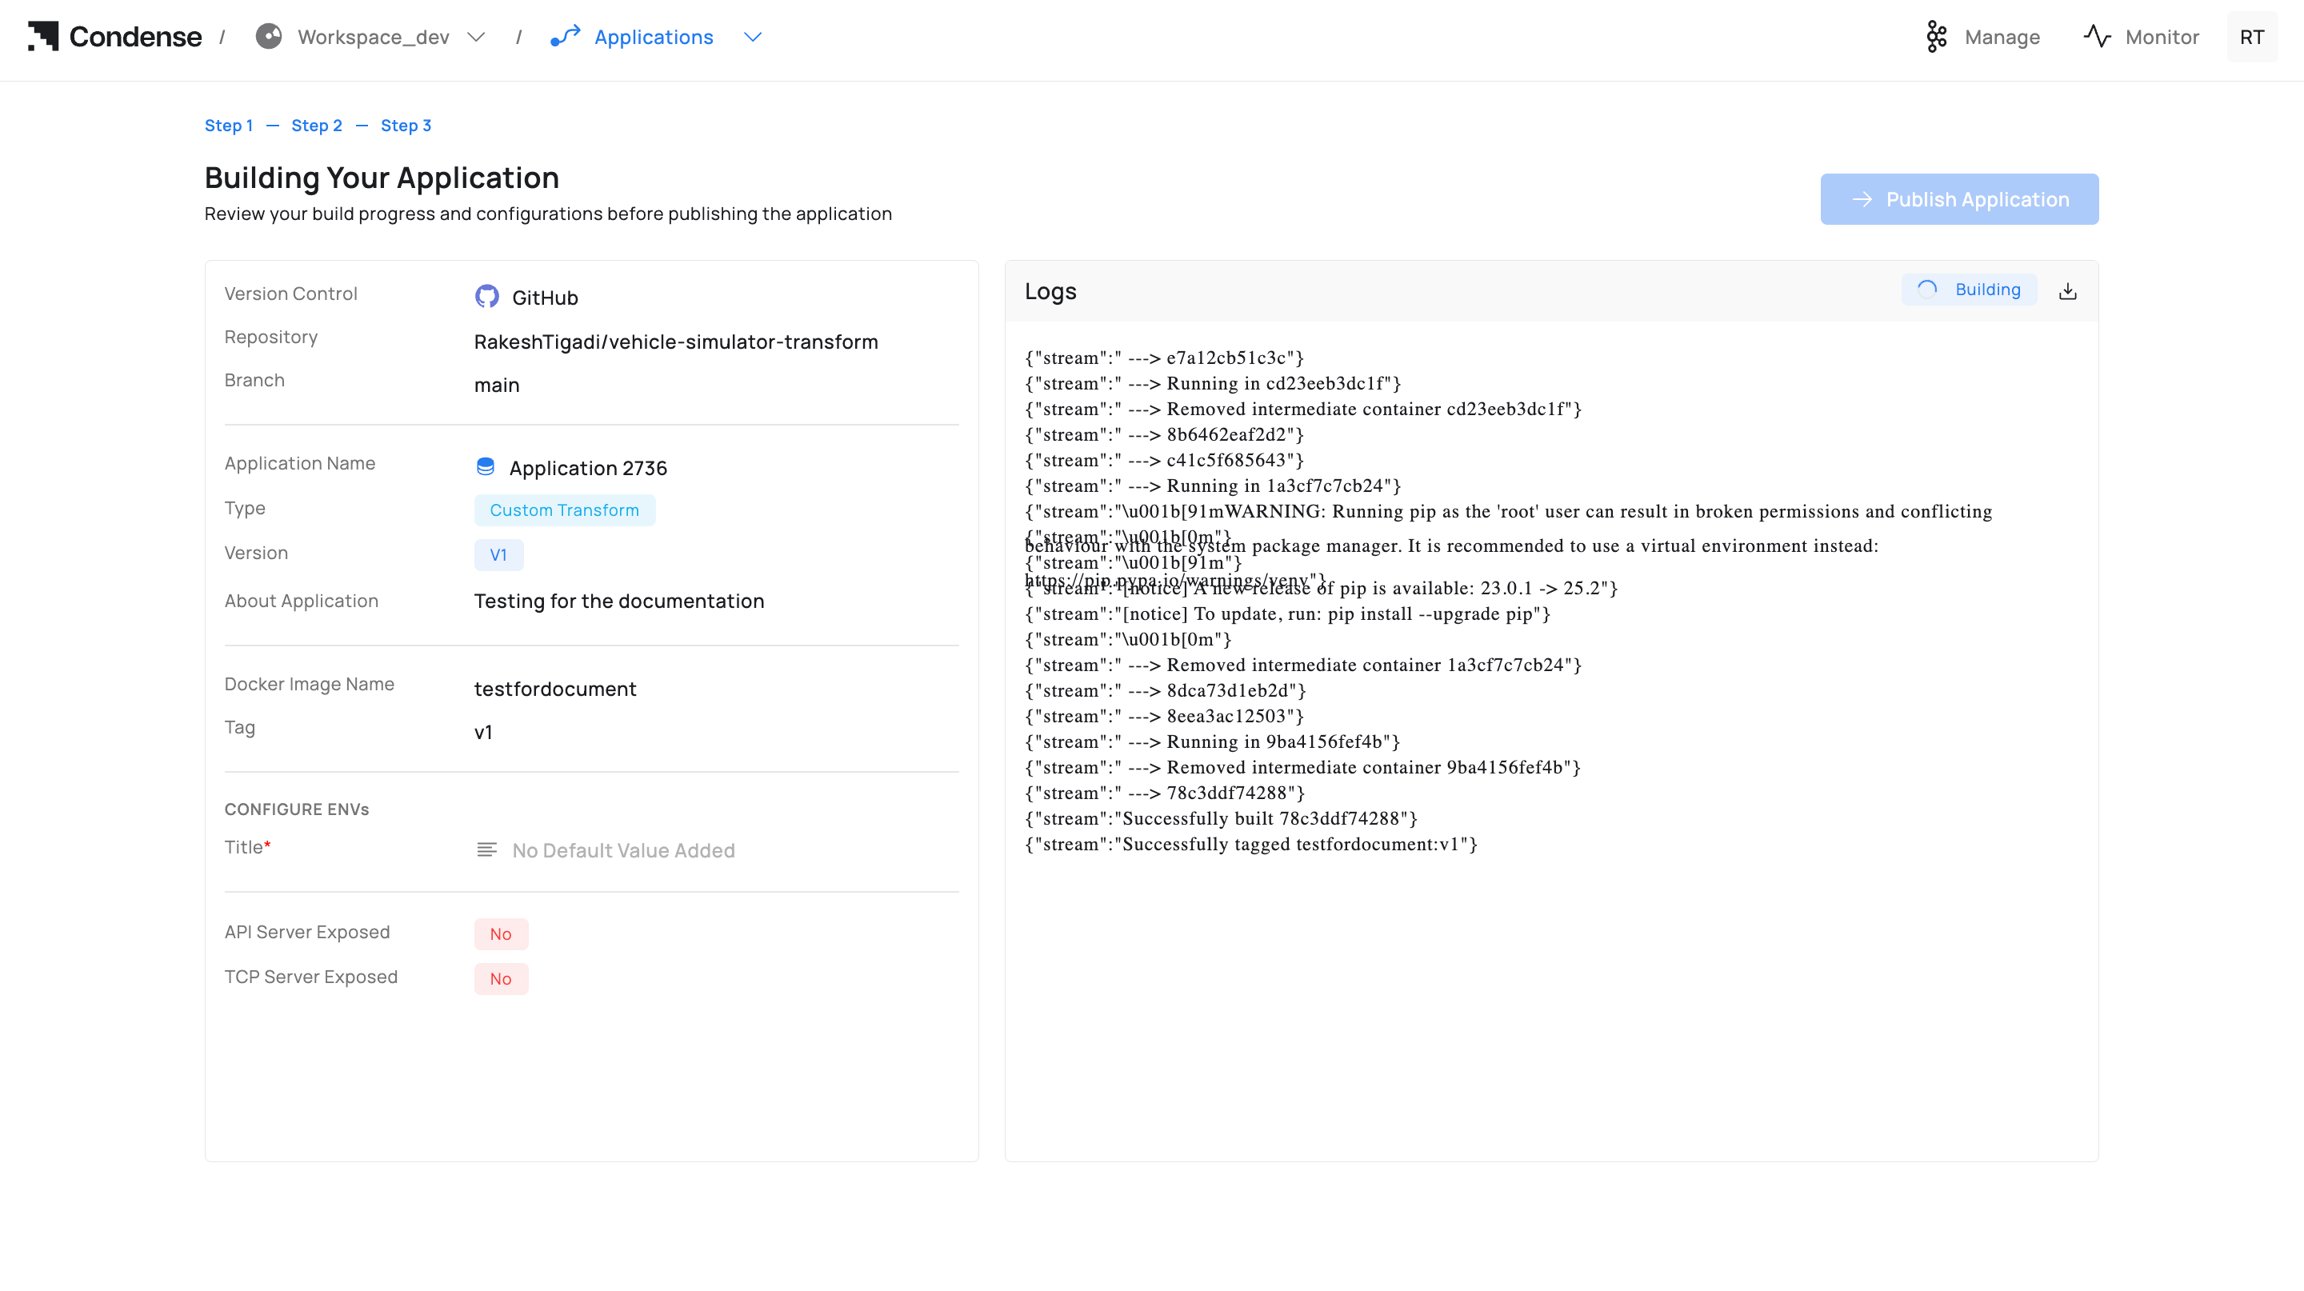
1. Click **Build Application**.
2. Enter the **Docker Image Name** (registry path, e.g. `registry/acme/my-transform`) and **Tag** (e.g. `v1.0.0`).
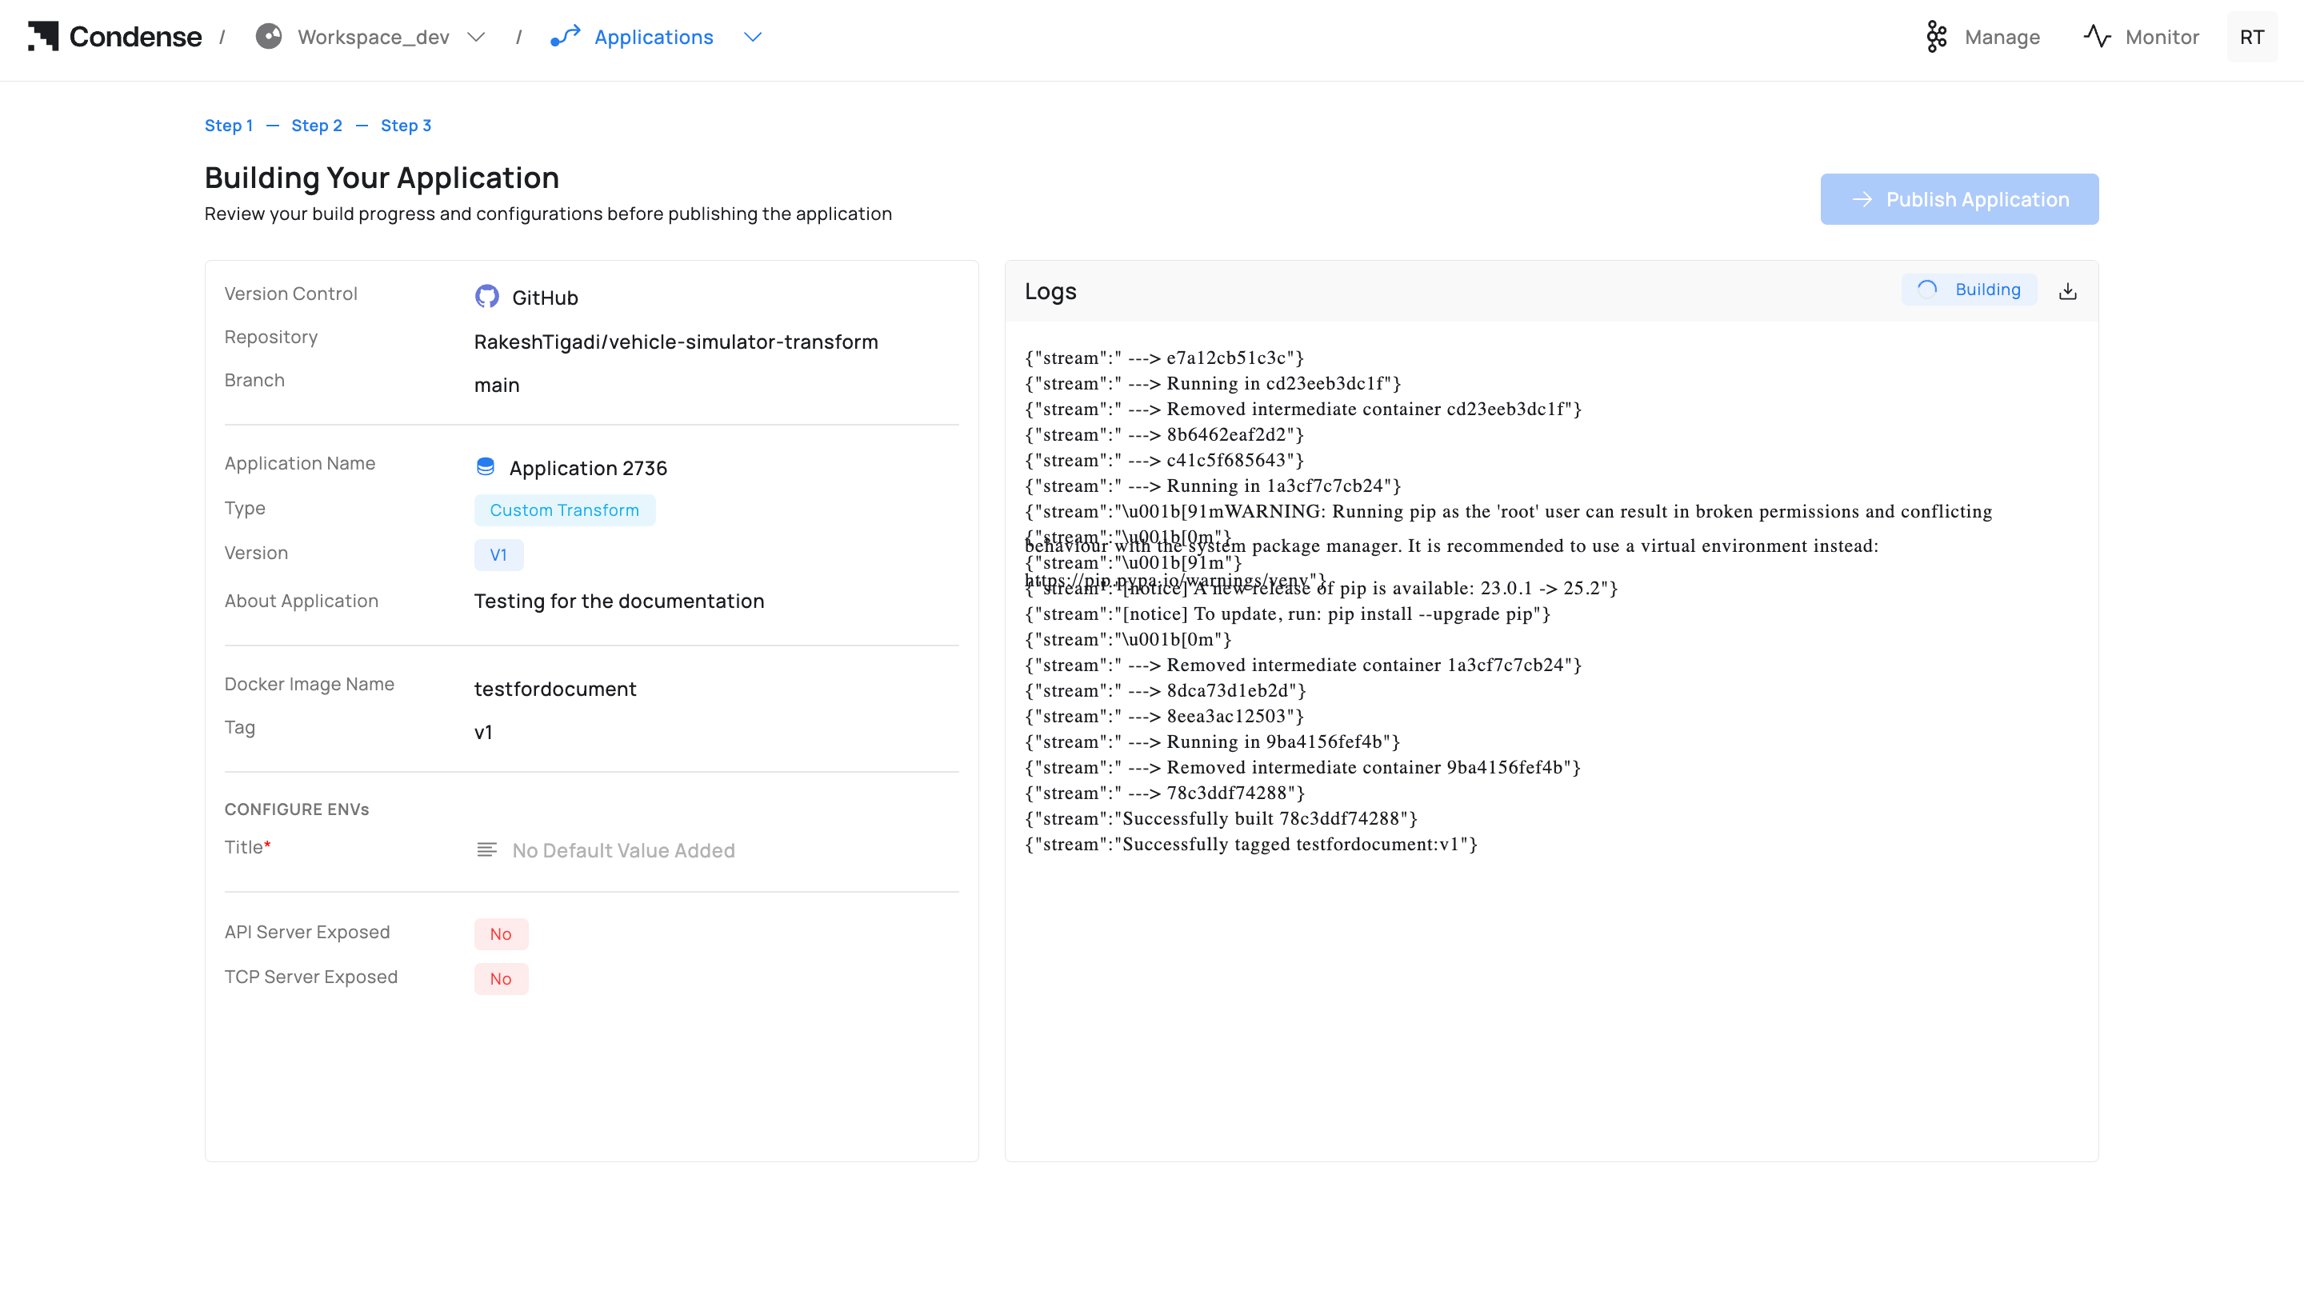
3. Click **Start Build** and monitor the **Build Logs** in real time.
4. If the build fails, review the error output, fix code/ENVs/Dockerfile, and rebuild.
**Best practice:** Use Publish/Subscribe testers before building to catch schema or mapping issues early.
***
### Step 3 - Build the Application
**Who can build:** Admins, Maintainers, Developers
1. Click **Build Application**.
2. Enter the **Docker Image Name** (registry path, e.g. `registry/acme/my-transform`) and **Tag** (e.g. `v1.0.0`).
3. Click **Start Build** and monitor the **Build Logs** in real time.
4. If the build fails, review the error output, fix code/ENVs/Dockerfile, and rebuild.
 **Build tips:**
* Use a fully qualified image name for external registries.
* Some registries enforce lowercase tags - prefer lowercase alphanumerics, dots, and dashes.
* Pass secrets via ENVs; do not bake them into the image.
***
### Step 4 - Publish the Application
**Who can publish:** Admins, Maintainers
1. Click **Publish Application**.
2. Confirm **Publish as a custom**: select **Transform**.
3. Confirm the **Version** and add optional release notes.
4. Click **Publish**.
**Build tips:**
* Use a fully qualified image name for external registries.
* Some registries enforce lowercase tags - prefer lowercase alphanumerics, dots, and dashes.
* Pass secrets via ENVs; do not bake them into the image.
***
### Step 4 - Publish the Application
**Who can publish:** Admins, Maintainers
1. Click **Publish Application**.
2. Confirm **Publish as a custom**: select **Transform**.
3. Confirm the **Version** and add optional release notes.
4. Click **Publish**.
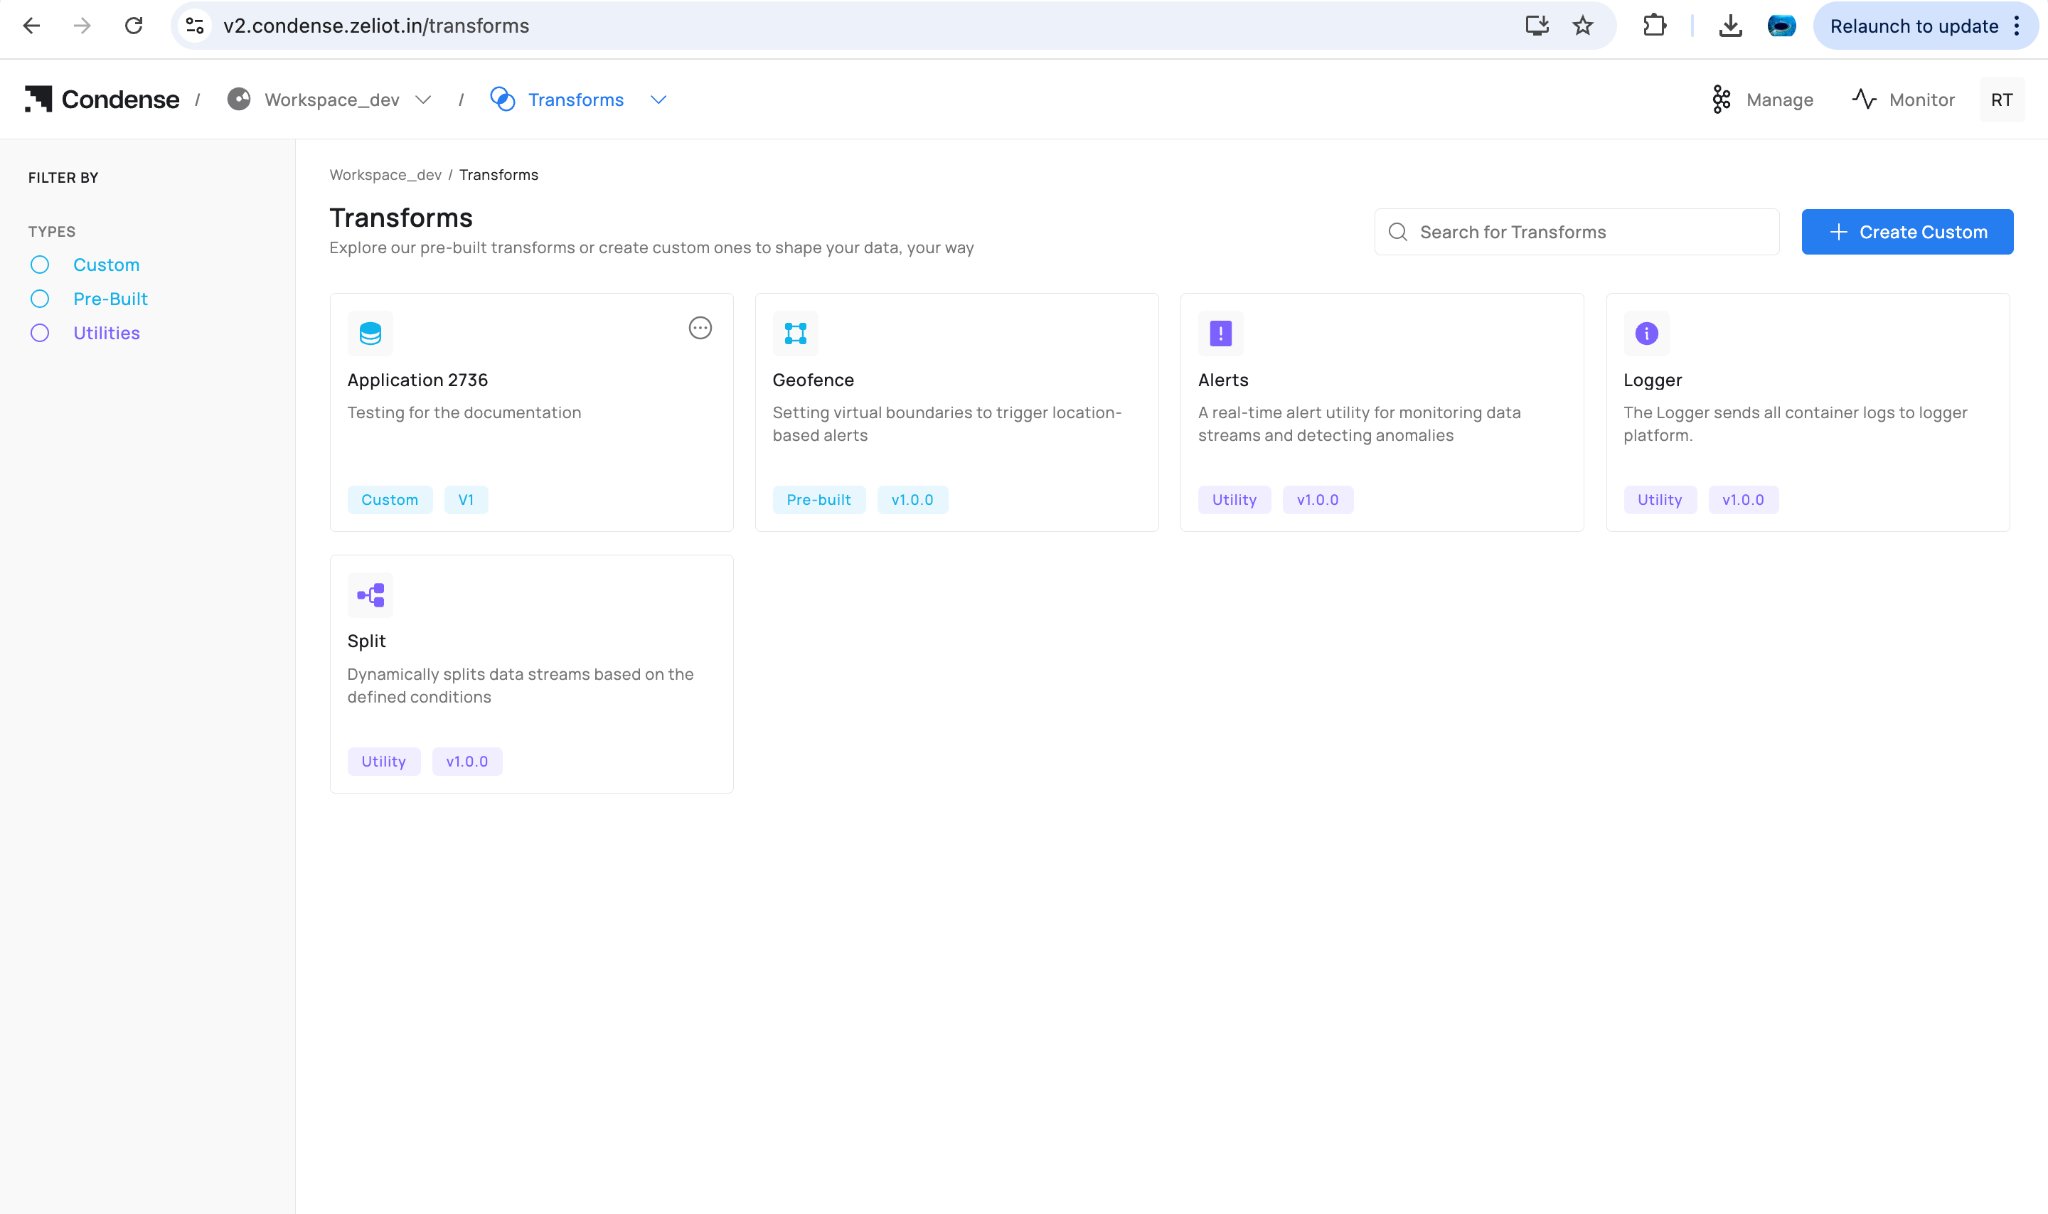
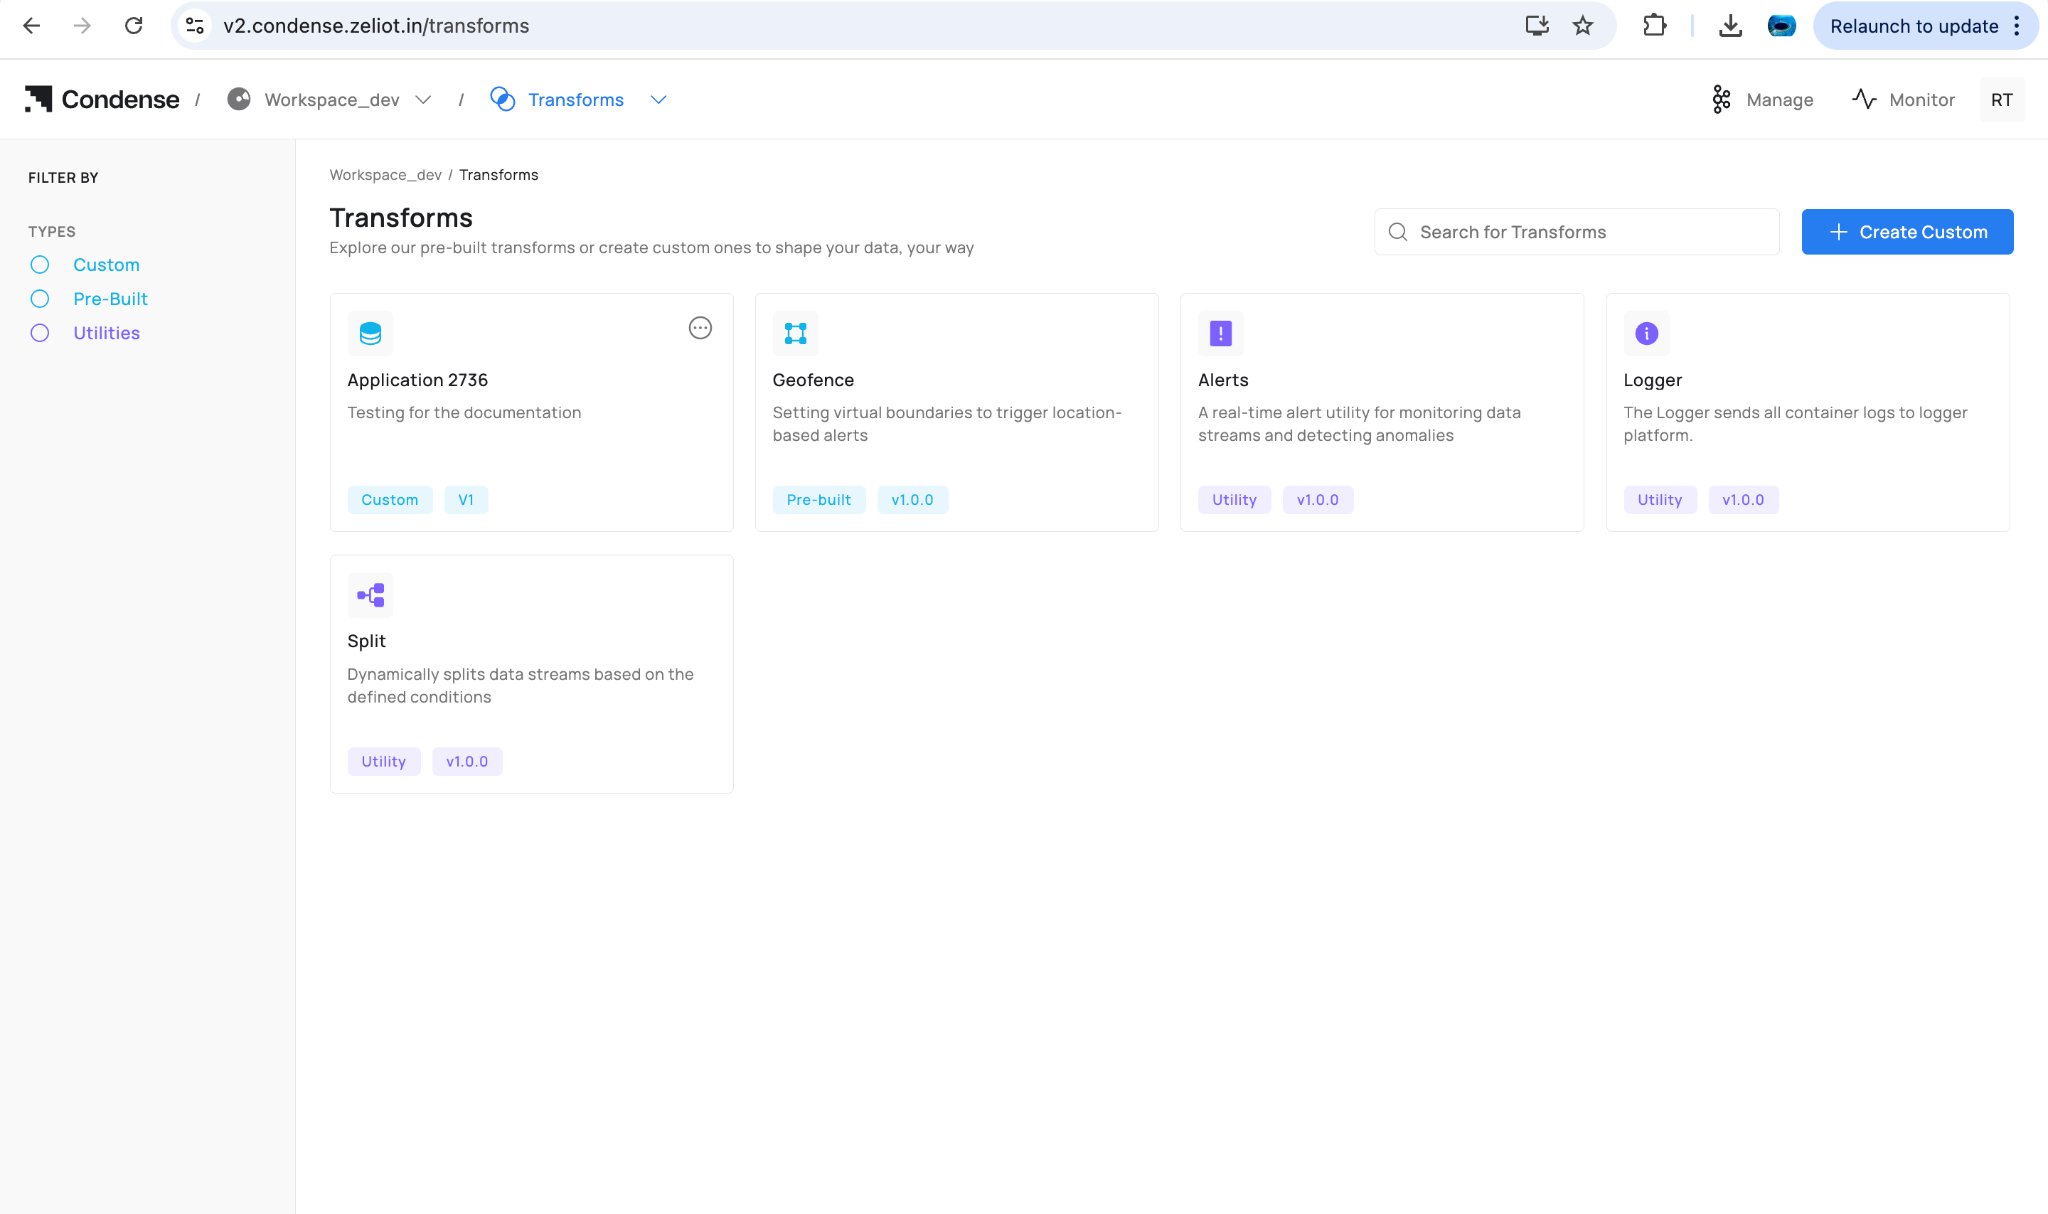 Once published, the custom transform appears in the **Transforms → Custom** section of the pipeline editor and is ready to deploy.
Published versions are **immutable**. To change logic, you must edit the code, rebuild, and publish a new version.
***
### Step 5 - Deploy to the Pipeline
**Who can deploy:** Workspace Admins, Maintainers
1. Go to the **workspace pipeline editor**.
Once published, the custom transform appears in the **Transforms → Custom** section of the pipeline editor and is ready to deploy.
Published versions are **immutable**. To change logic, you must edit the code, rebuild, and publish a new version.
***
### Step 5 - Deploy to the Pipeline
**Who can deploy:** Workspace Admins, Maintainers
1. Go to the **workspace pipeline editor**.
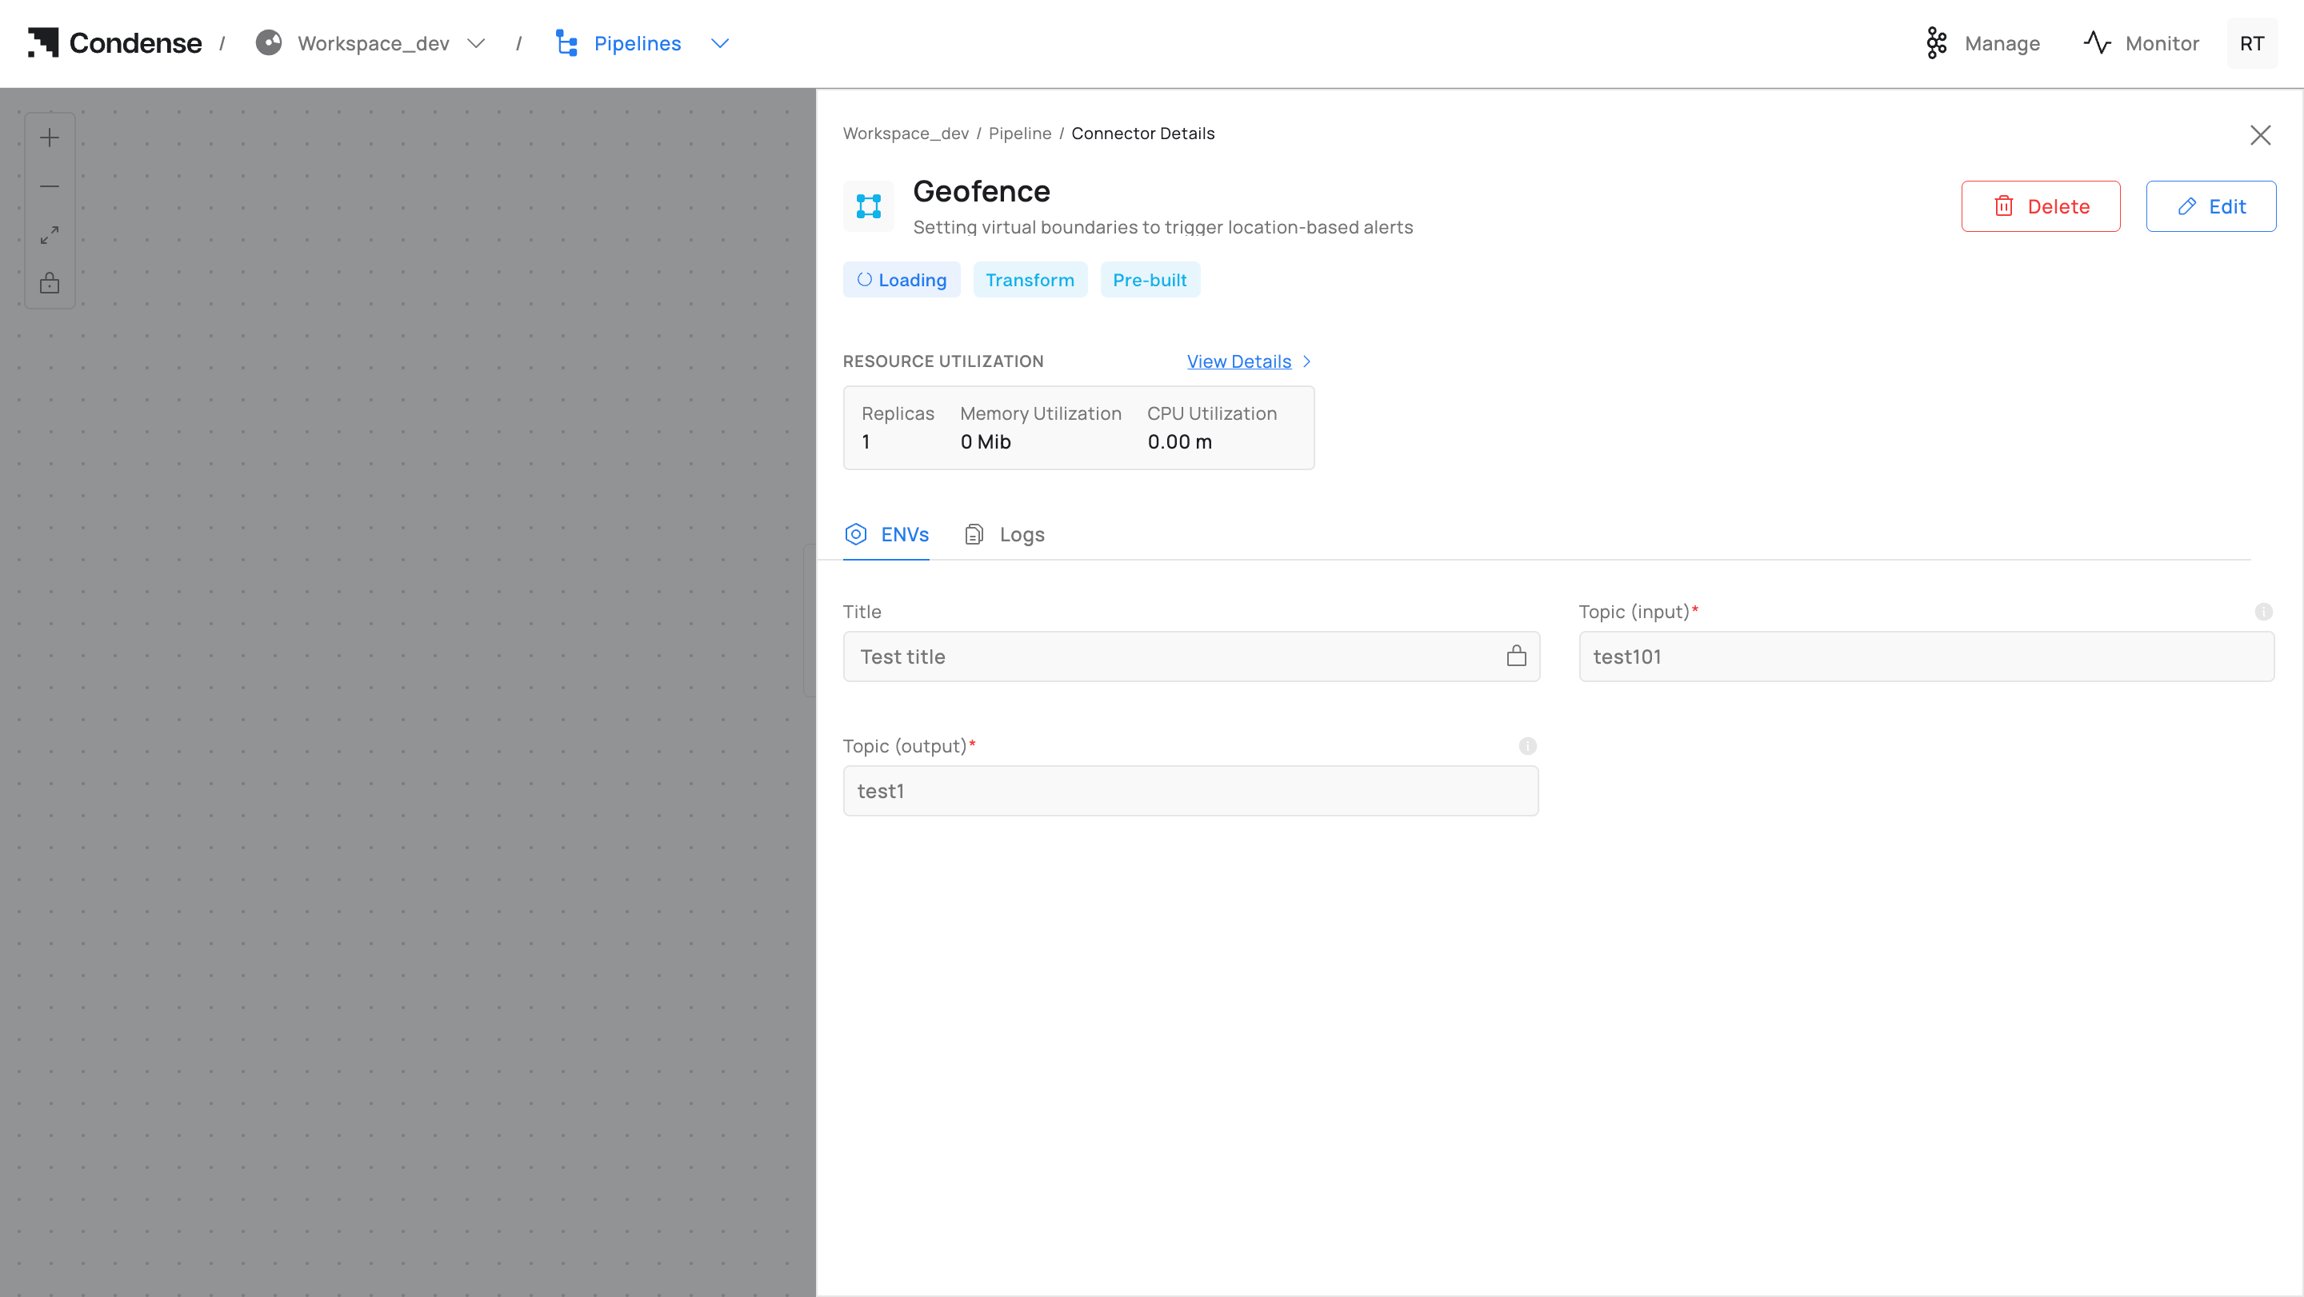
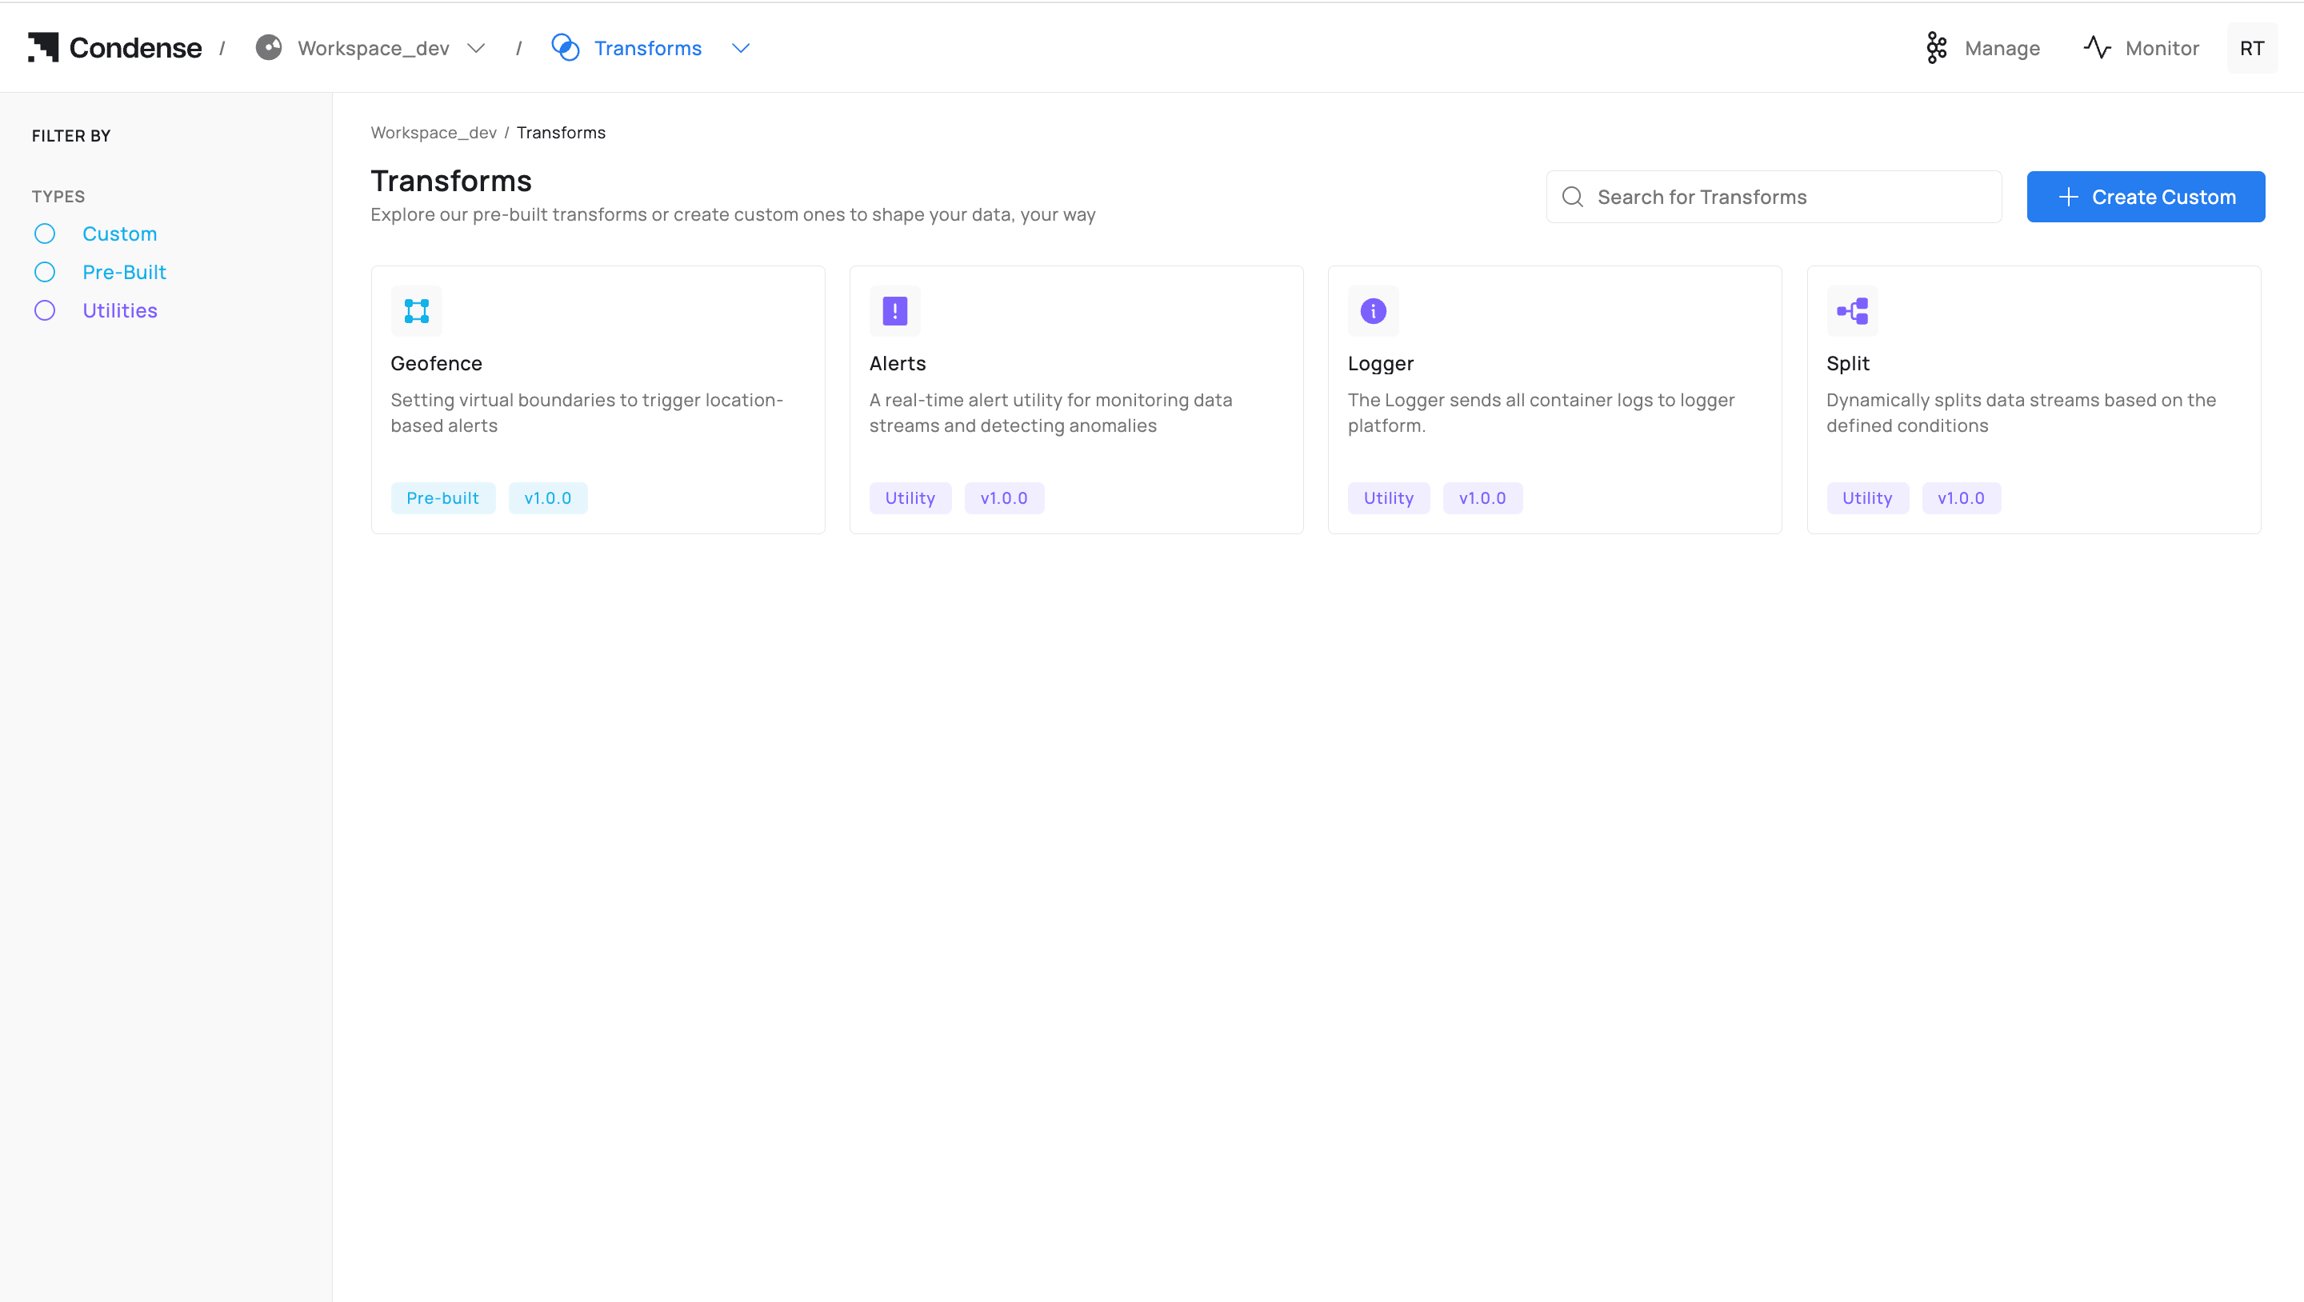 2. Click **Add Transform**.
3. Select **Custom** category → choose your published application and version.
4. Configure ENVs and parameters.
2. Click **Add Transform**.
3. Select **Custom** category → choose your published application and version.
4. Configure ENVs and parameters.
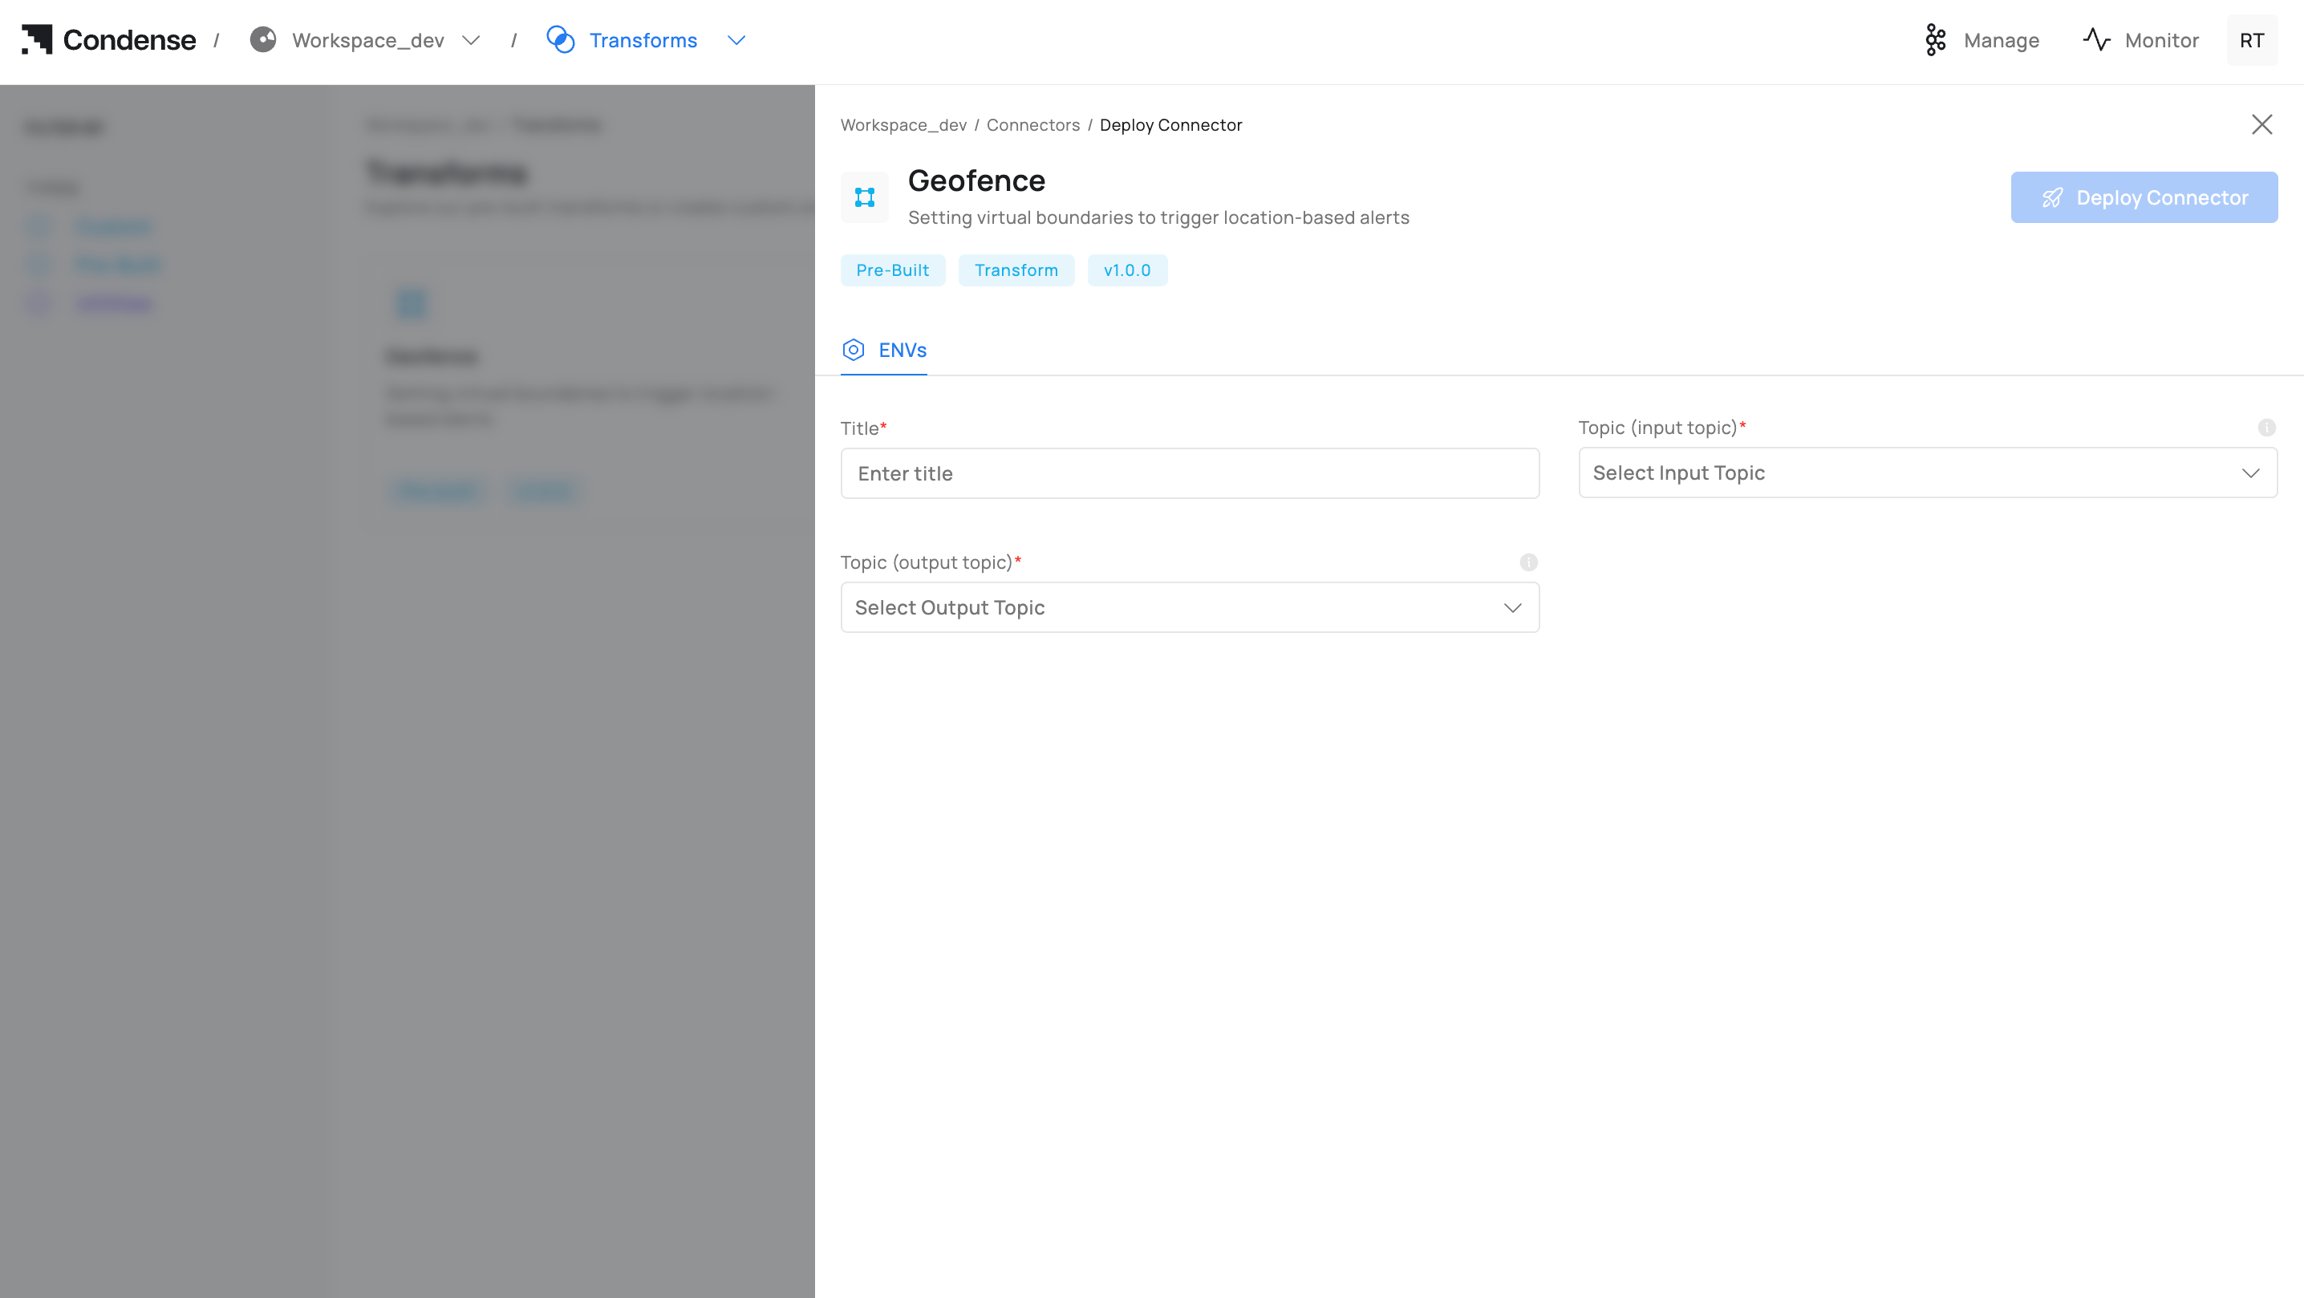
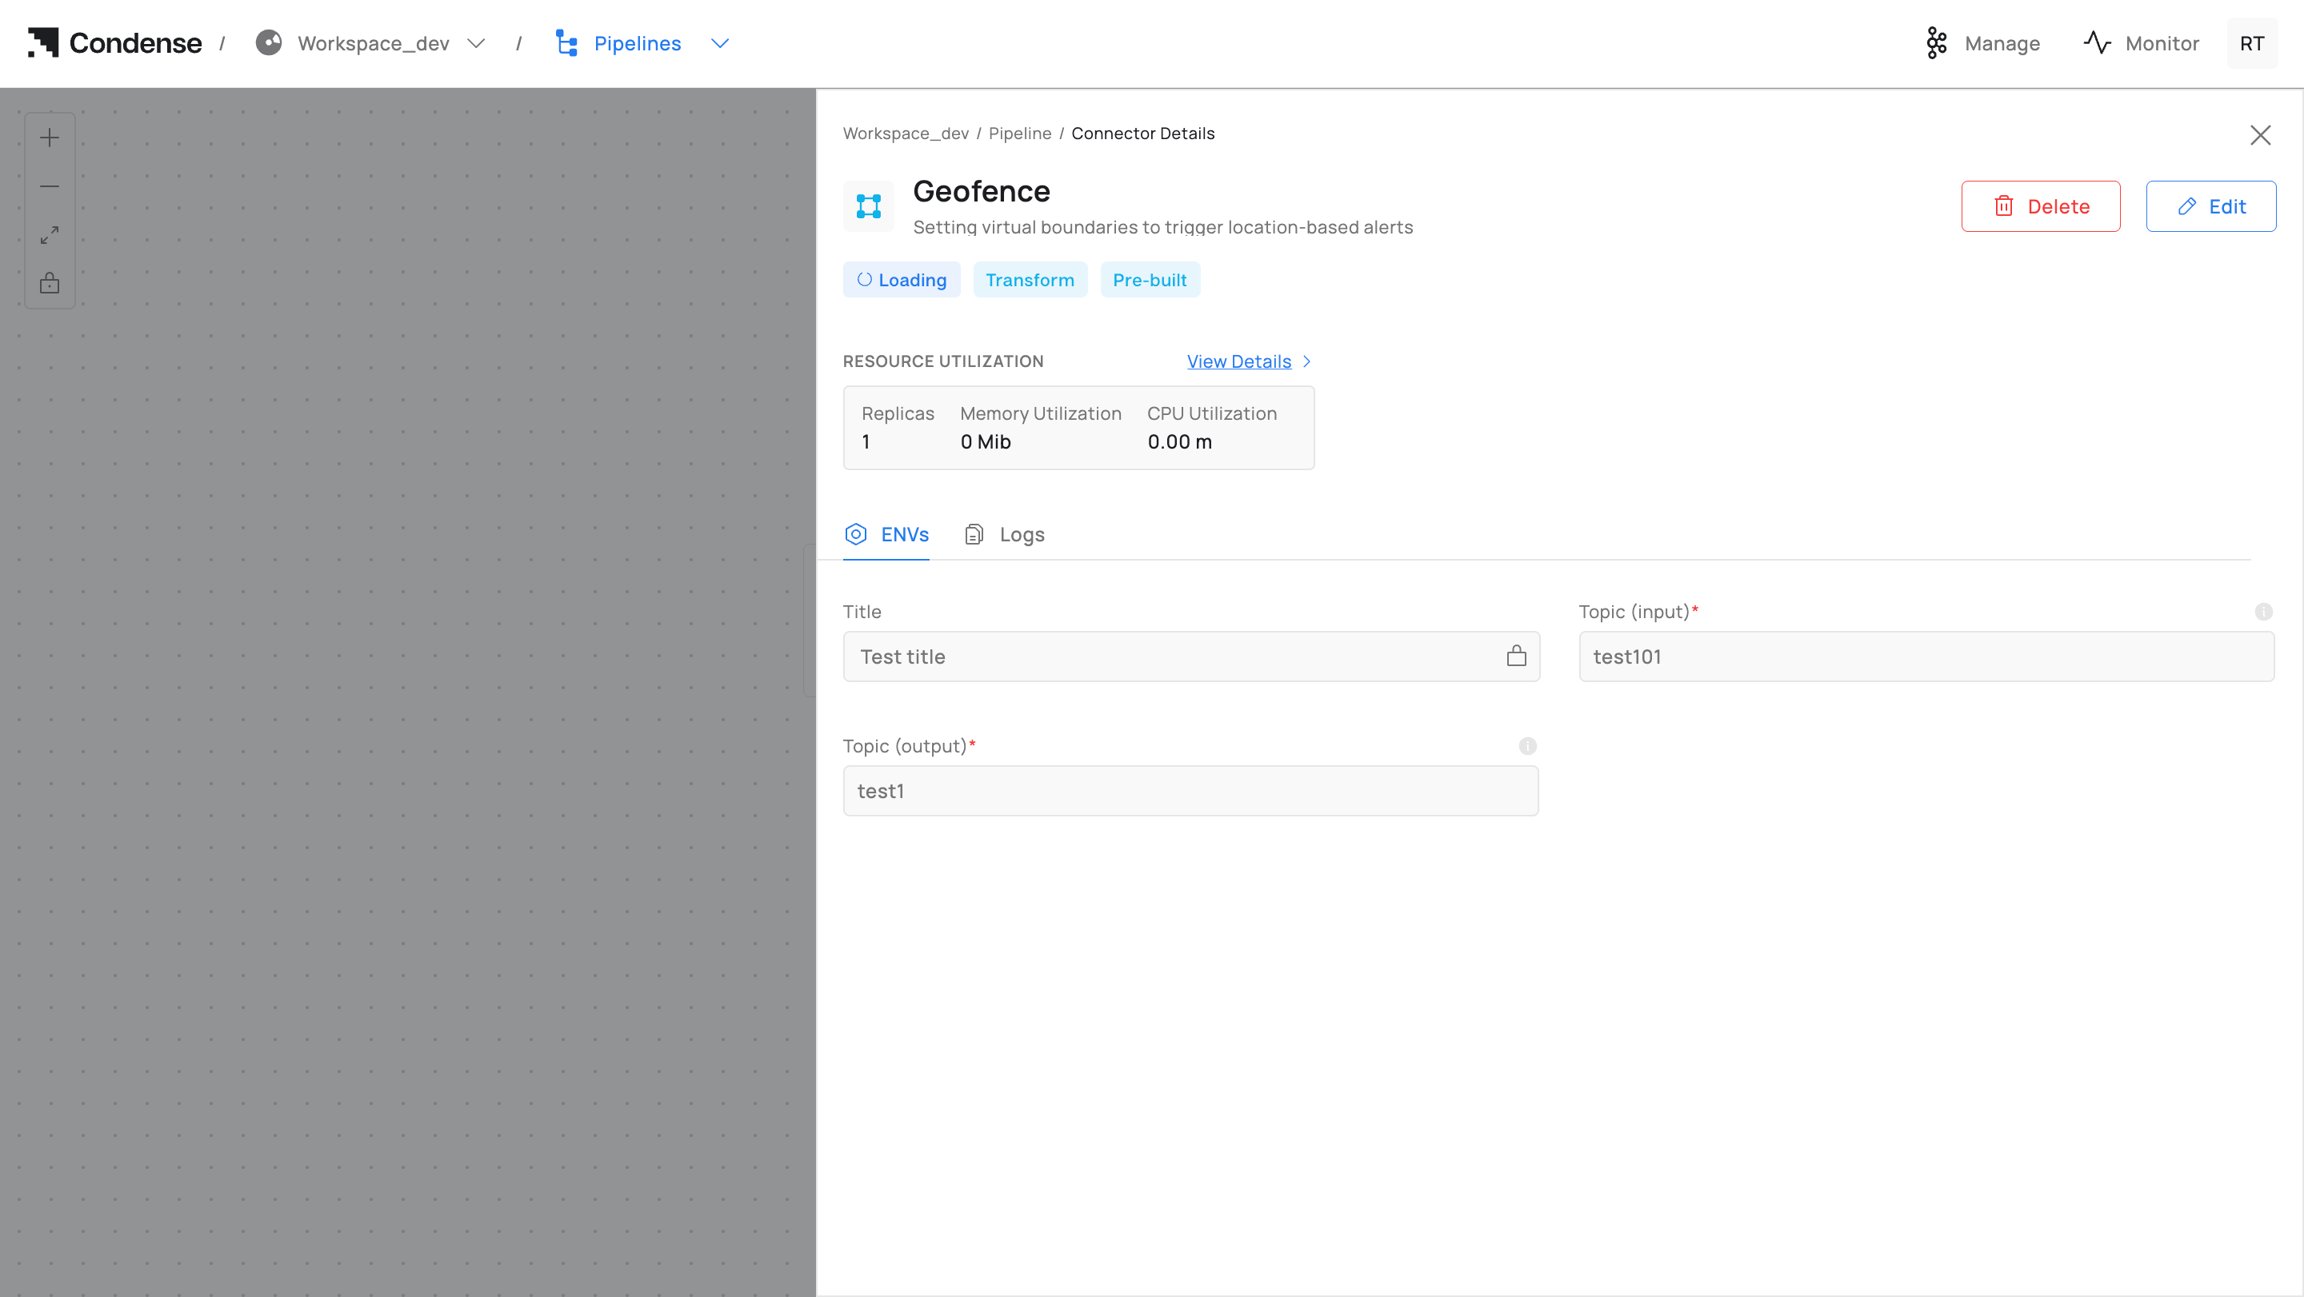
 5. Click **Save and Deploy**.
 ***
### Step 6 - Update or Roll Back a Version
To update the logic of a deployed custom transform:
1. Go to **Applications** in the workspace.
2. Edit the application code in the IDE.
3. Rebuild and publish a **new version**.
4. In the pipeline editor, select the deployed transform block → click **Edit** → switch the **Version** to the new release.
***
### Step 6 - Update or Roll Back a Version
To update the logic of a deployed custom transform:
1. Go to **Applications** in the workspace.
2. Edit the application code in the IDE.
3. Rebuild and publish a **new version**.
4. In the pipeline editor, select the deployed transform block → click **Edit** → switch the **Version** to the new release.
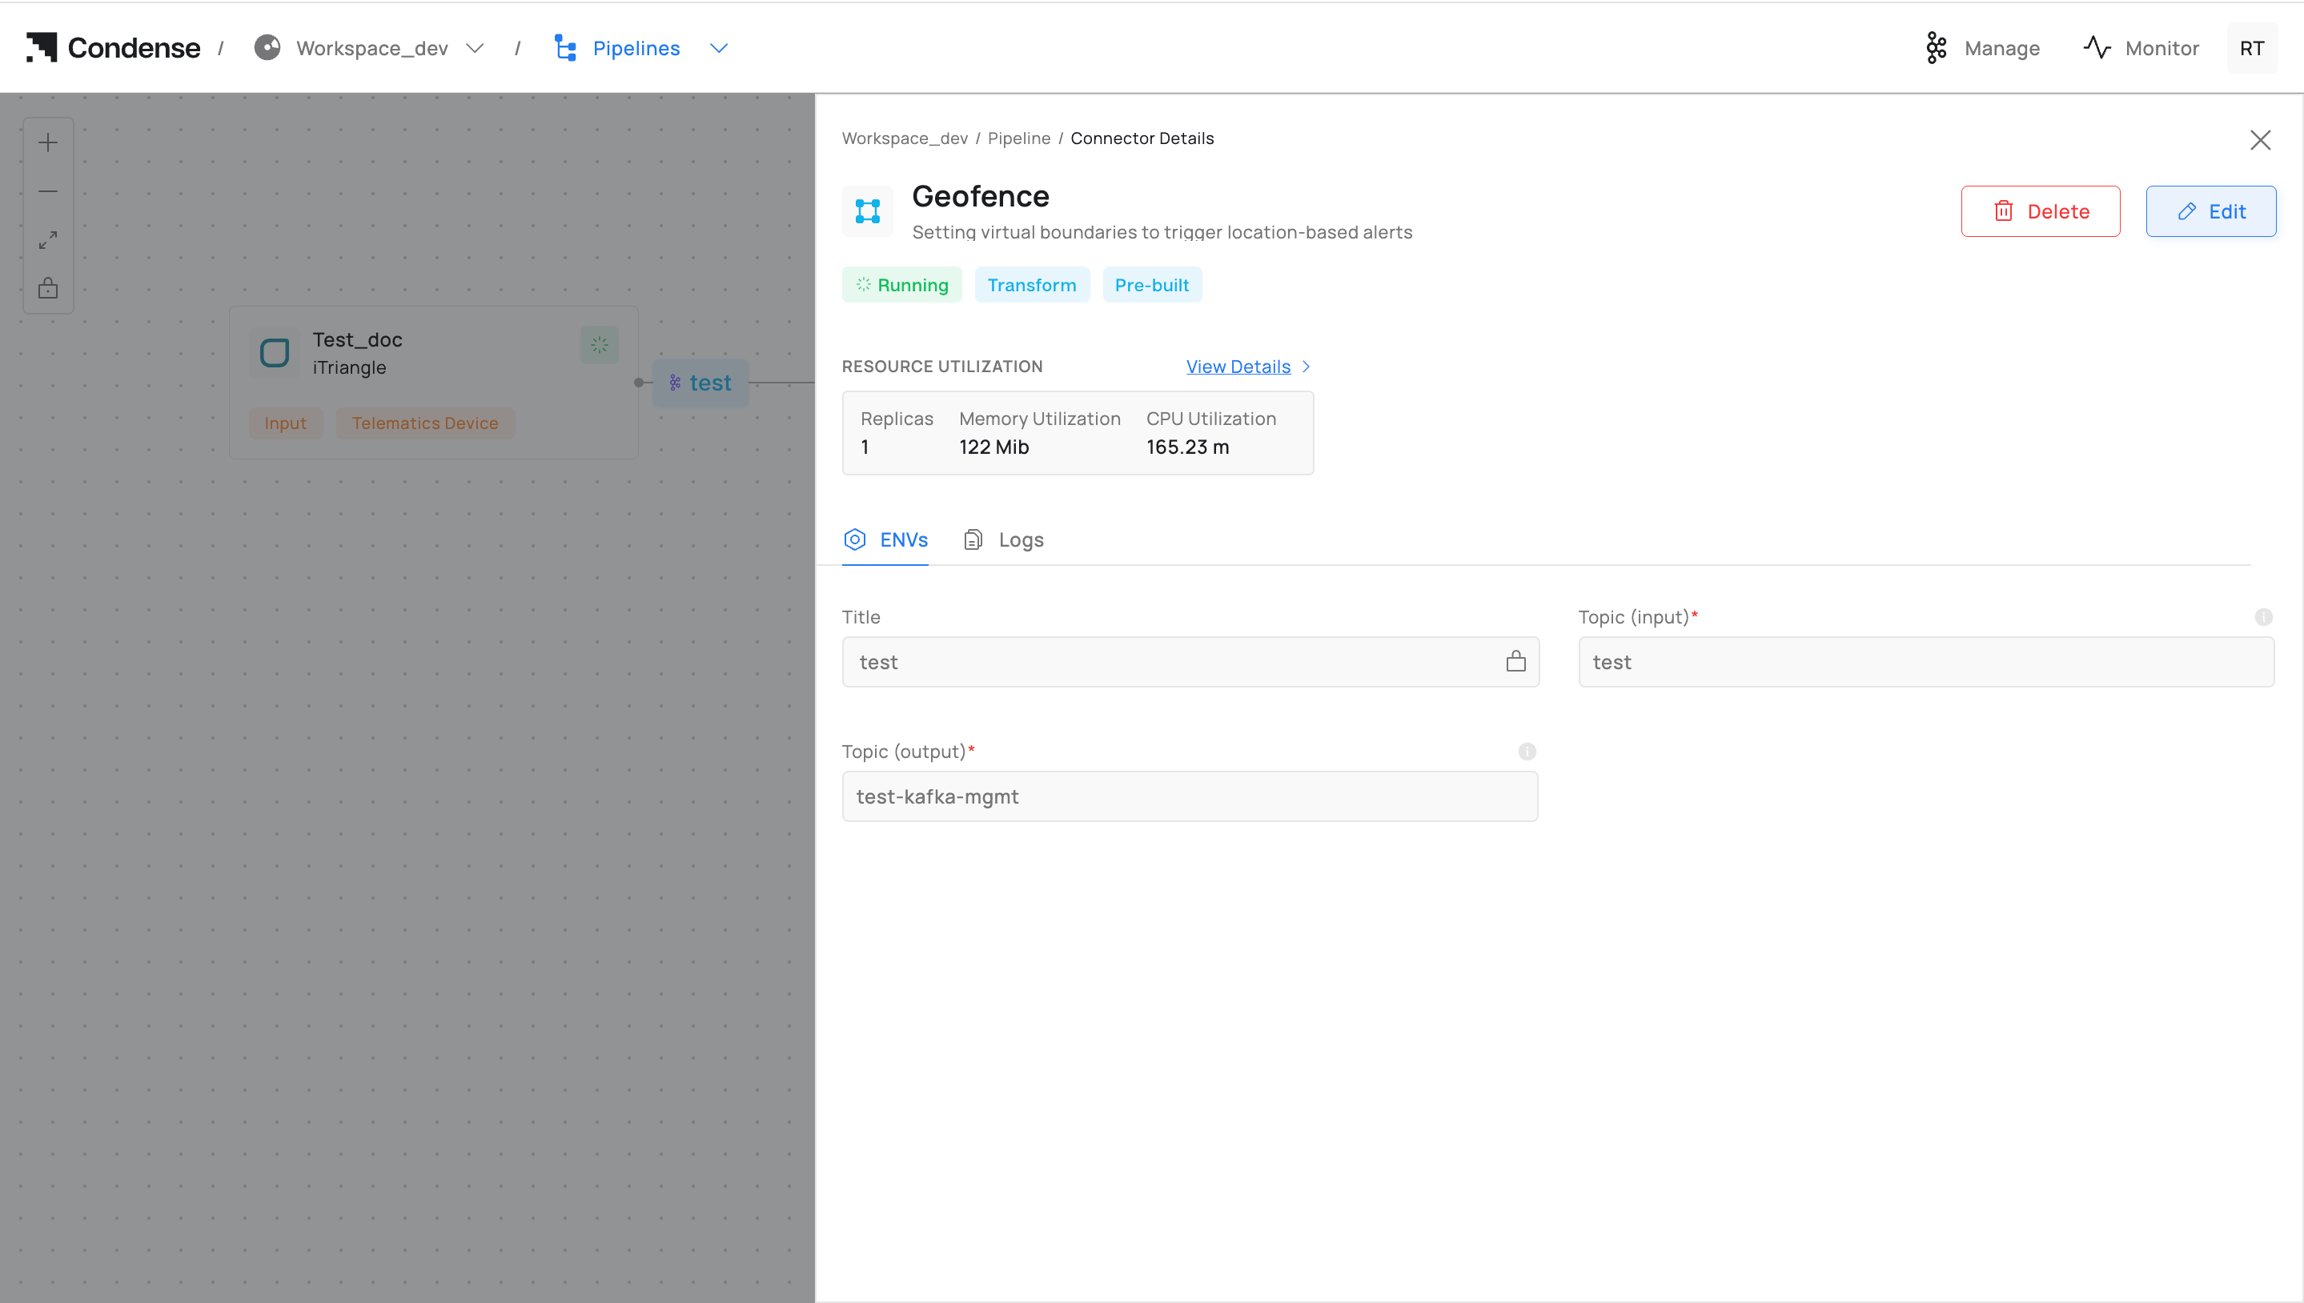
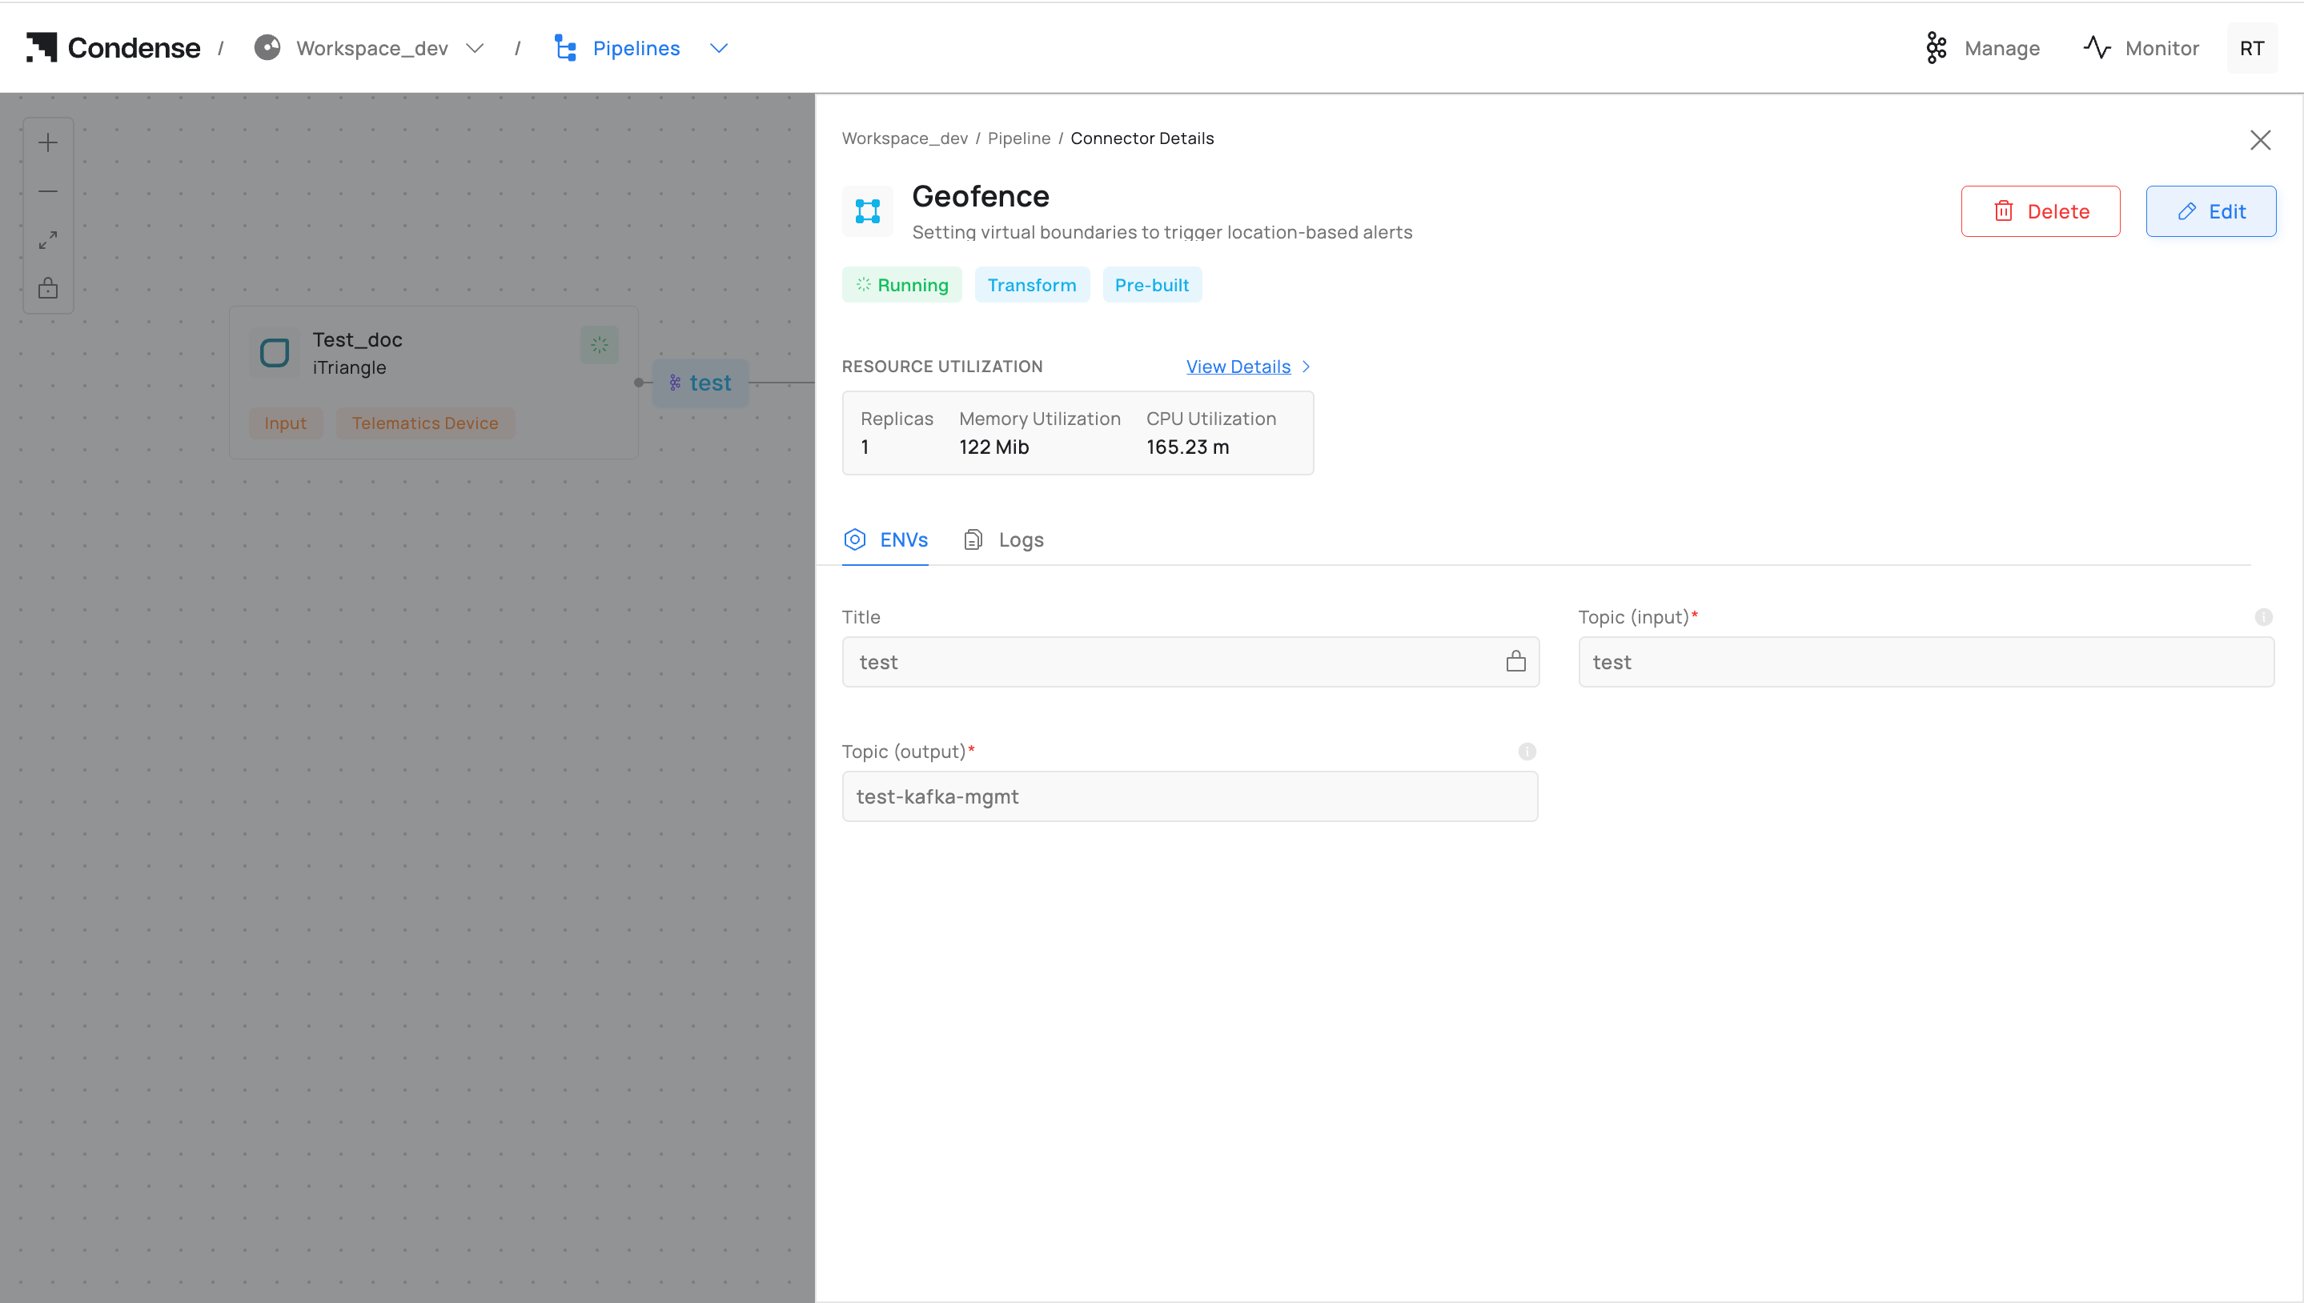 To **roll back**, simply select an older published version from the Version dropdown - no rebuild is needed.
 ***
### Roles and Permissions
| **Operation** | Admin | Maintainer | Developer | Viewer |
| ------------------------------ | :---: | :--------: | :-------: | :----: |
| Create Application | **✓** | **✓** | **✓** | **✕** |
| Edit code / ENVs | **✓** | **✓** | **✓** | **✕** |
| Build application | **✓** | **✓** | **✓** | **✕** |
| Publish application | **✓** | **✓** | **✕** | **✕** |
| Deploy transform to pipeline | **✓** | **✓** | **✕** | **✕** |
| Edit deployed transform config | **✓** | **✓** | **✓** | **✕** |
| Delete transform / application | **✓** | **✓** | **✕** | **✕** |
| View transform list / config | **✓** | **✓** | **✓** | **✓** |
| Access transform logs | **✓** | **✓** | **✓** | **✓** |
***
### Monitoring and Audit
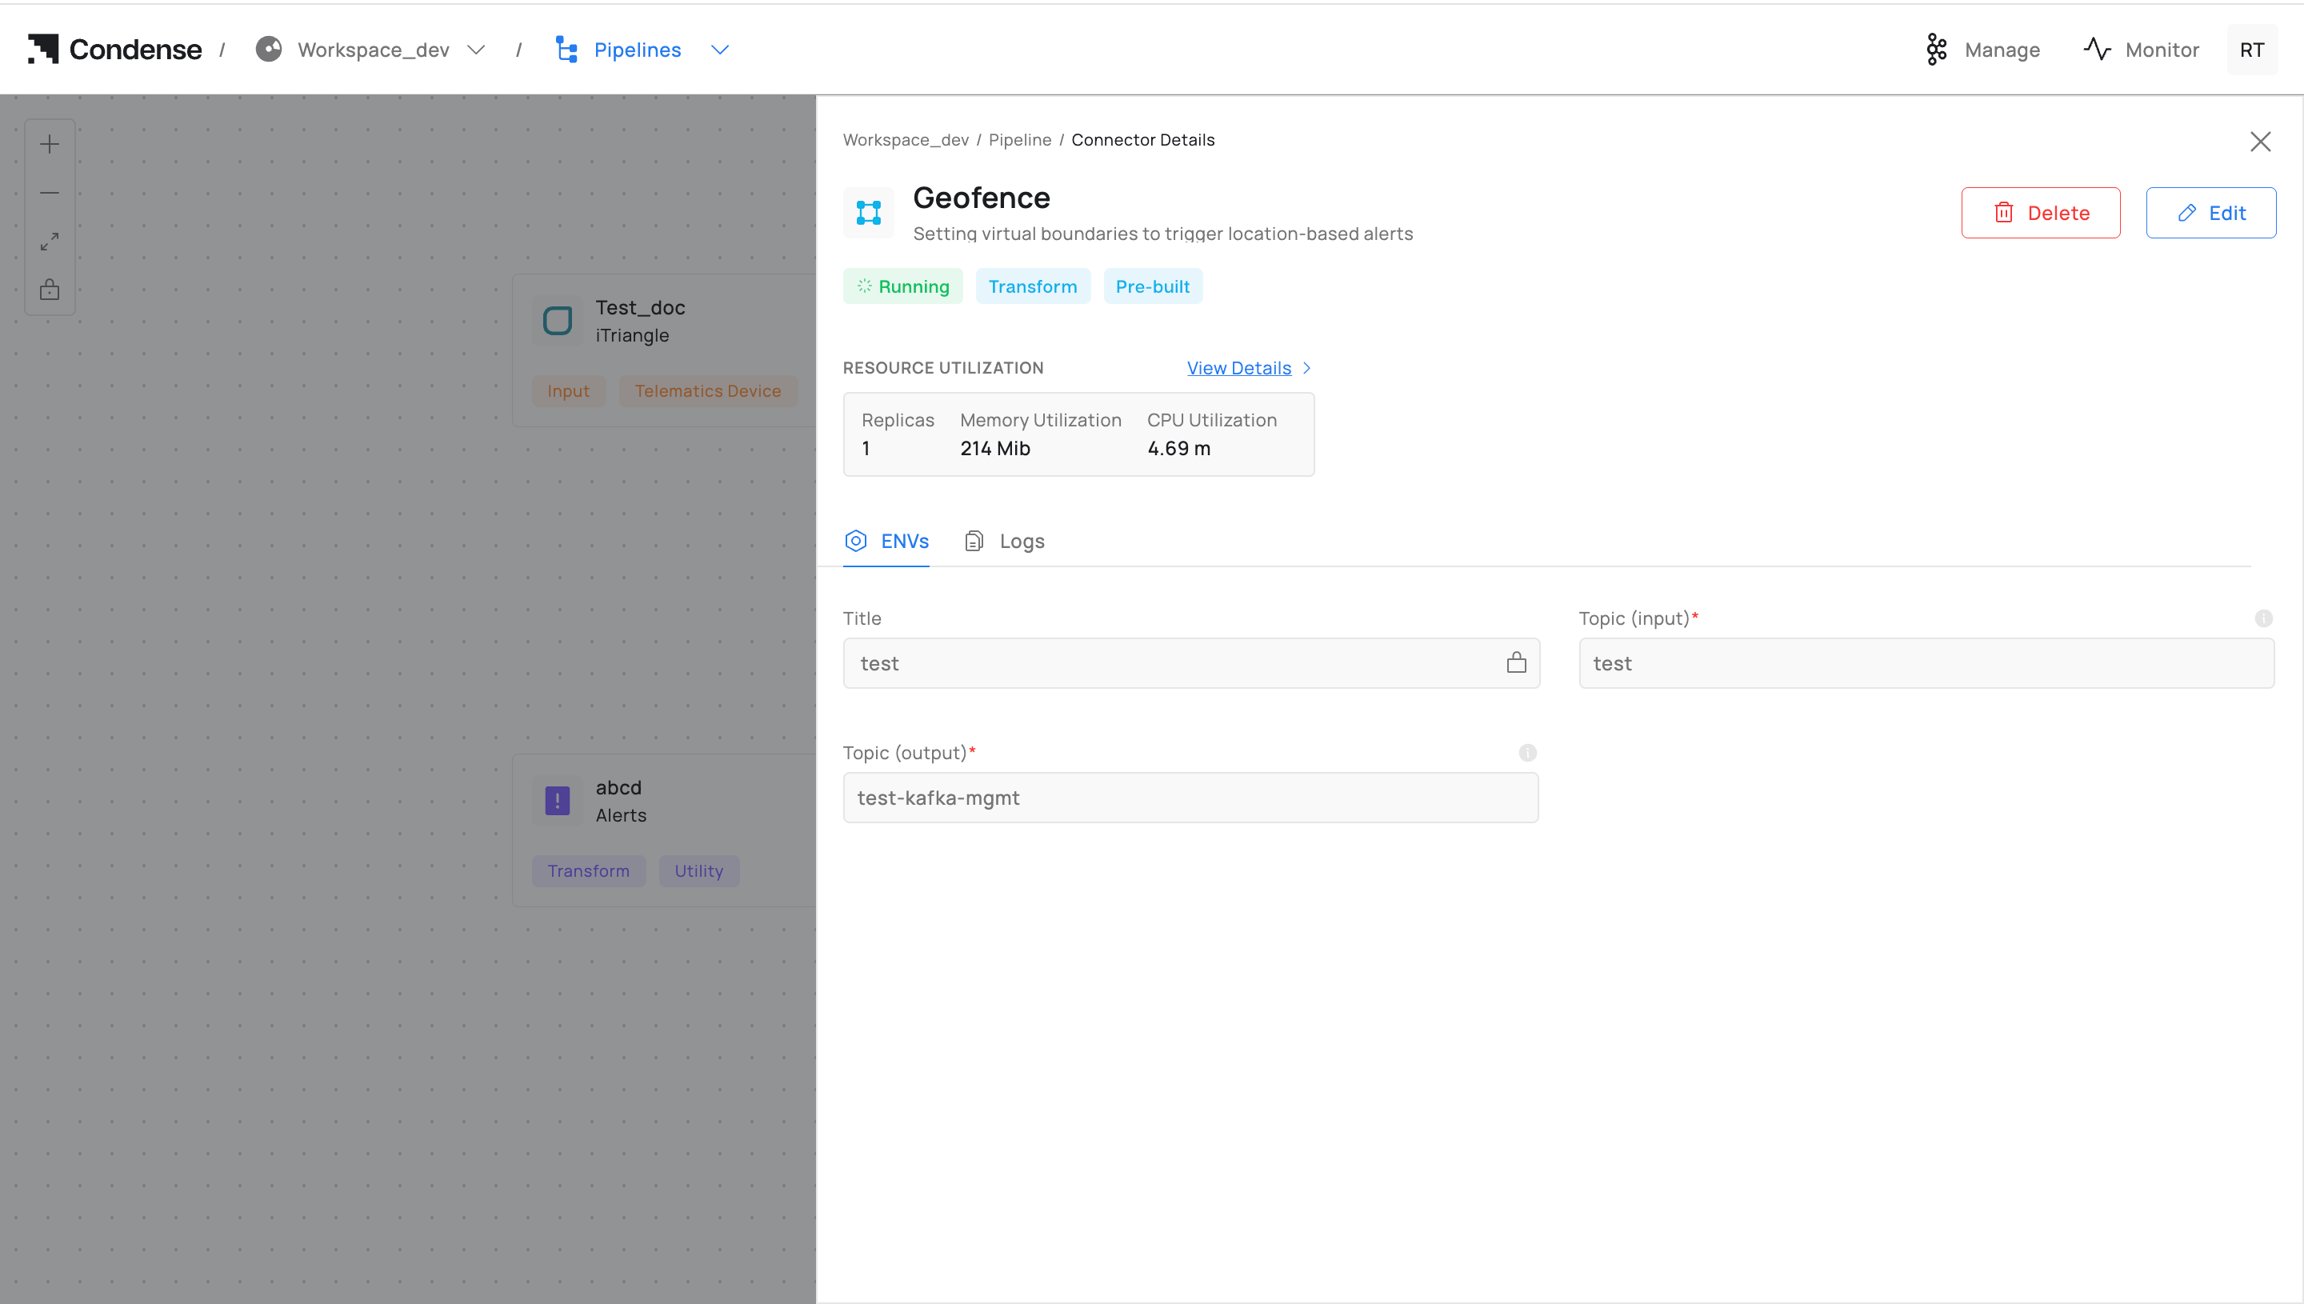
In the pipeline view, click on a deployed transform block to open its detail page. Here you can view:
* **Status** (active, error)
* **Execution metrics** (throughput, processing latency, error rate)
* **Resource utilization** metrics
* **Version history** for each transform
* **Activity logs** for creation, modification, and deletion events
* **Runtime logs** (stdout/stderr) via the Logger/observability stack
***
### Roles and Permissions
| **Operation** | Admin | Maintainer | Developer | Viewer |
| ------------------------------ | :---: | :--------: | :-------: | :----: |
| Create Application | **✓** | **✓** | **✓** | **✕** |
| Edit code / ENVs | **✓** | **✓** | **✓** | **✕** |
| Build application | **✓** | **✓** | **✓** | **✕** |
| Publish application | **✓** | **✓** | **✕** | **✕** |
| Deploy transform to pipeline | **✓** | **✓** | **✕** | **✕** |
| Edit deployed transform config | **✓** | **✓** | **✓** | **✕** |
| Delete transform / application | **✓** | **✓** | **✕** | **✕** |
| View transform list / config | **✓** | **✓** | **✓** | **✓** |
| Access transform logs | **✓** | **✓** | **✓** | **✓** |
***
### Monitoring and Audit
In the pipeline view, click on a deployed transform block to open its detail page. Here you can view:
* **Status** (active, error)
* **Execution metrics** (throughput, processing latency, error rate)
* **Resource utilization** metrics
* **Version history** for each transform
* **Activity logs** for creation, modification, and deletion events
* **Runtime logs** (stdout/stderr) via the Logger/observability stack
 ***
### Best Practices
* Keep each application focused on a **single responsibility** for simpler testing and review.
* Use **ENVs** over hardcoding - configure ports, credentials, and endpoints via environment variables.
* Map Git branches to deployment stages: `dev`, `staging`, `main`.
* Align Version labels, image tags, and Git tags/commits for full traceability.
* Always **test using Publish/Subscribe** testers before building.
* Keep custom transform logic **modular and version-controlled** in Git.
* Regularly review **transform performance metrics** to detect bottlenecks early.
***
### Common Pitfalls
| **Problem** | Cause | How to Avoid |
| -------------------------------------------- | ------------------------------------------------ | --------------------------------------------------------------------------- |
| Published transform not visible in pipeline | Wrong publication type selected | Always confirm **Transform** (not Input/Output Connector) before publishing |
| Unreachable HTTP/TCP during testing | Server not exposed or wrong port binding | Enable the correct toggle and match the port ENV in code |
| "No messages yet" in Subscribe | Topic/partition/offset mismatch | Use First/Last/Size presets and verify topic and partition |
| Build failures due to missing dependencies | Dependencies not in project config | Add to dependency file (e.g. `requirements.txt`) and rebuild |
| Runtime errors after deleting an application | Active pipeline still references the application | Update or remove dependent pipeline deployments first |
***
***
### Best Practices
* Keep each application focused on a **single responsibility** for simpler testing and review.
* Use **ENVs** over hardcoding - configure ports, credentials, and endpoints via environment variables.
* Map Git branches to deployment stages: `dev`, `staging`, `main`.
* Align Version labels, image tags, and Git tags/commits for full traceability.
* Always **test using Publish/Subscribe** testers before building.
* Keep custom transform logic **modular and version-controlled** in Git.
* Regularly review **transform performance metrics** to detect bottlenecks early.
***
### Common Pitfalls
| **Problem** | Cause | How to Avoid |
| -------------------------------------------- | ------------------------------------------------ | --------------------------------------------------------------------------- |
| Published transform not visible in pipeline | Wrong publication type selected | Always confirm **Transform** (not Input/Output Connector) before publishing |
| Unreachable HTTP/TCP during testing | Server not exposed or wrong port binding | Enable the correct toggle and match the port ENV in code |
| "No messages yet" in Subscribe | Topic/partition/offset mismatch | Use First/Last/Size presets and verify topic and partition |
| Build failures due to missing dependencies | Dependencies not in project config | Add to dependency file (e.g. `requirements.txt`) and rebuild |
| Runtime errors after deleting an application | Active pipeline still references the application | Update or remove dependent pipeline deployments first |
***