

Overview
An Application in Condense is a custom, code‑based unit developed in the built‑in IDE and version‑controlled through Git. Once built and published, an application becomes deployable as a Custom Transform or a Custom Connector (Input or Output) within a workspace pipeline. Applications help:- Implement domain‑specific processing or integrations when prebuilt options are insufficient.
- Keep logic close to the data path and governed by workspace roles.
- Maintain traceability through Git commits, image tags, and published versions.
- Standardize development‑to‑deployment through a single, auditable workflow.
What You Can Do in Applications
Create, Develop, and Test
- Create an Application from a connected Git repository or start from a template.
- Edit code in the IDE (file explorer + code editor) and commit to Git.
- Configure ENVs (environment variables) for build/runtime.
- Optionally expose HTTP(s)/TCP servers for service testing.
- Use Publish/Subscribe testers to validate I/O against workspace topics.
Build and Publish
- Build the Application into a container image (image name + tag) with live build logs.
- Publish the Application as:
- Custom Transform (processing component in pipeline), or
- Custom Connector: Input or Output (integration component listed with connectors).
Operate and Maintain
- View versions (draft and published) with immutable release history.
- Roll back by selecting an earlier published version at deployment time.
- Delete drafts or published Applications (role‑gated; irreversible in Condense).
Applications Lifecycle
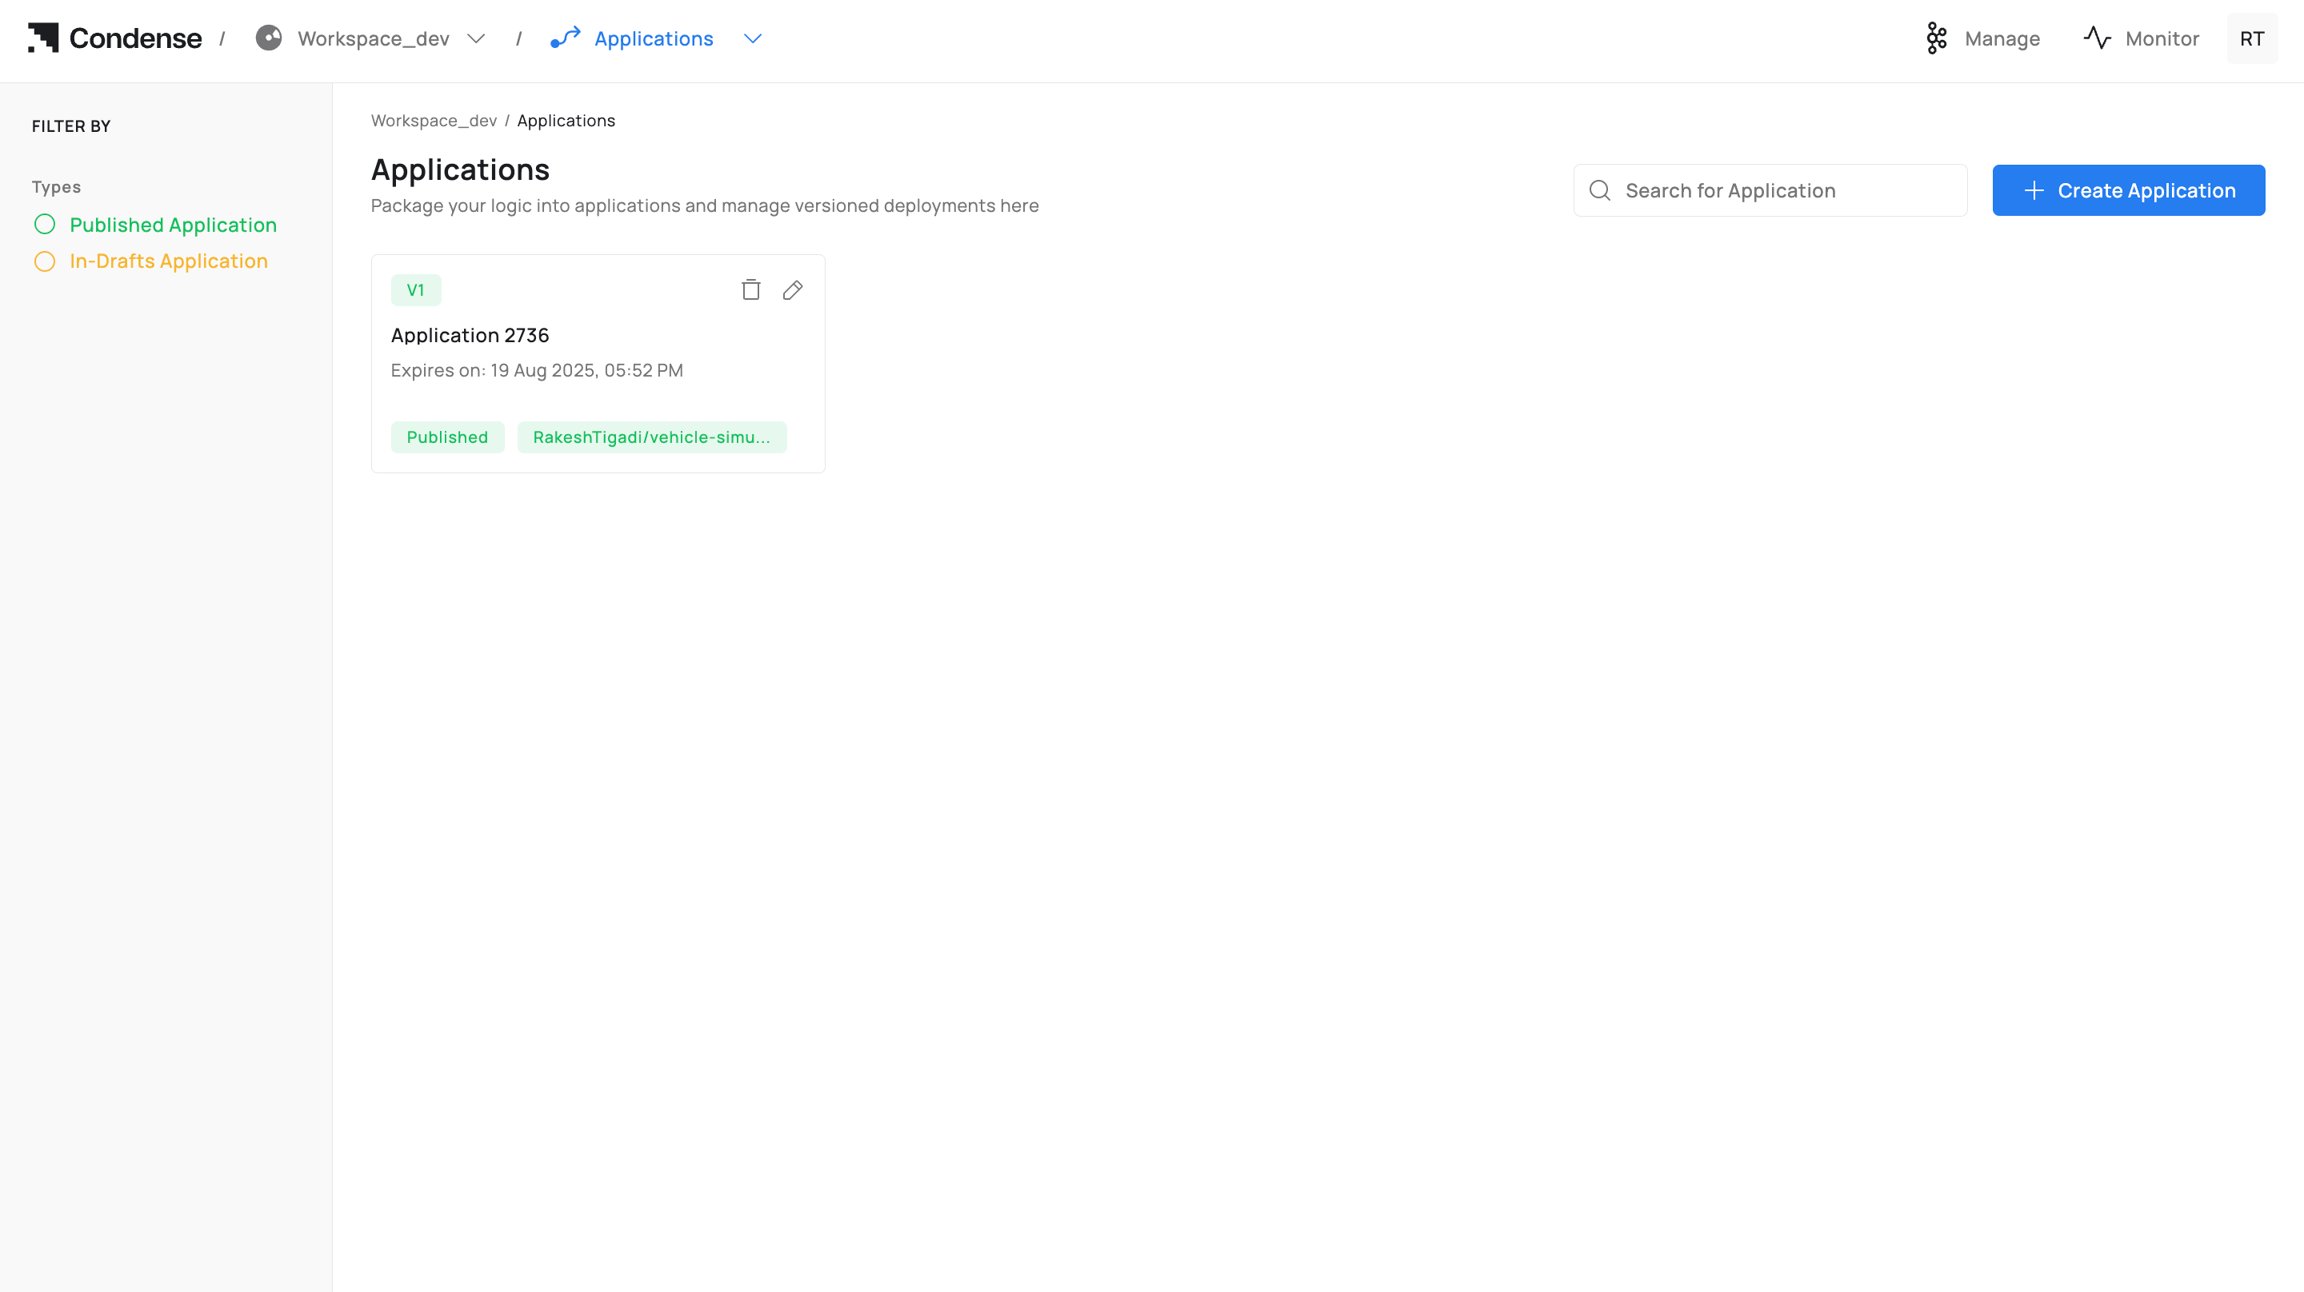
Every Application follows a clear lifecycle, from creation and development to build, publish, deployment, iteration, and eventual deletion. This section outlines each stage and who can perform it.1) Creating an Application
Who can create: Workspace Admins, Maintainers, Developers
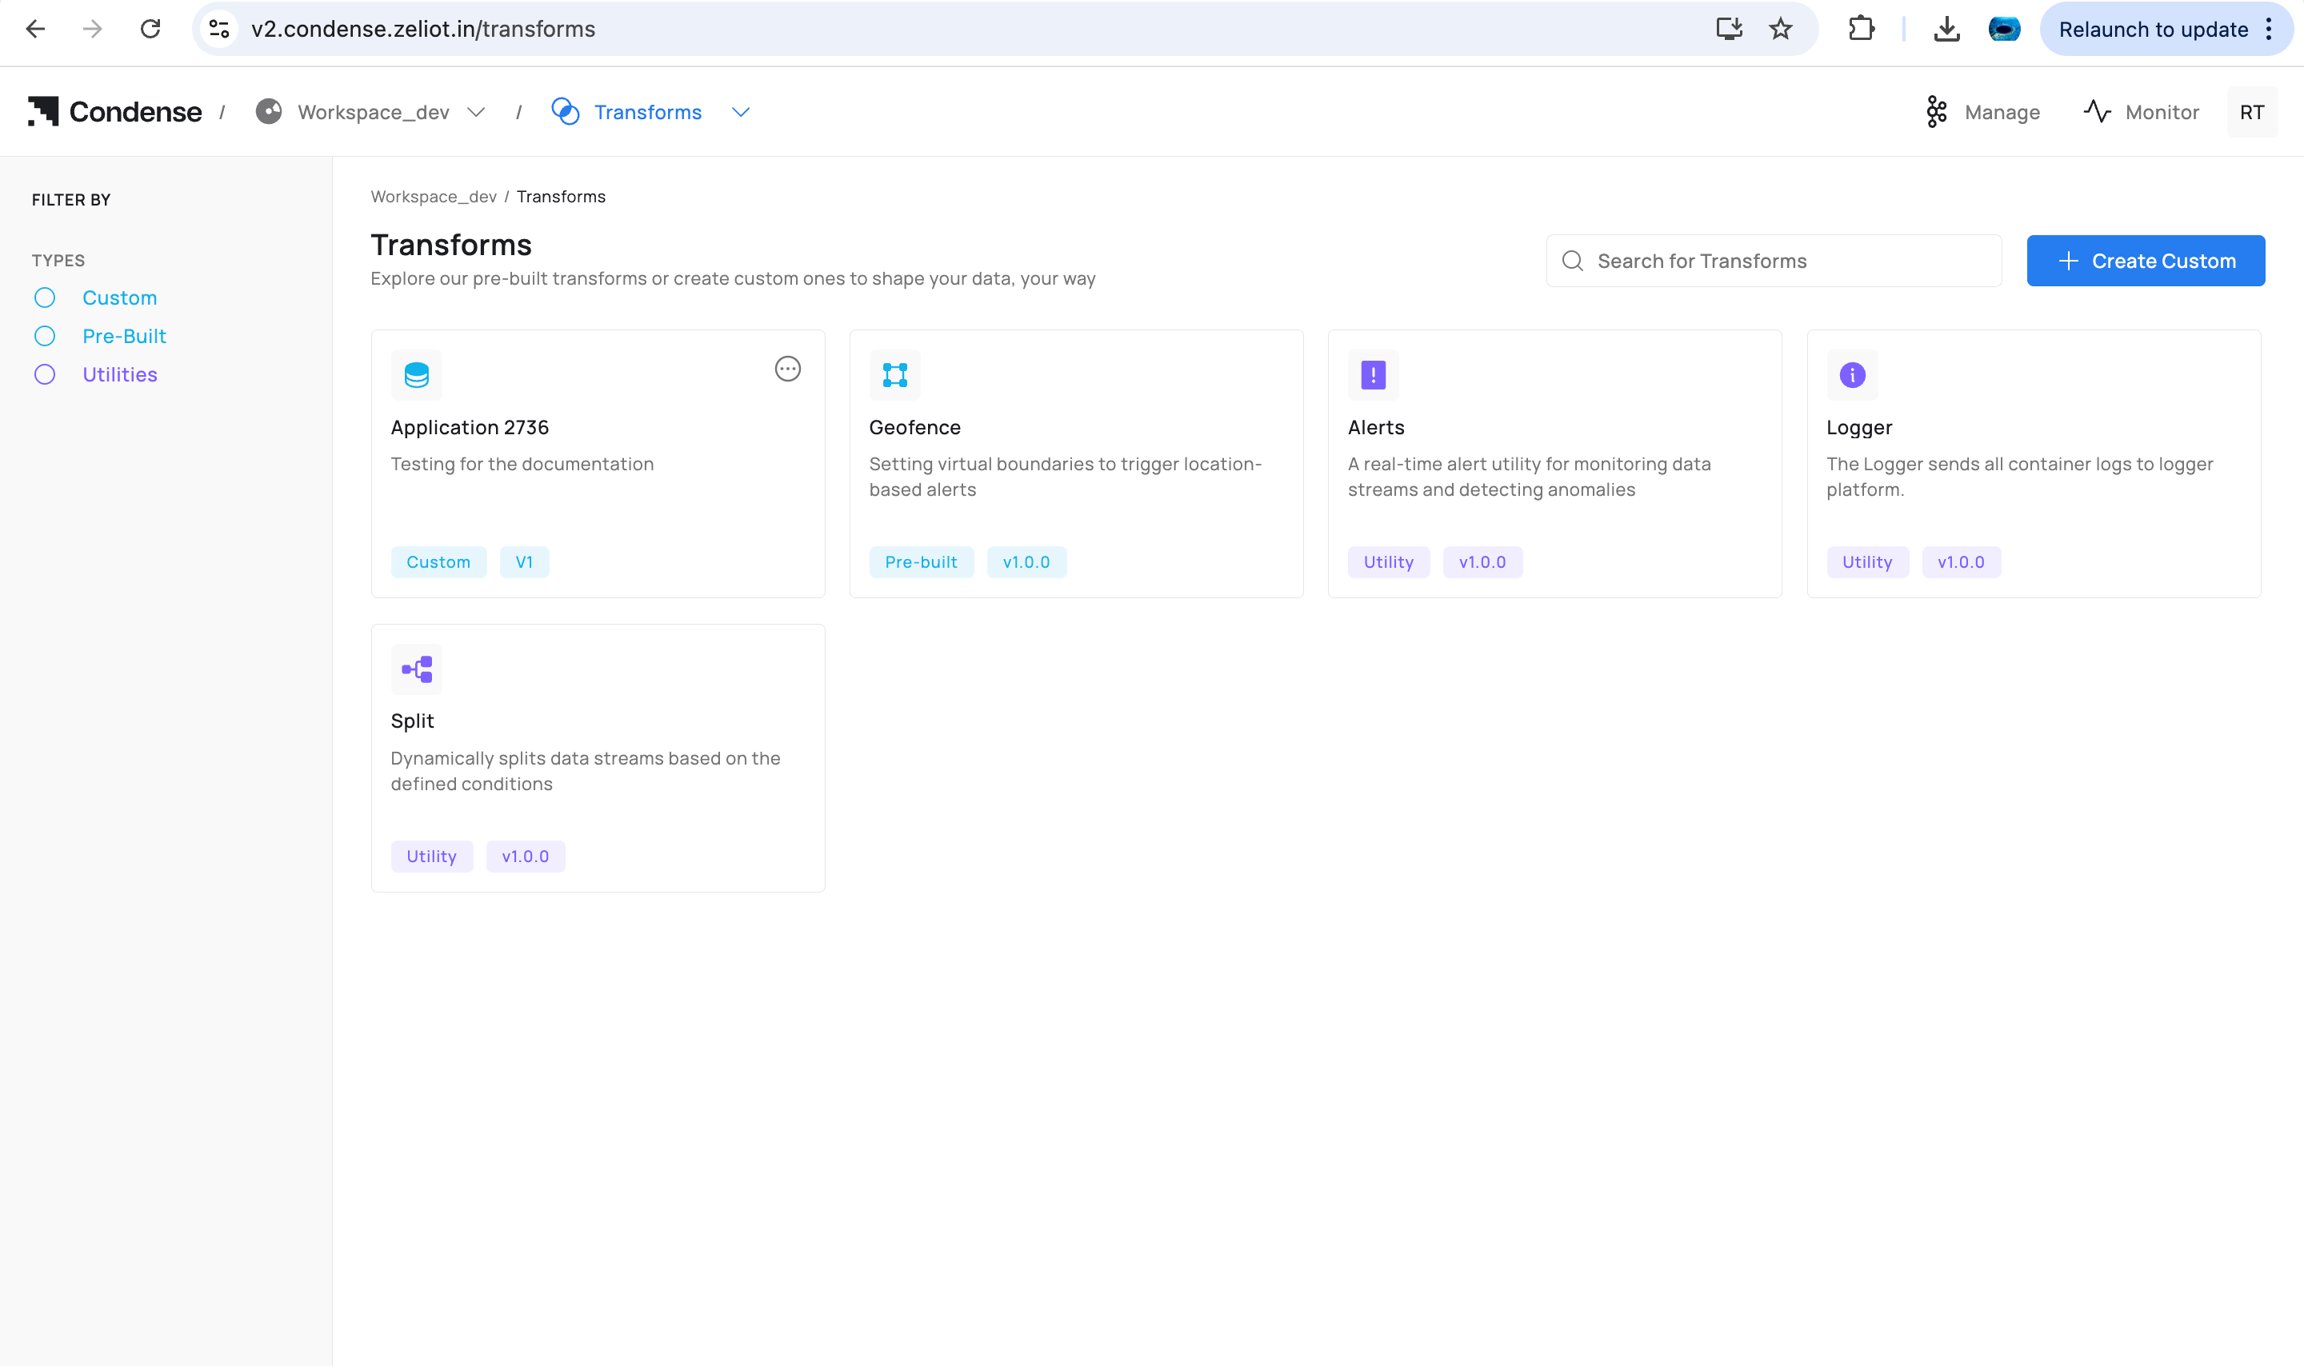
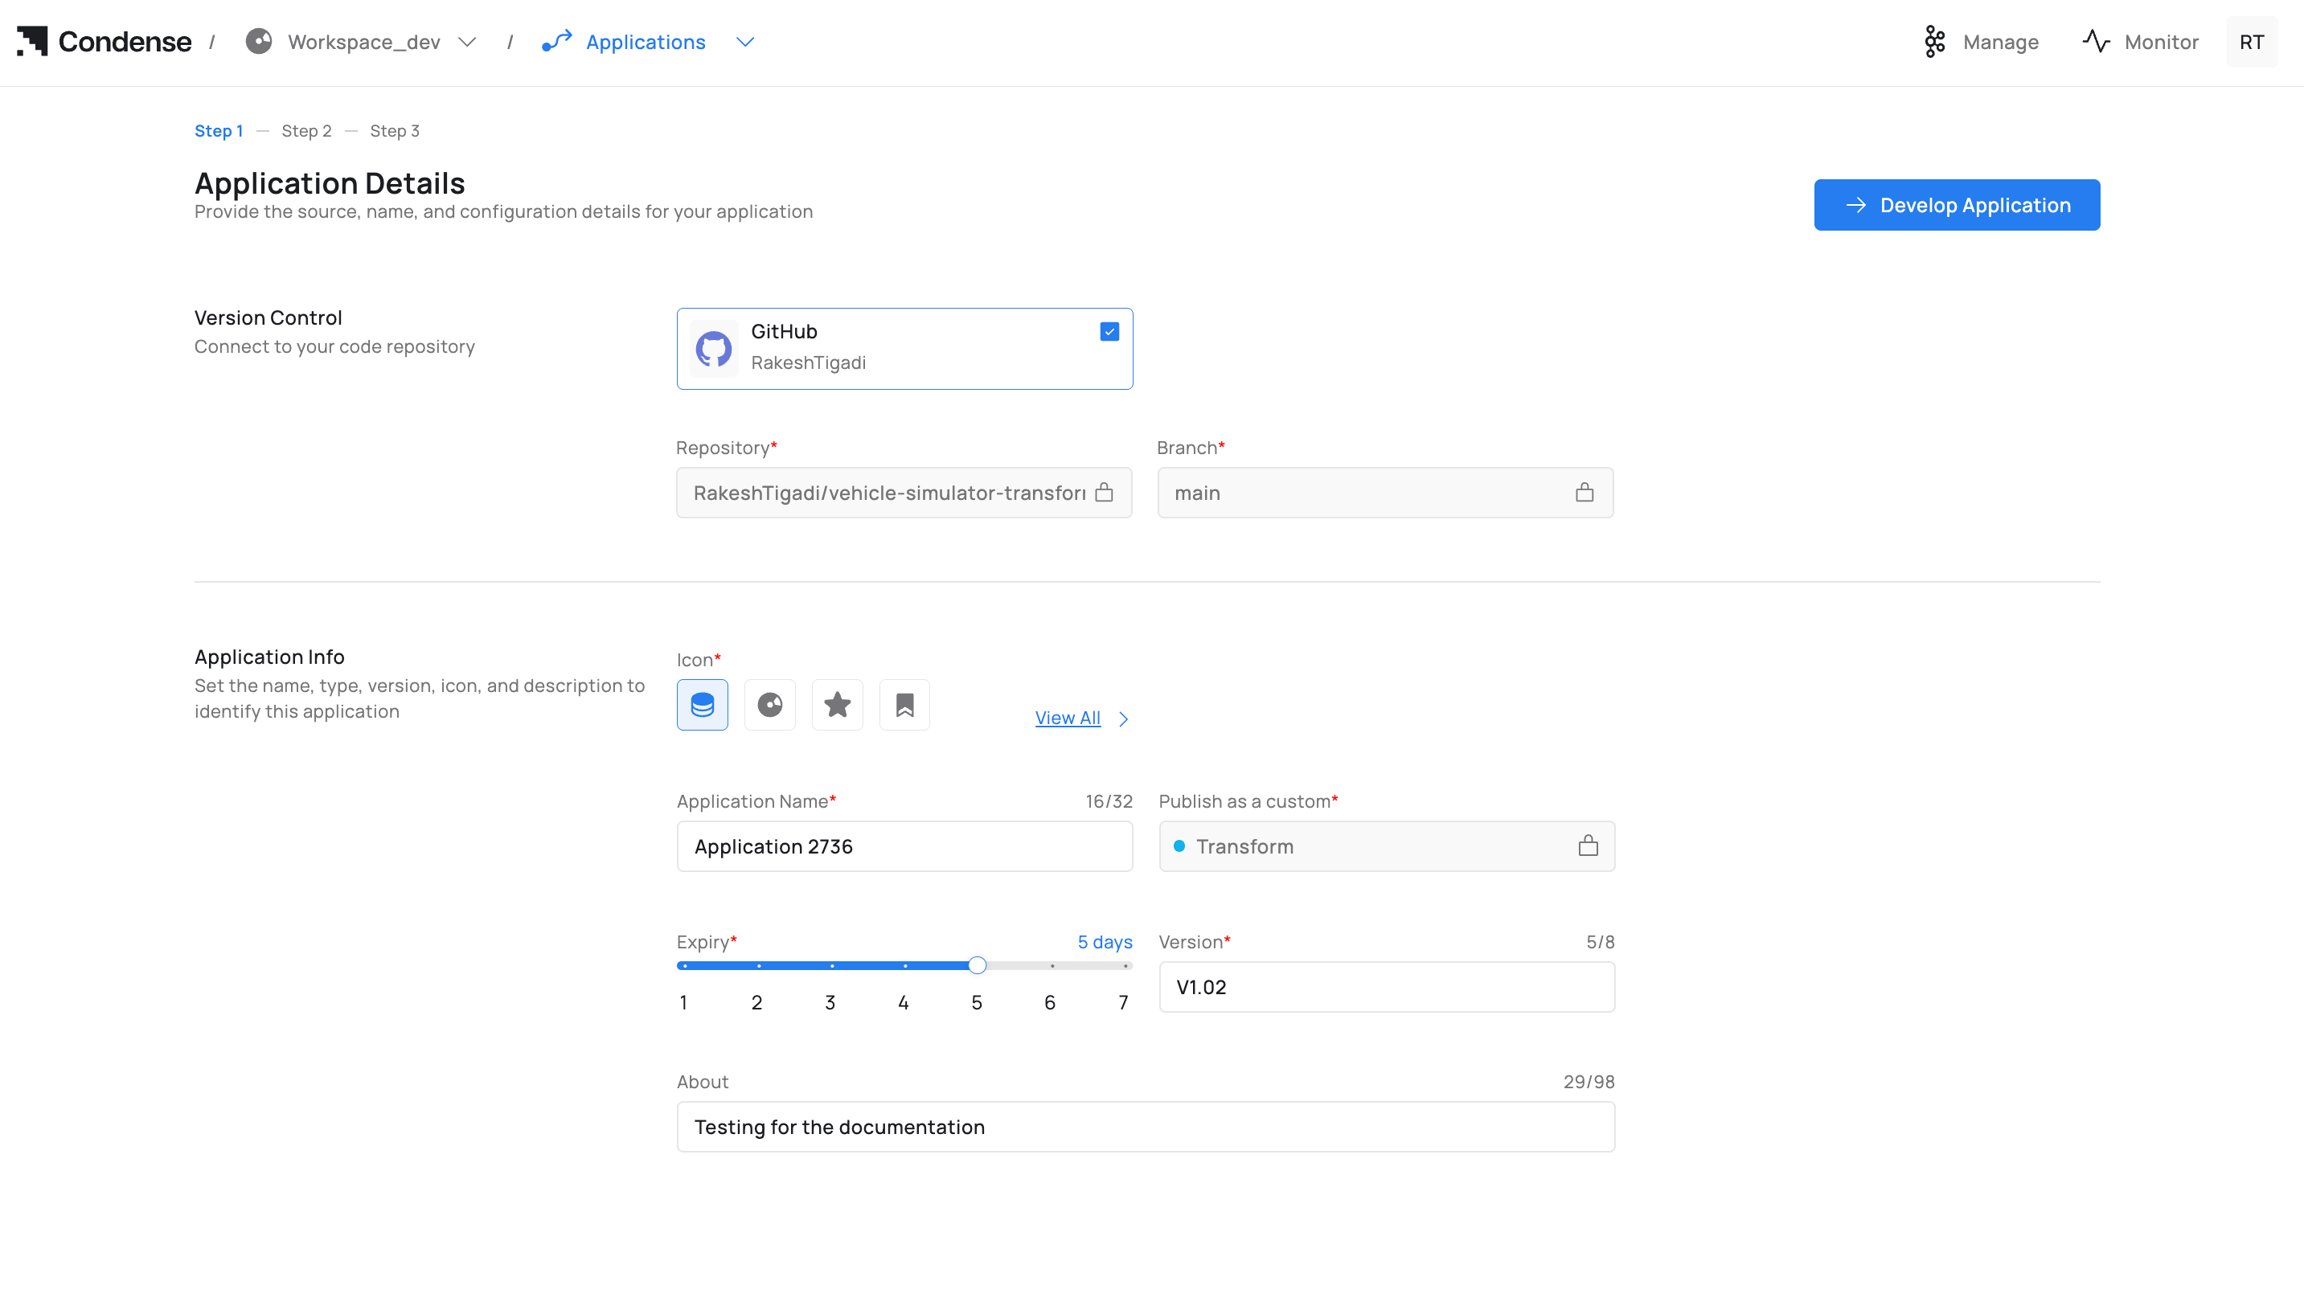
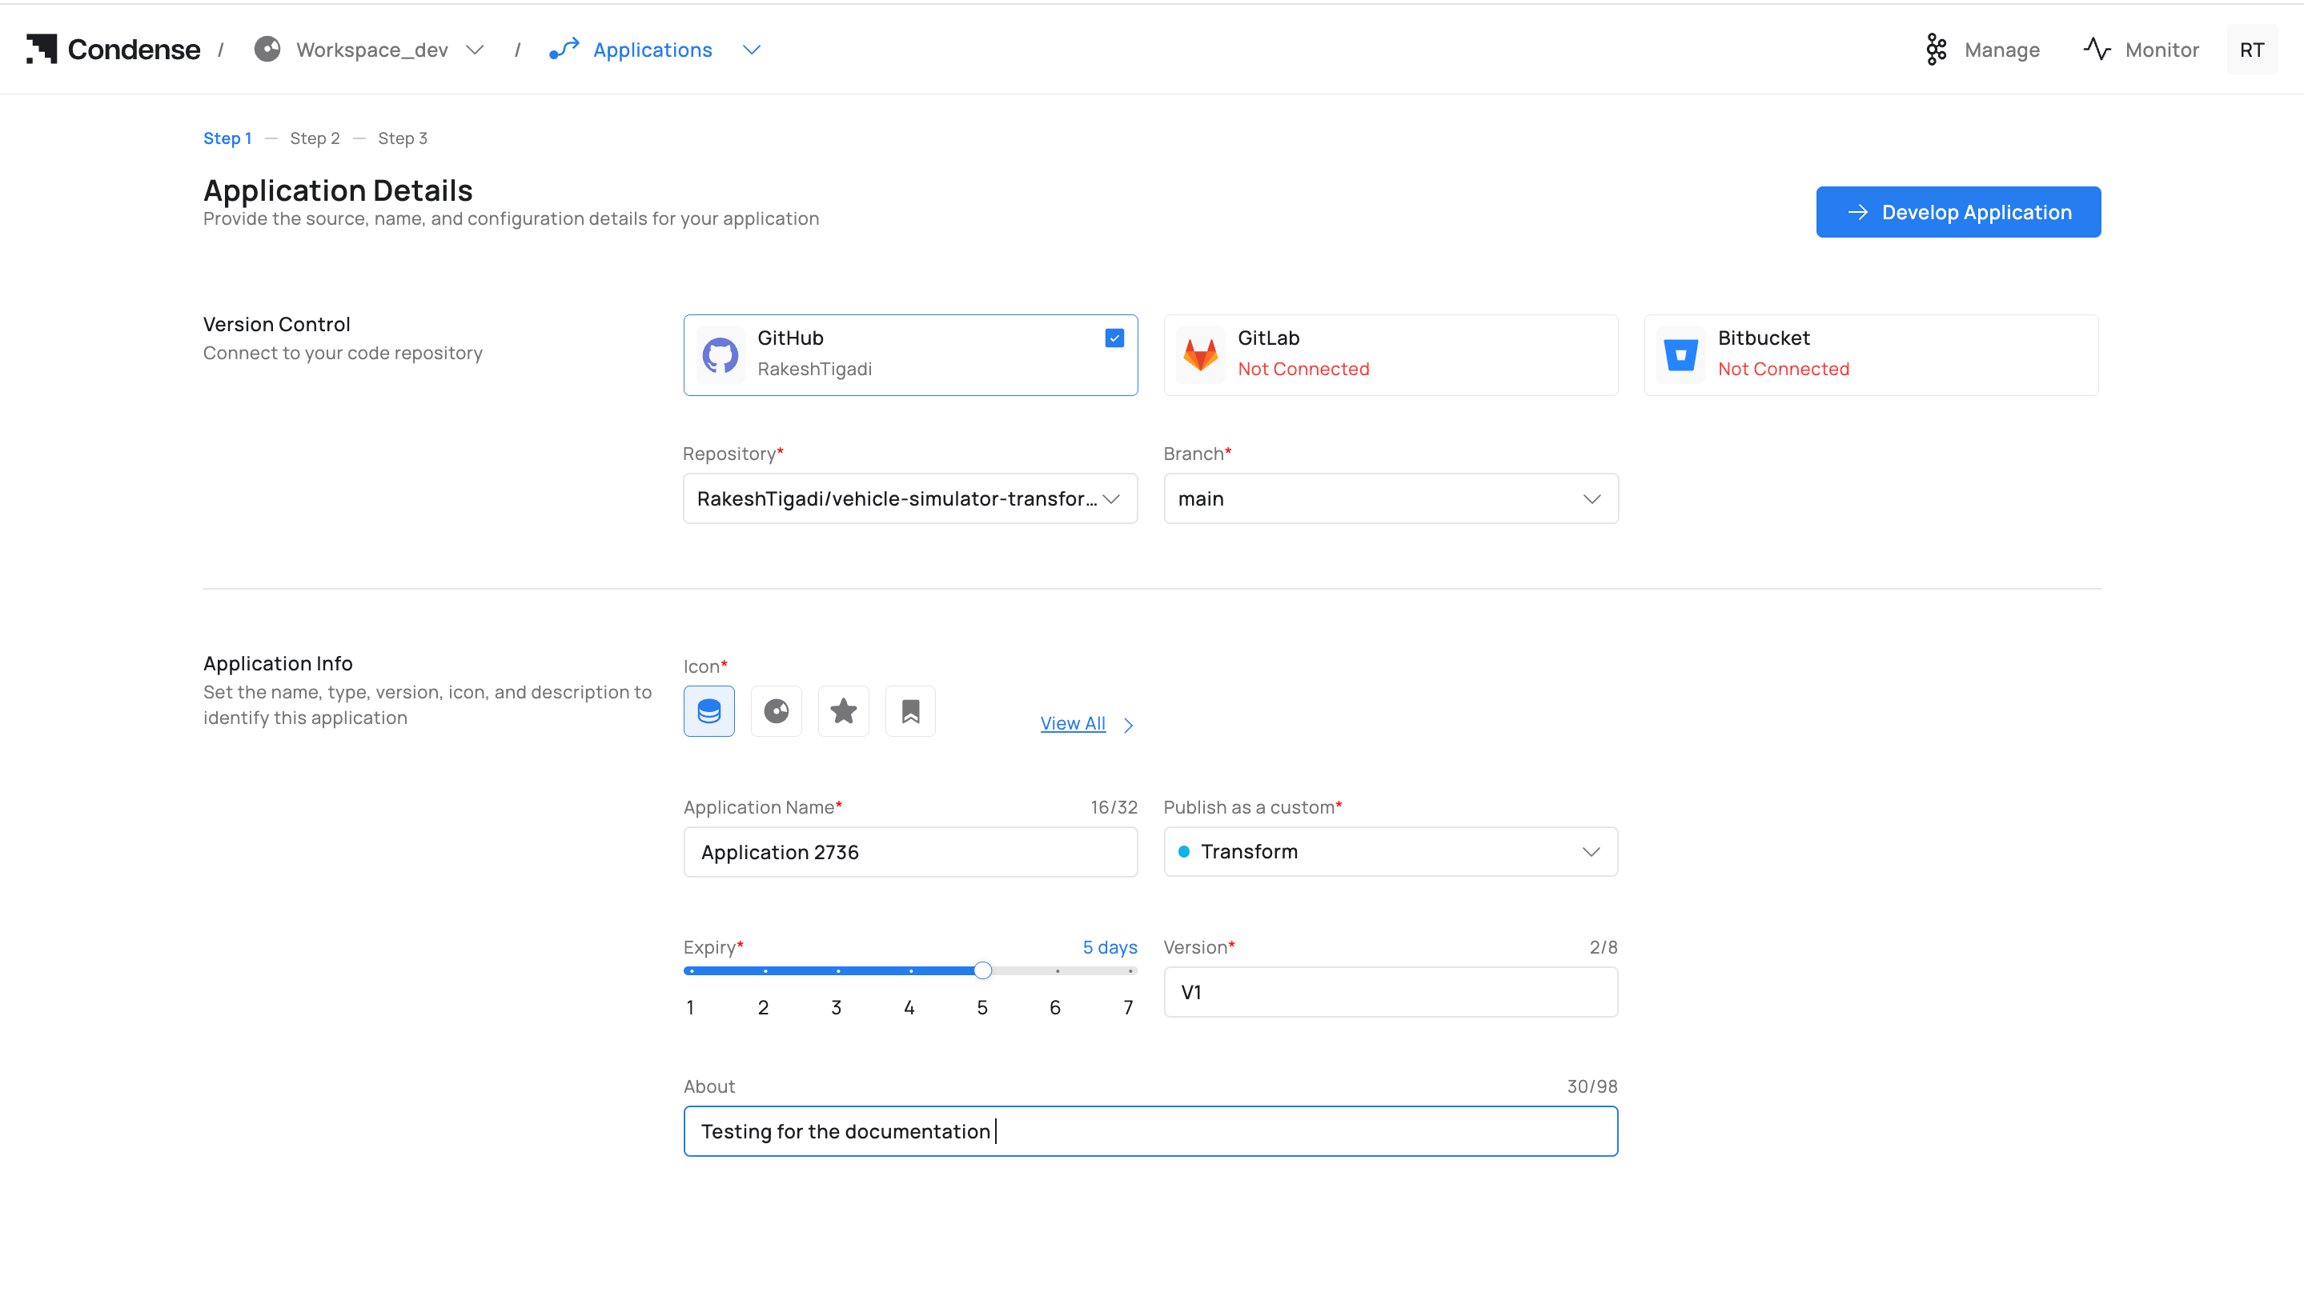
- Go to Applications → Create Application.
- Version Control: Connect a provider (GitHub/GitLab/Bitbucket), then select Repository and Branch.
- Application Info:
- Icon (optional)
- Application Name (unique within workspace)
- Publish as a custom: Transform, Input Connector, or Output Connector
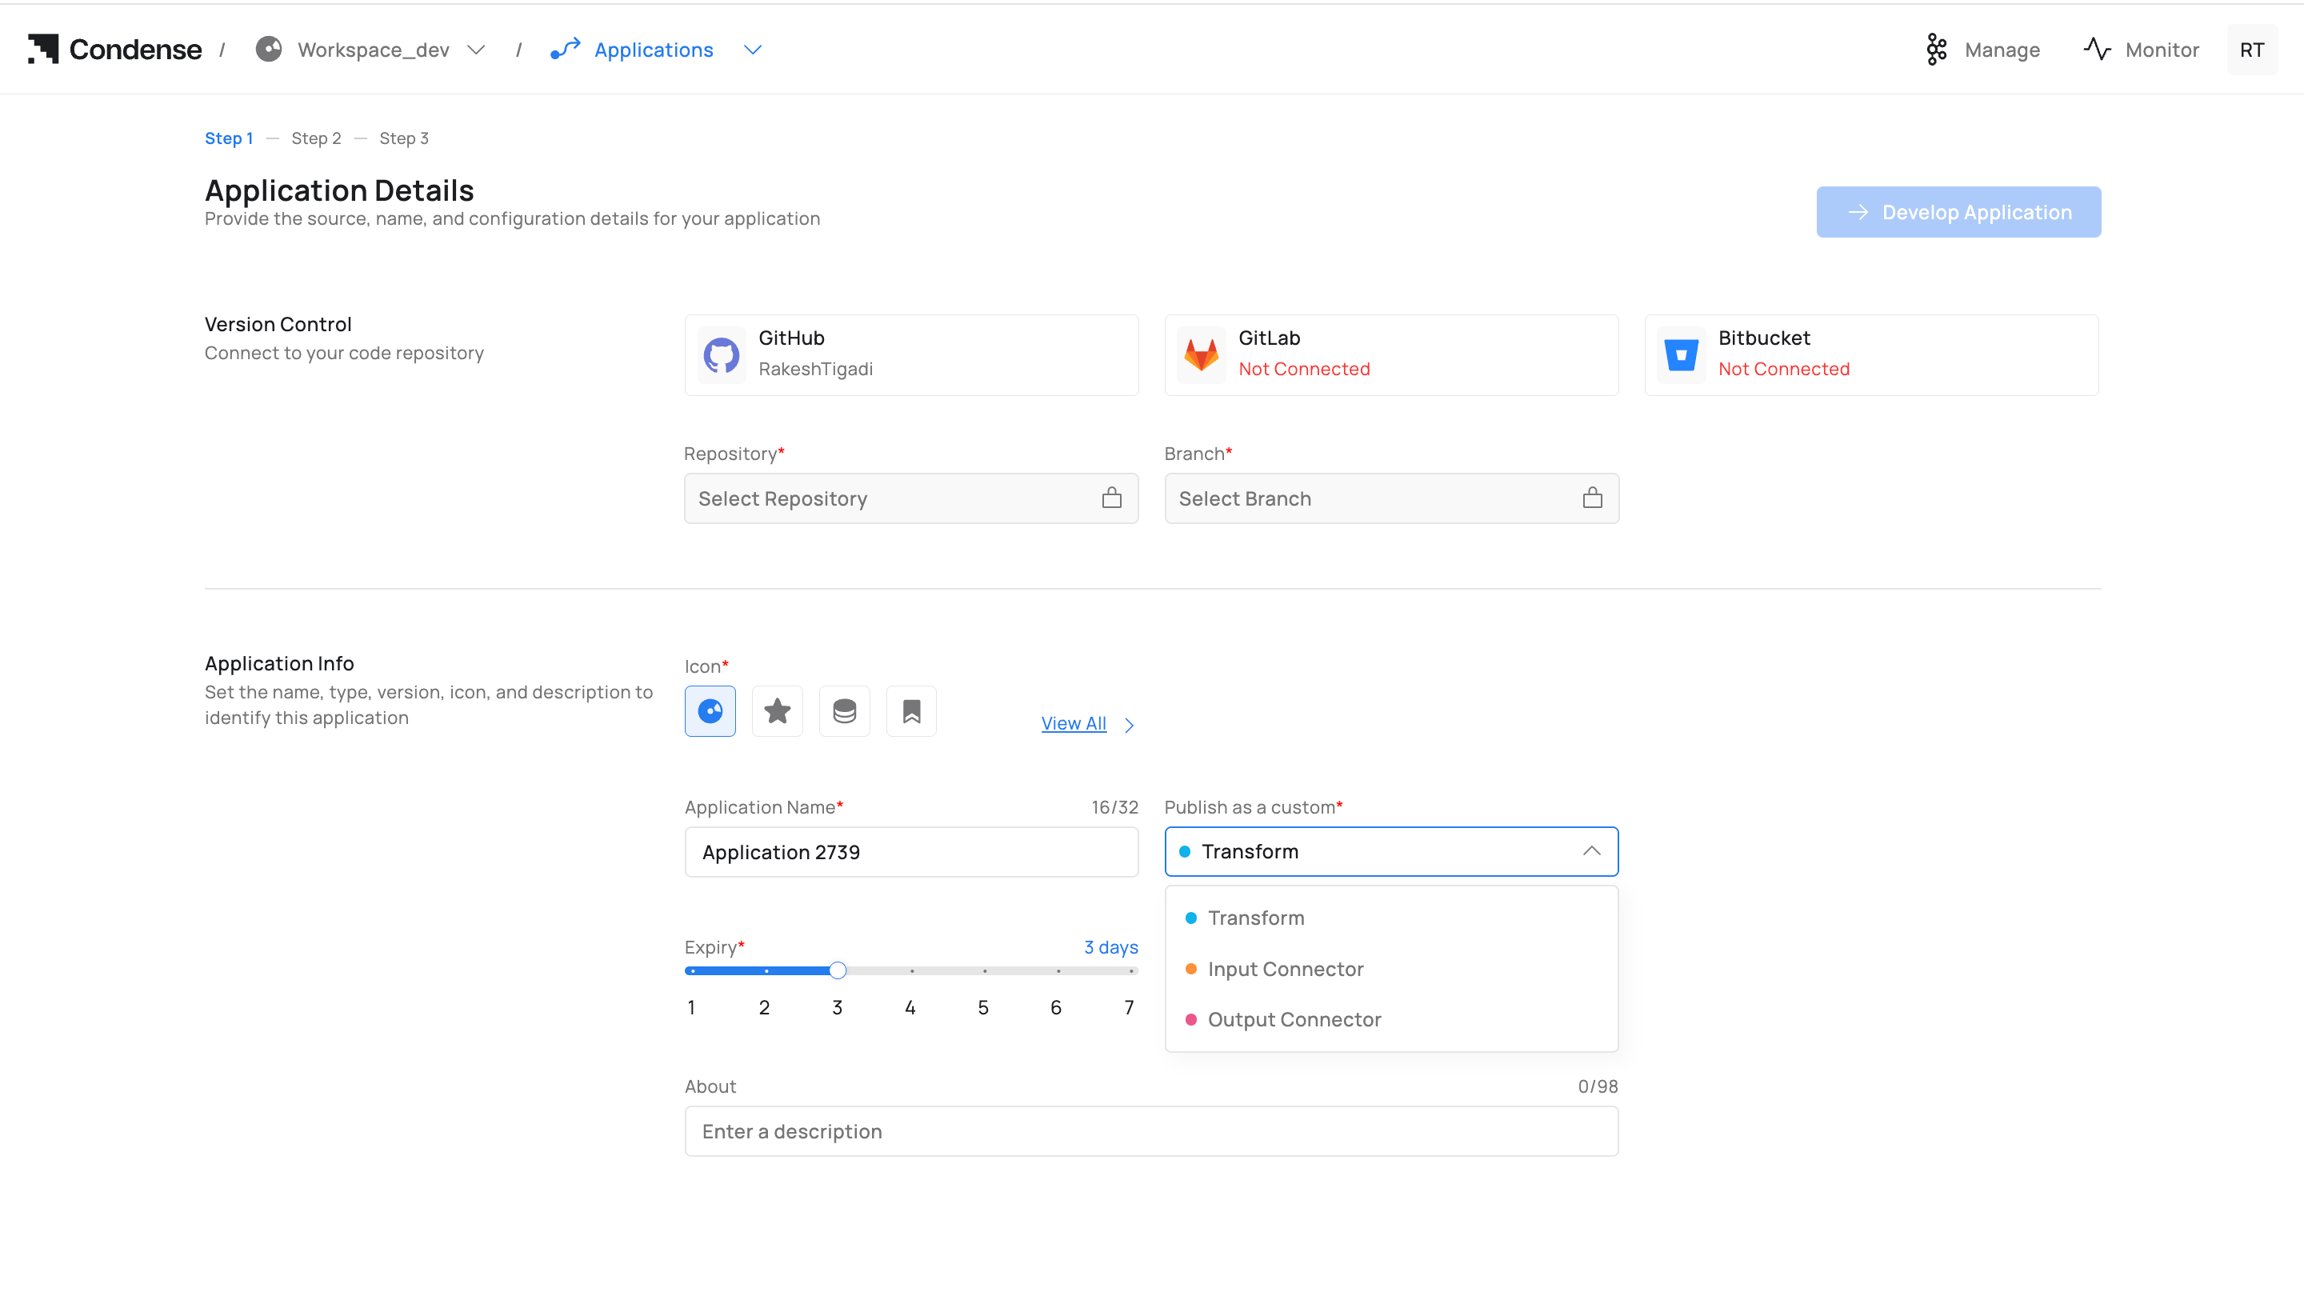
- Expiry (draft retention period)
- Version (e.g., v1, v1.1.0)
- About (optional description)
- Click Develop Application to open the IDE.
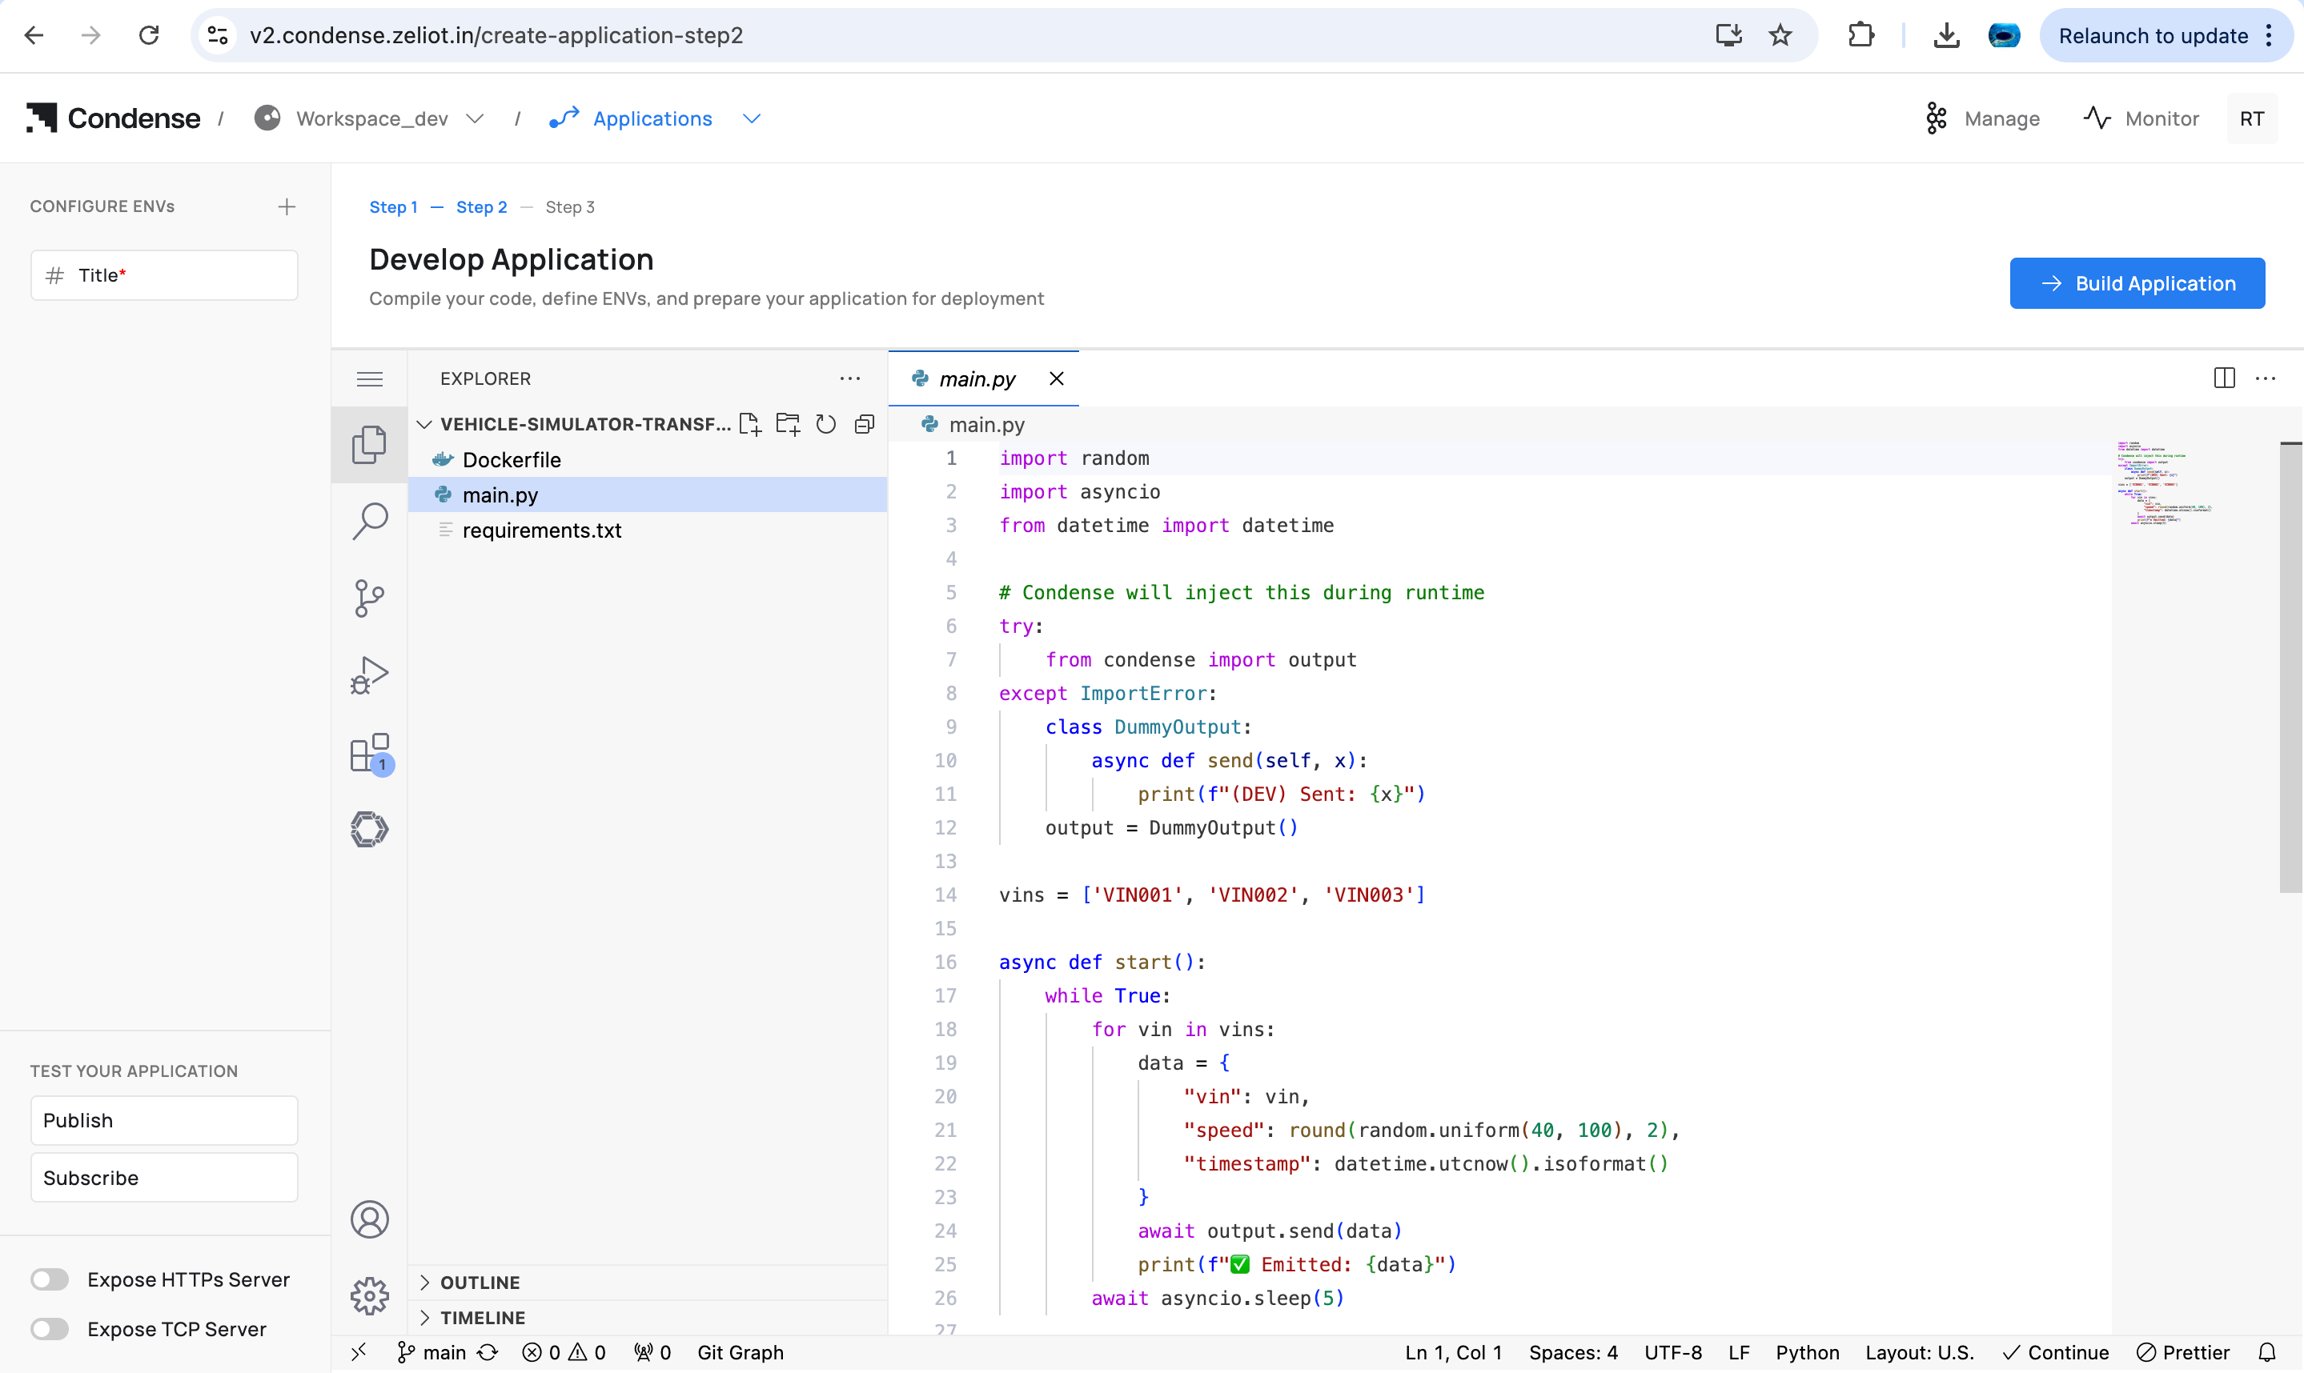
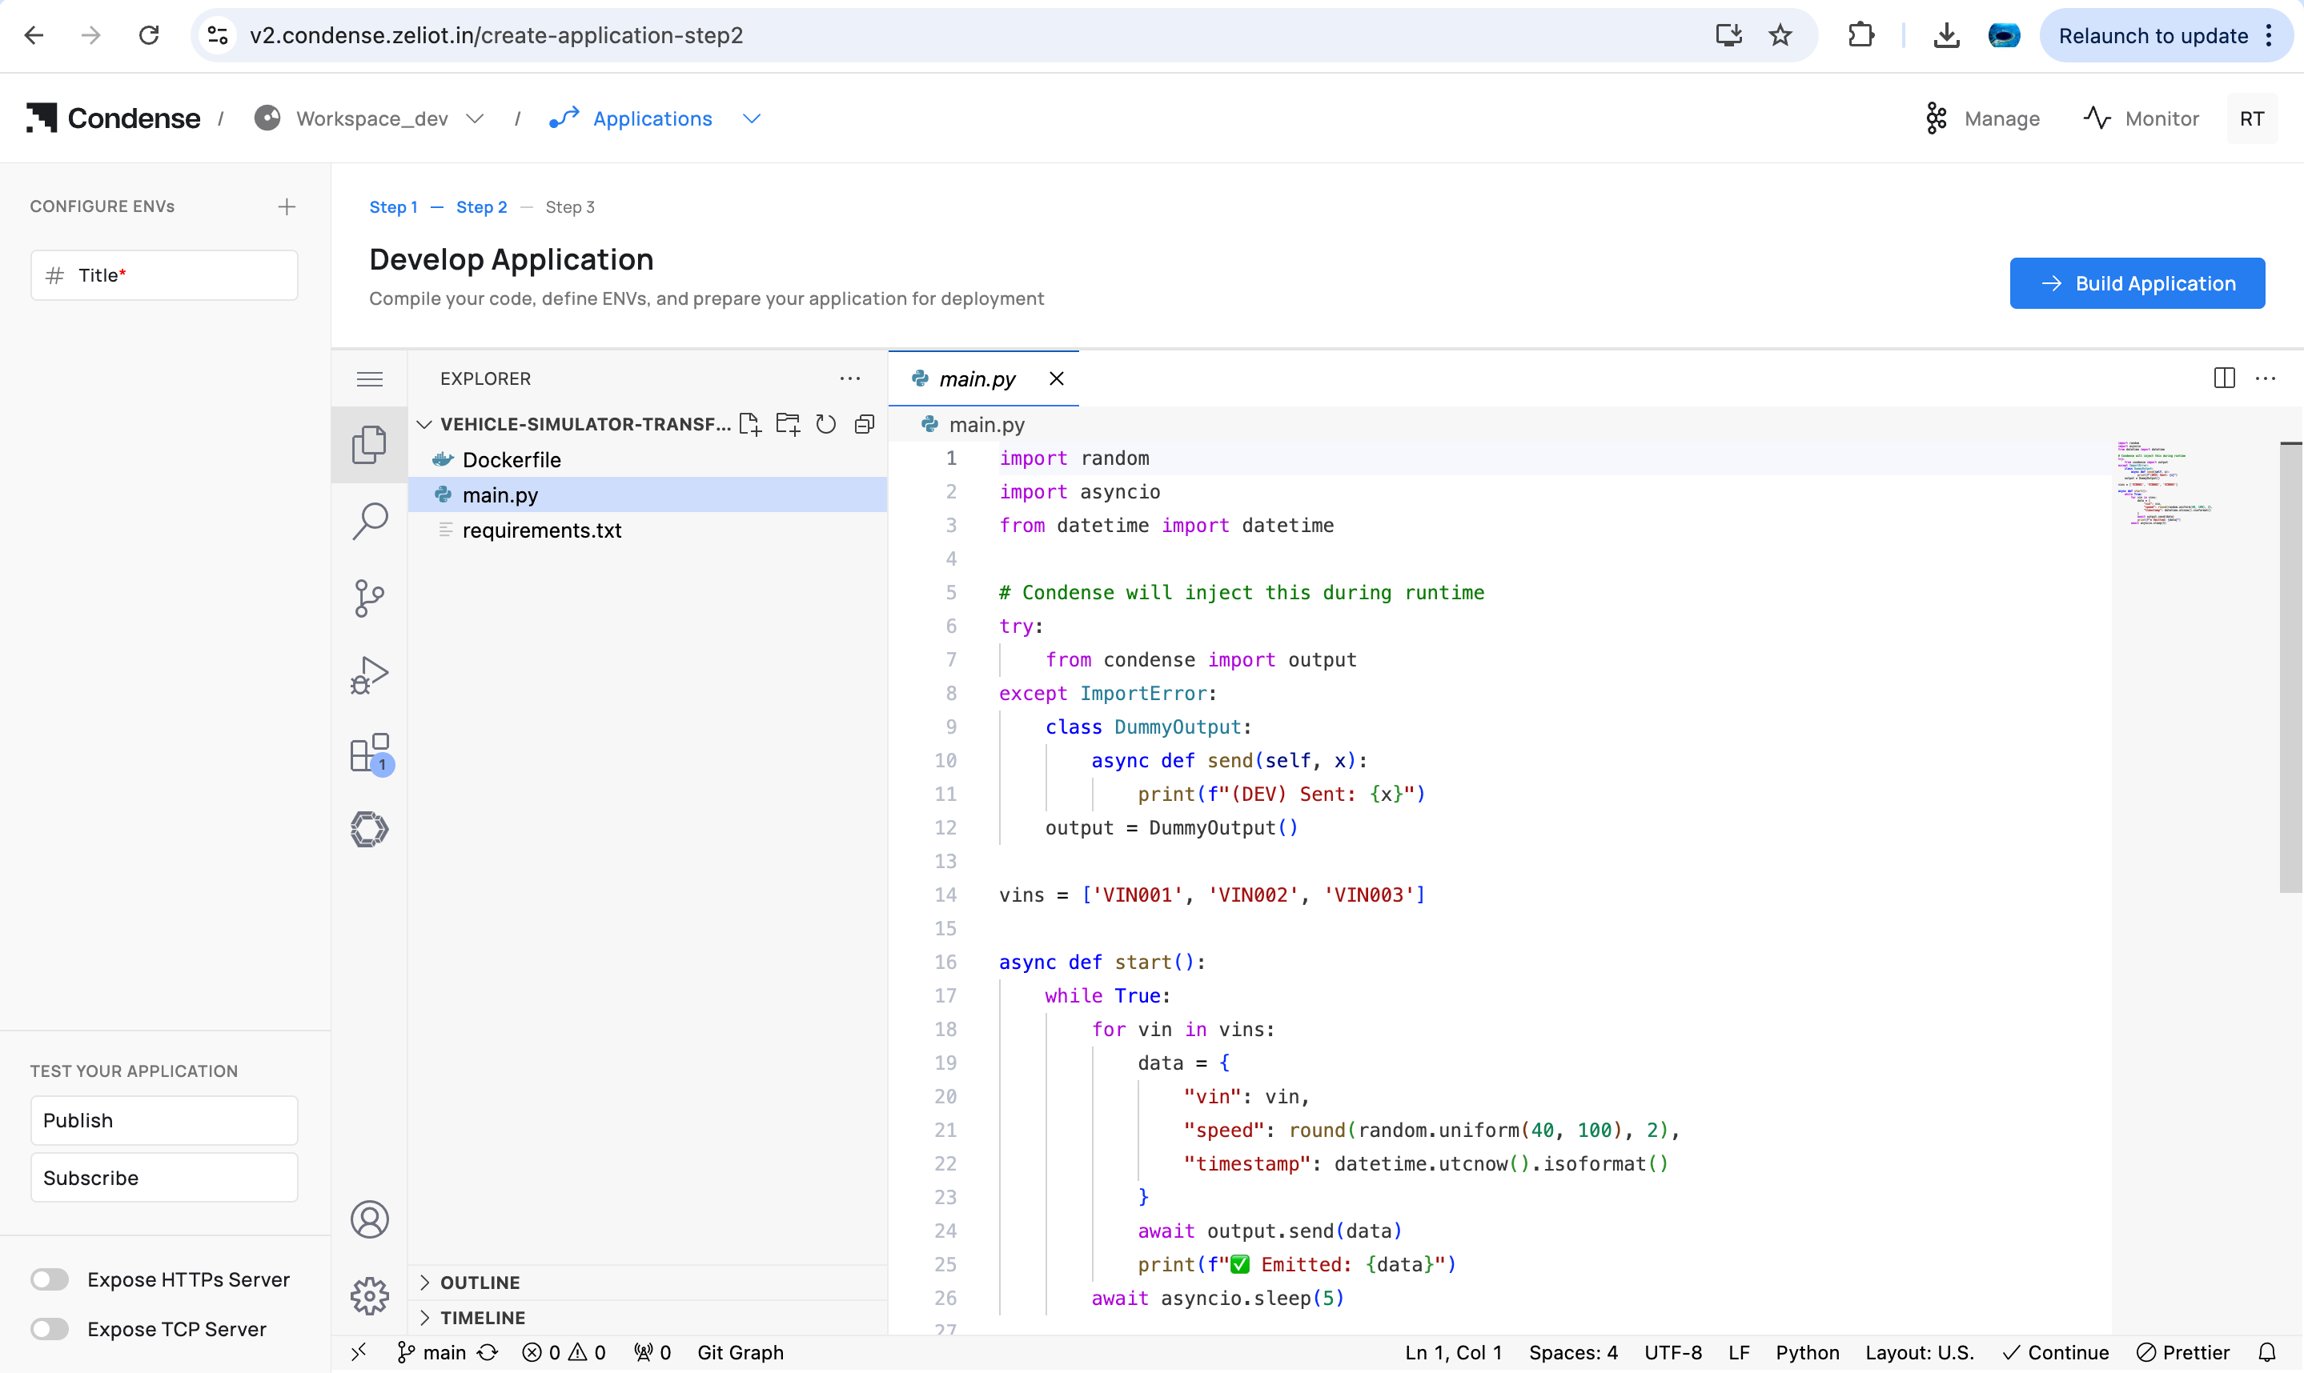
2) Develop in the IDE
Who can edit (drafts): Admins, Maintainers, Developers
- Navigate/edit code via File Explorer and Code Editor.
- Configure ENVs (build/runtime).
- (Optional) Enable Expose HTTP(s) Server / Expose TCP Server for local testing.
- Validate topic flow with Publish and Subscribe testers.
- Commit and push to the connected repository.
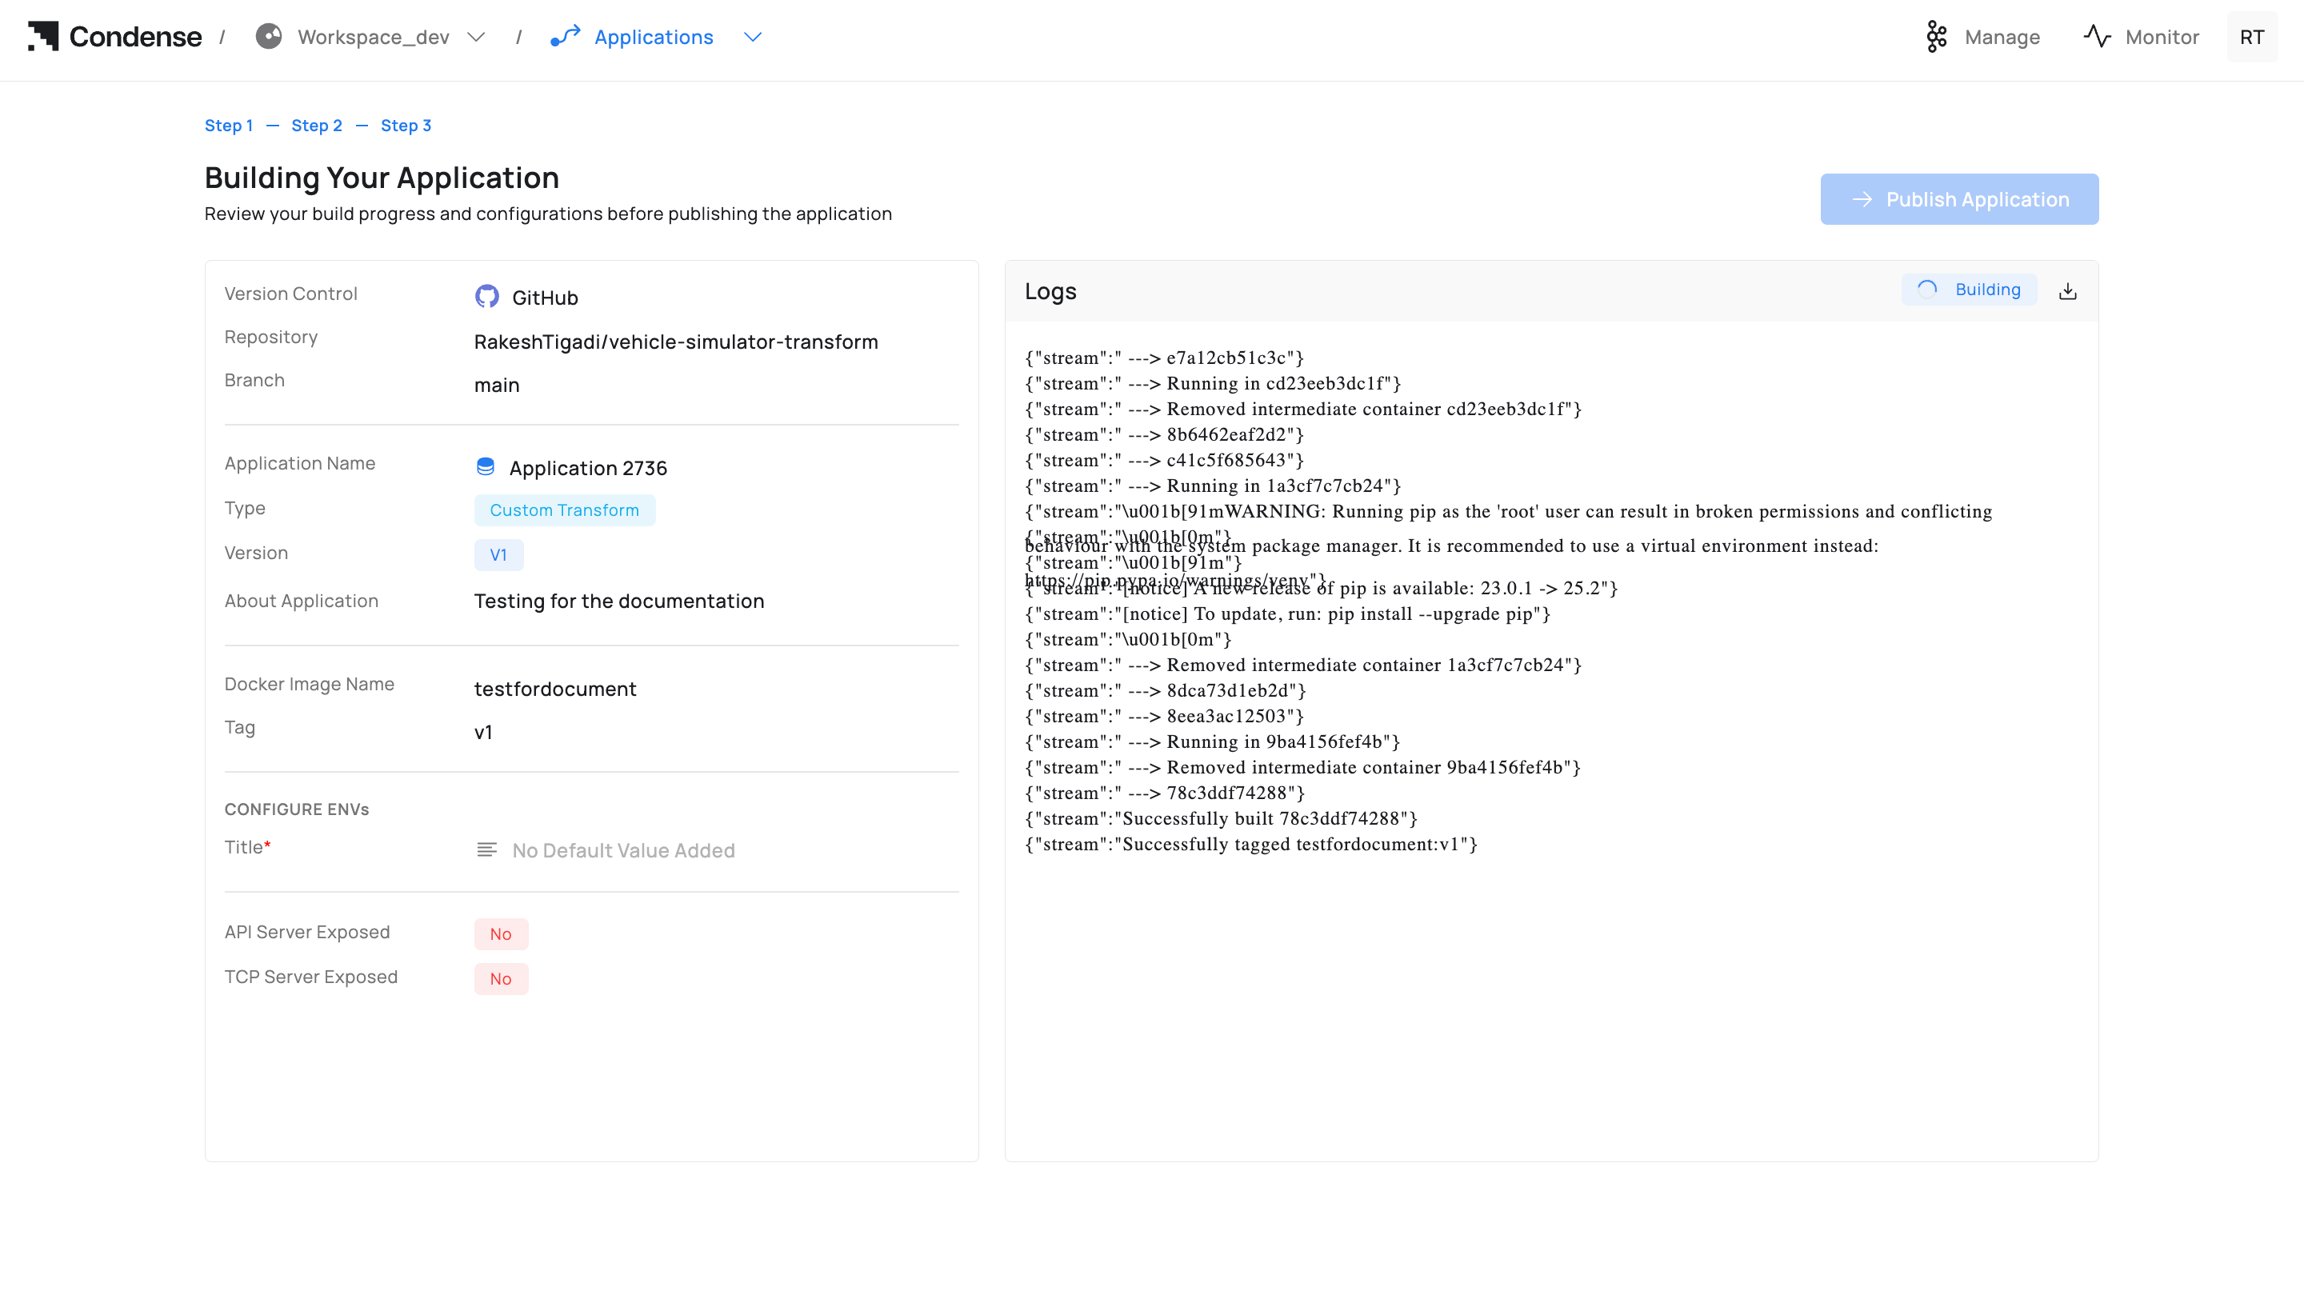
3) Build the Application
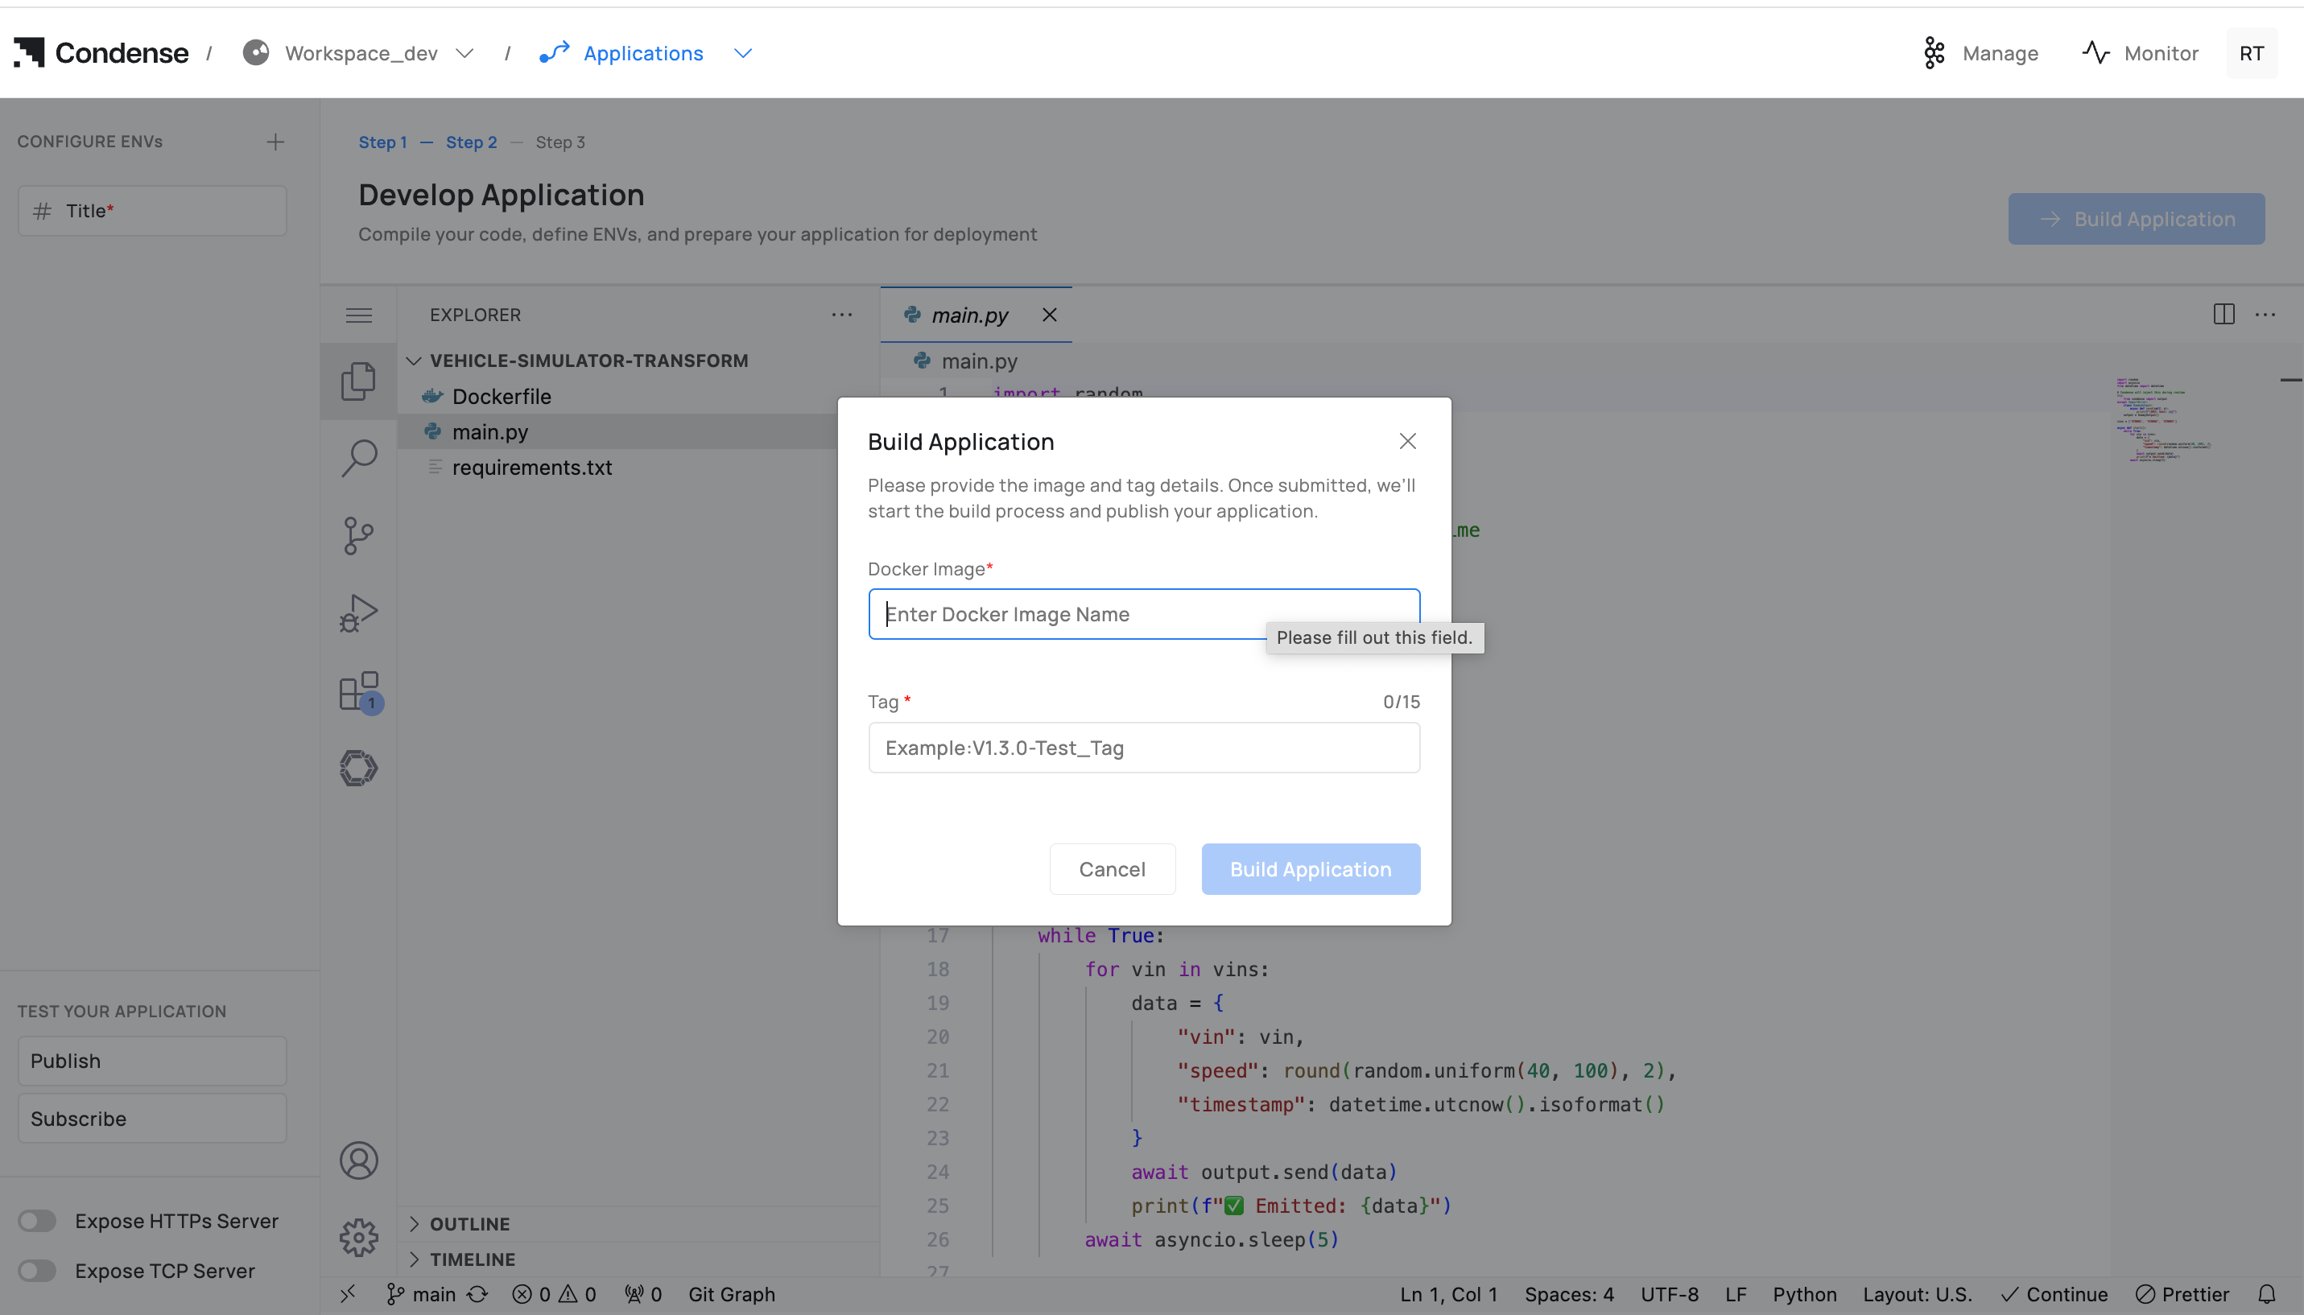
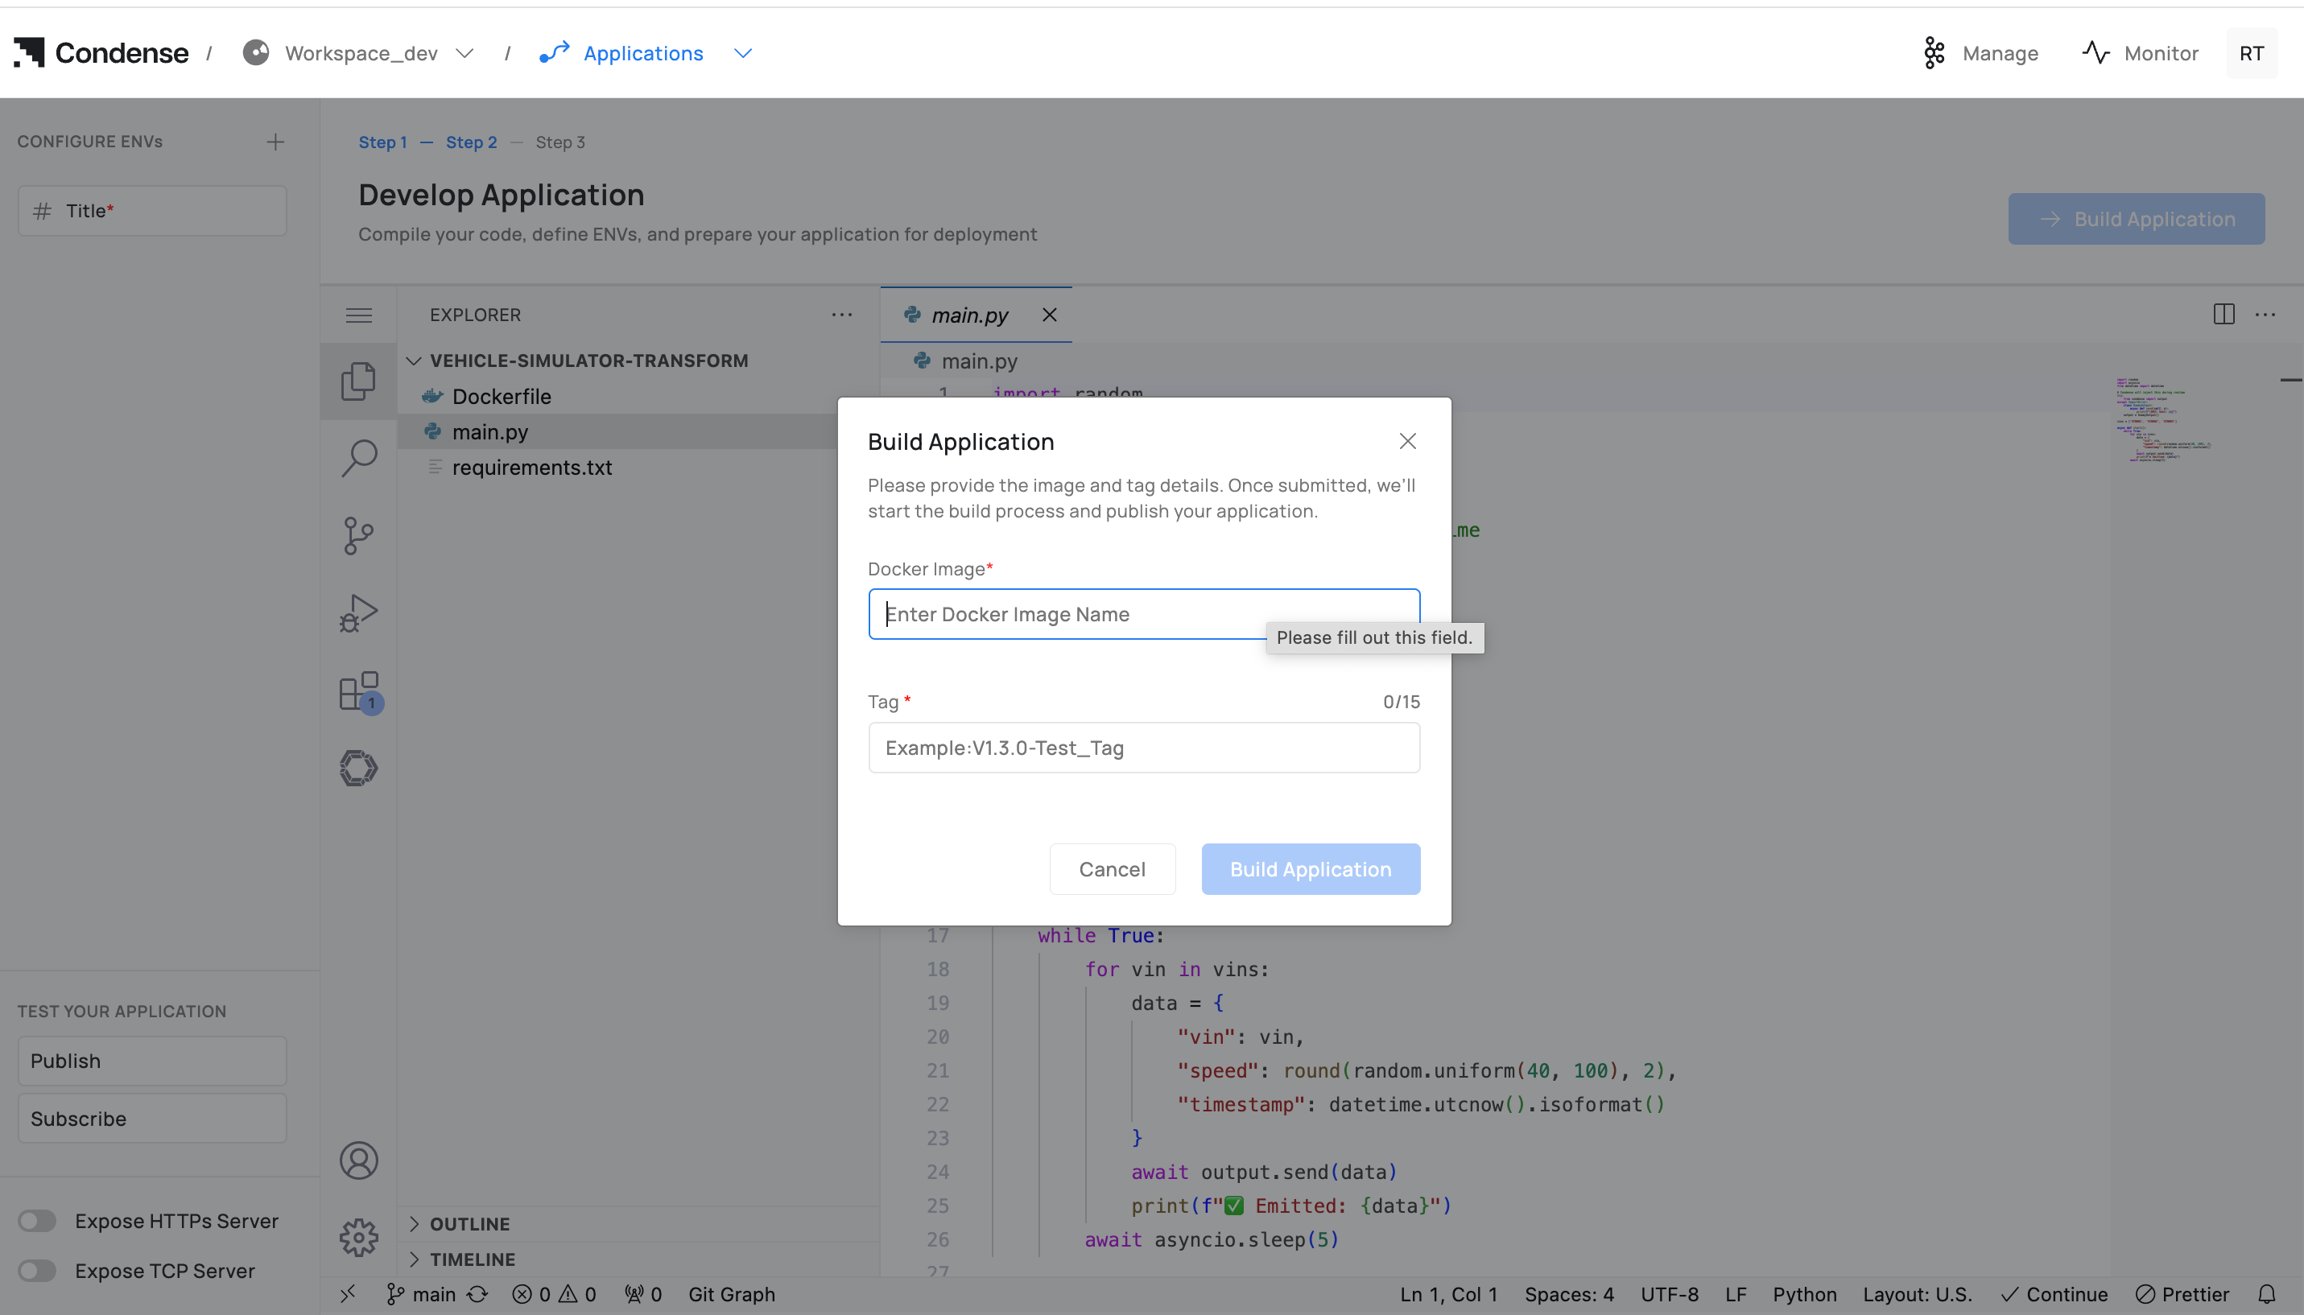
Who can build: Admins, Maintainers, Developers Steps to build an application:- Click Build Application.
- Enter Docker Image Name (registry path) and Tag.
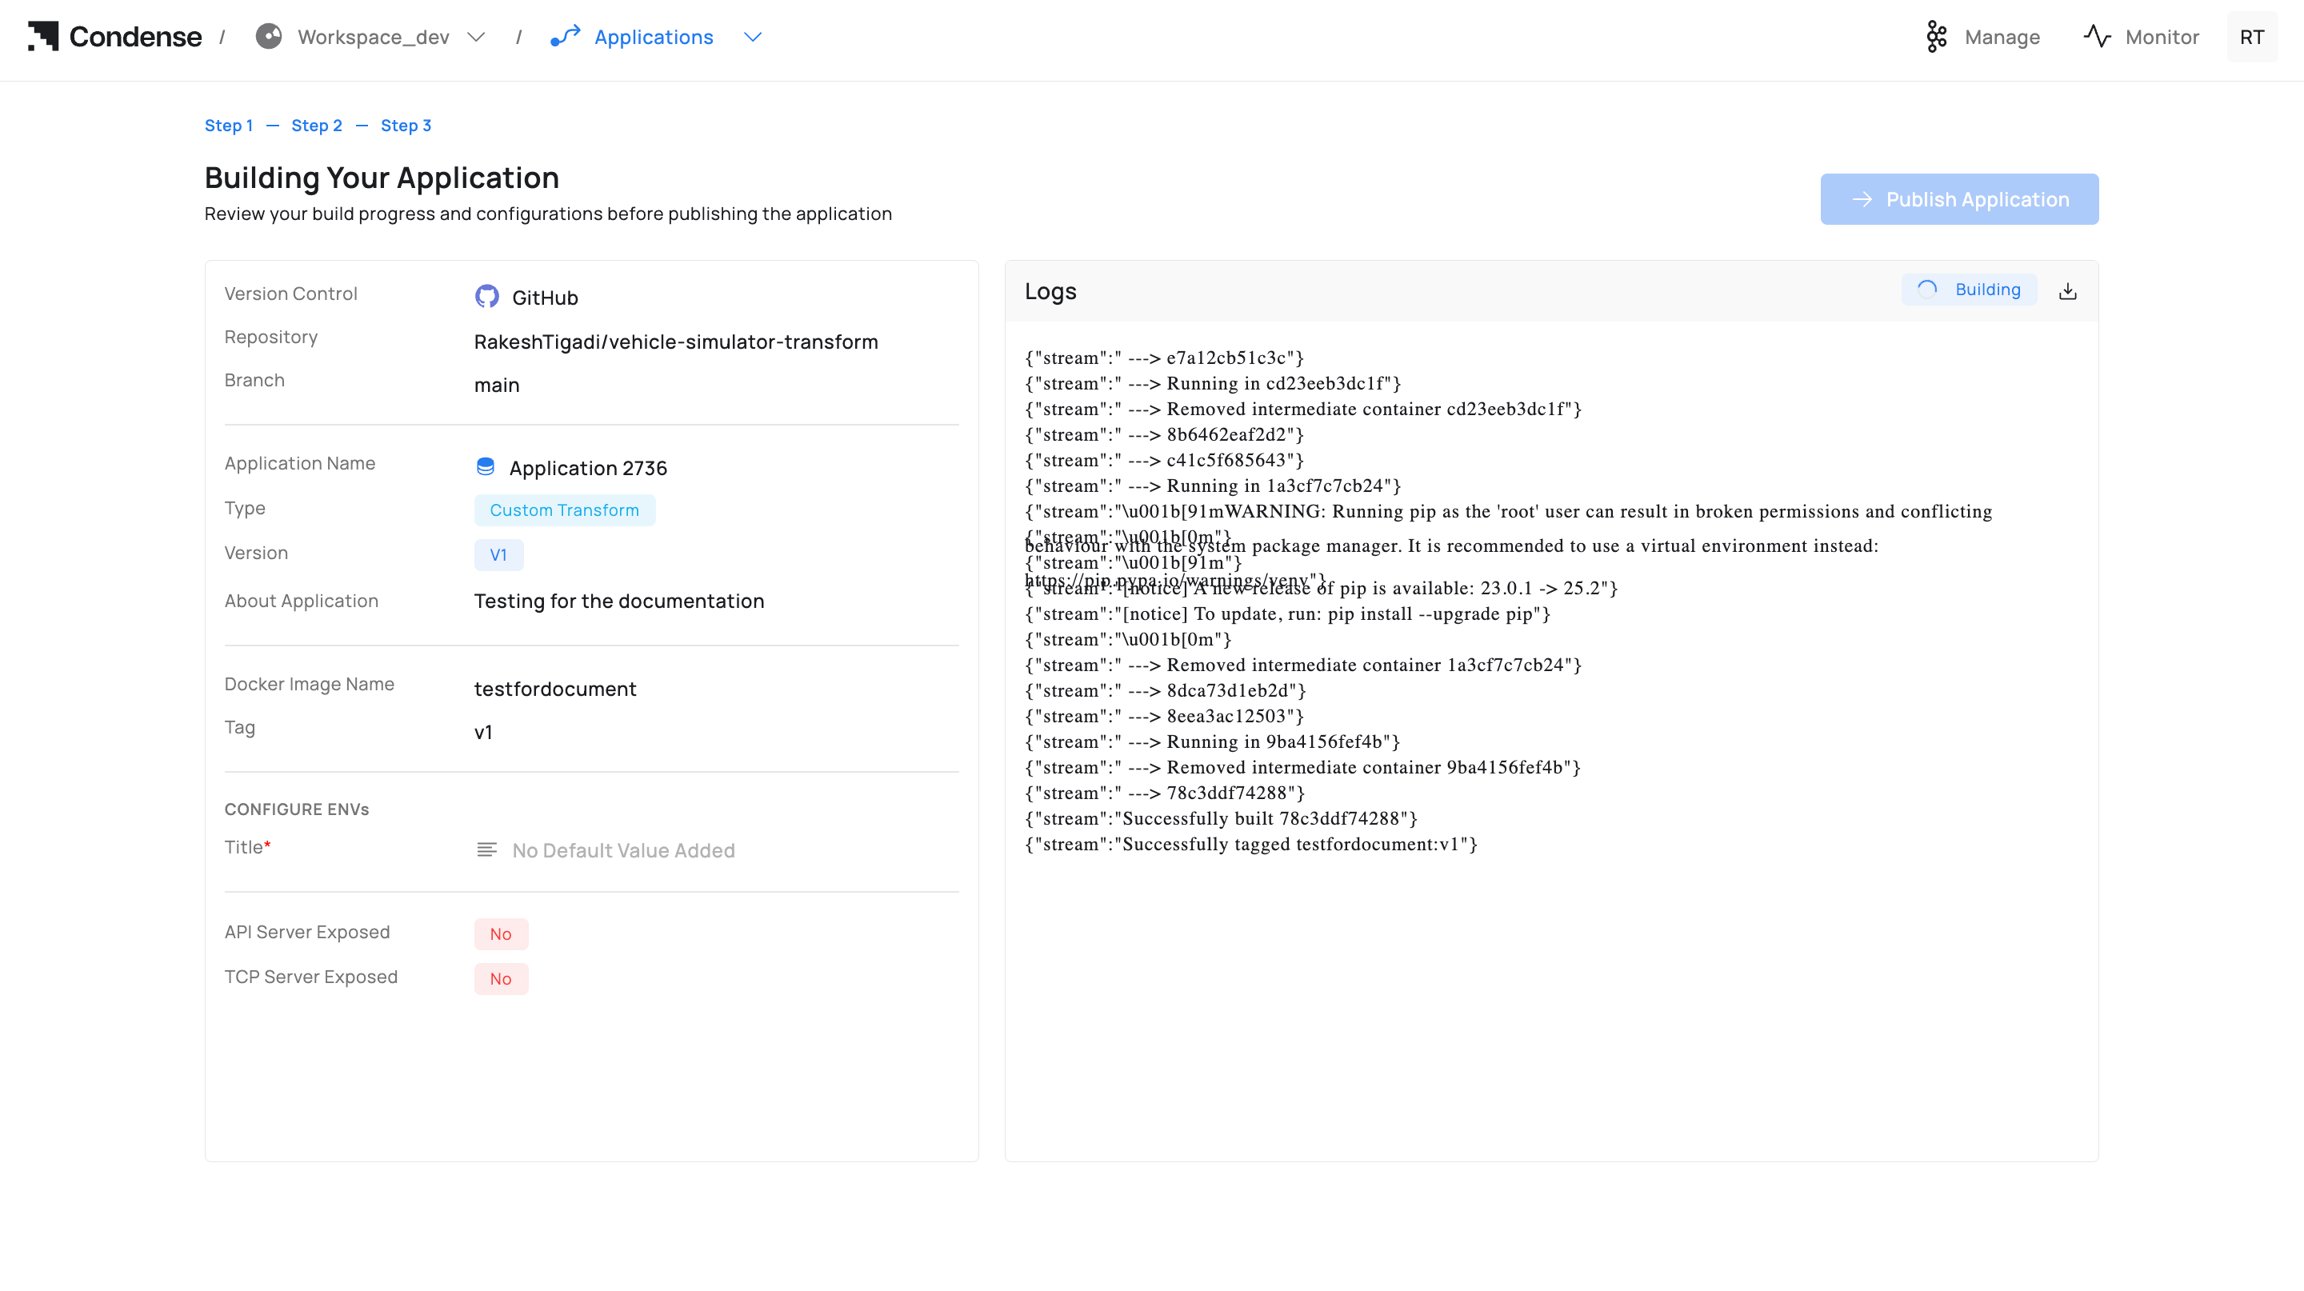
- Start building and monitor Build Logs; fix errors and rebuild if needed.
4) Publish the Application
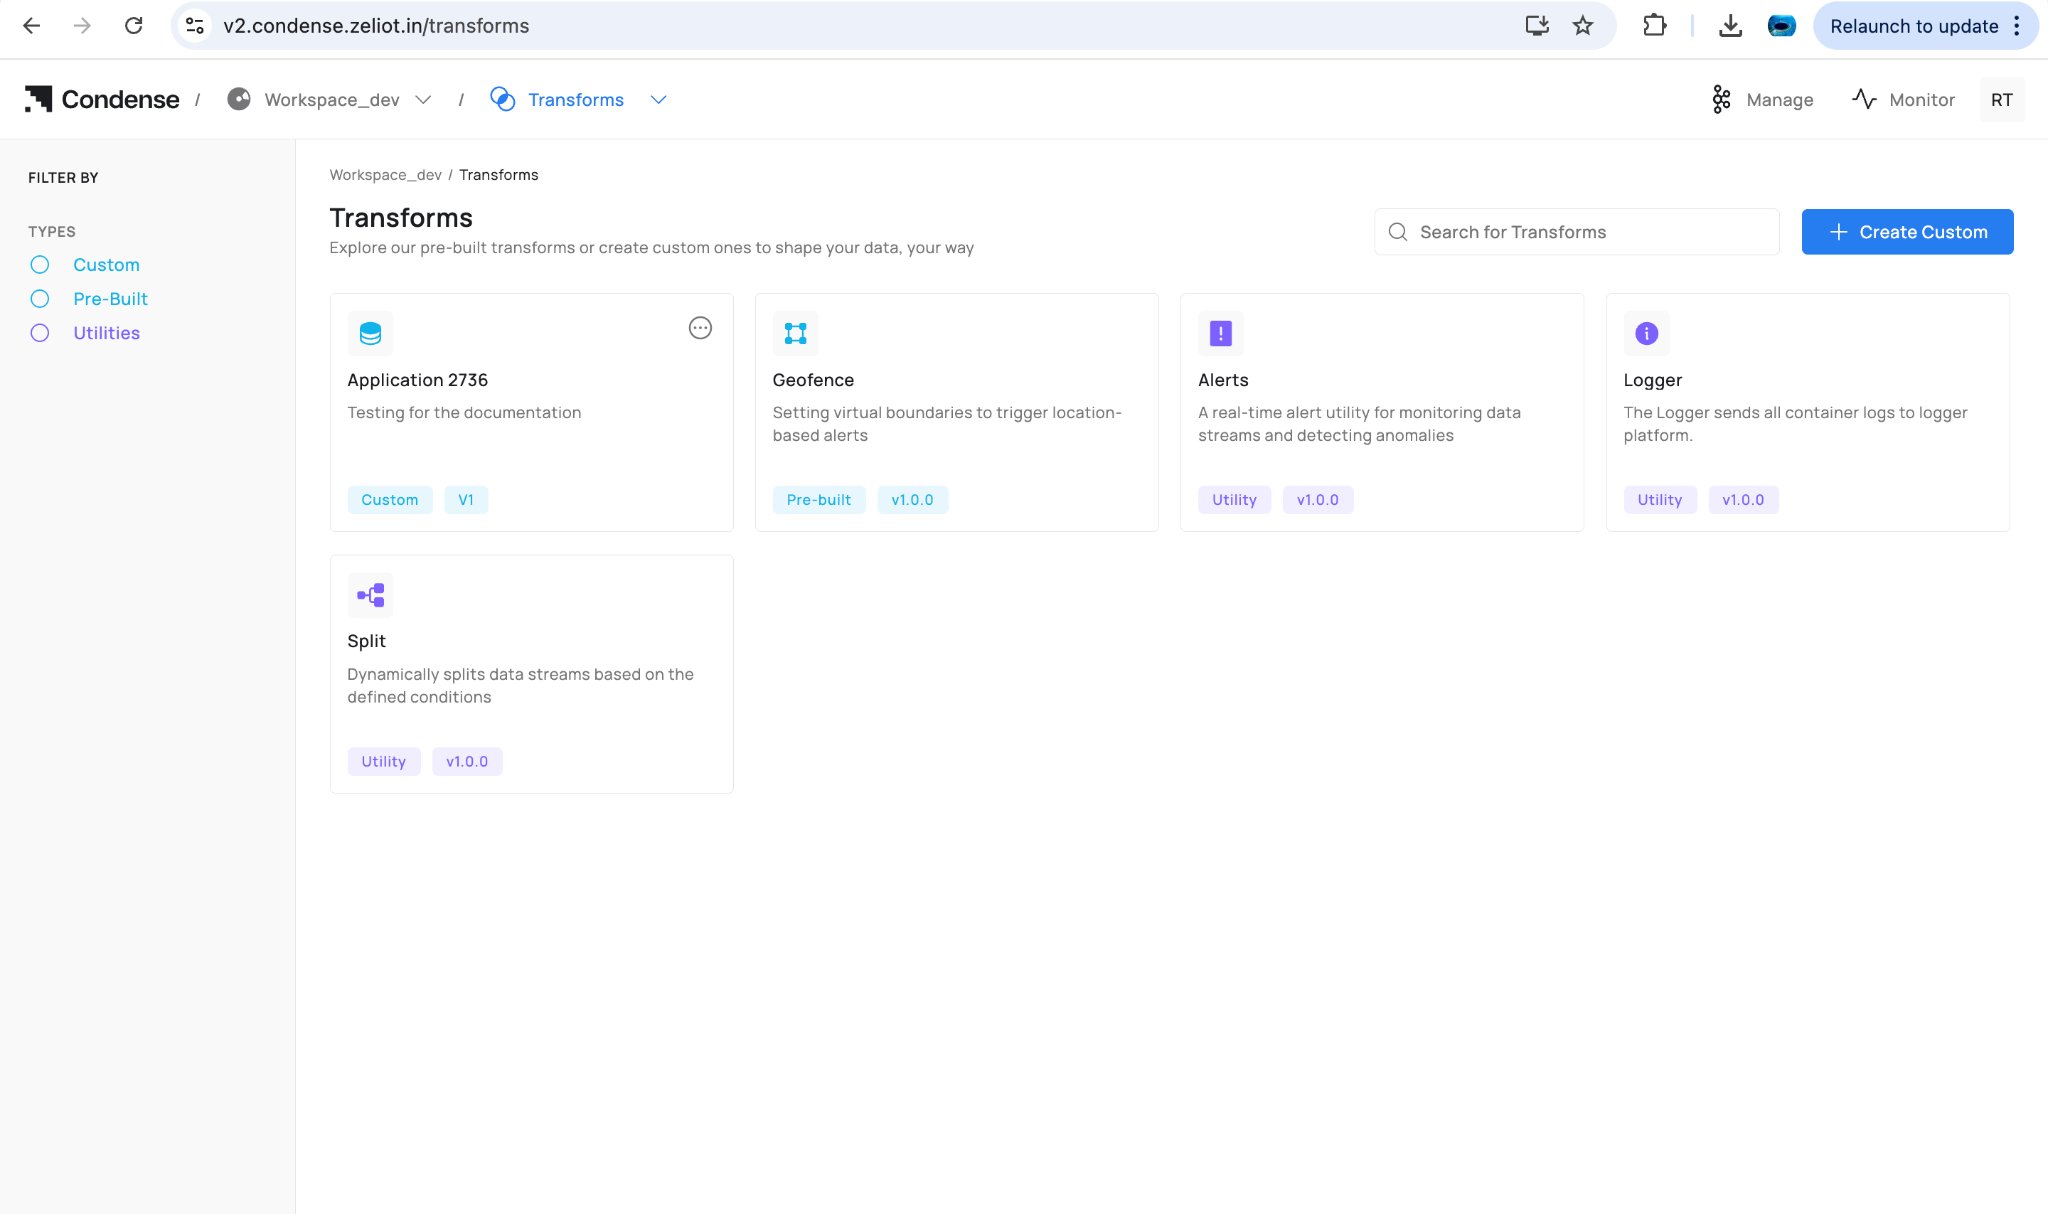
Who can publish: Admins, Maintainers Publish targets:- Custom Transform → appears in Transforms → Custom.
- Custom Connector (Input/Output) → appears in Connectors → Custom under the respective role.
- Click Publish Application.
- Confirm Publish as a custom type (Transform / Input Connector / Output Connector).
- Confirm Version and optional release notes.
- Click Publish.
5) Deploy the Published Artefact (reference)
Deployment happens outside Applications:- Transforms: pipeline editor → Add Transform → Custom → choose app/version → configure ENVs/parameters → Deploy.
- Connectors: Connectors → Custom → choose app → select role (Input/Output) → configure ENVs/parameters → Deploy.
6) Update / Roll Back a Version
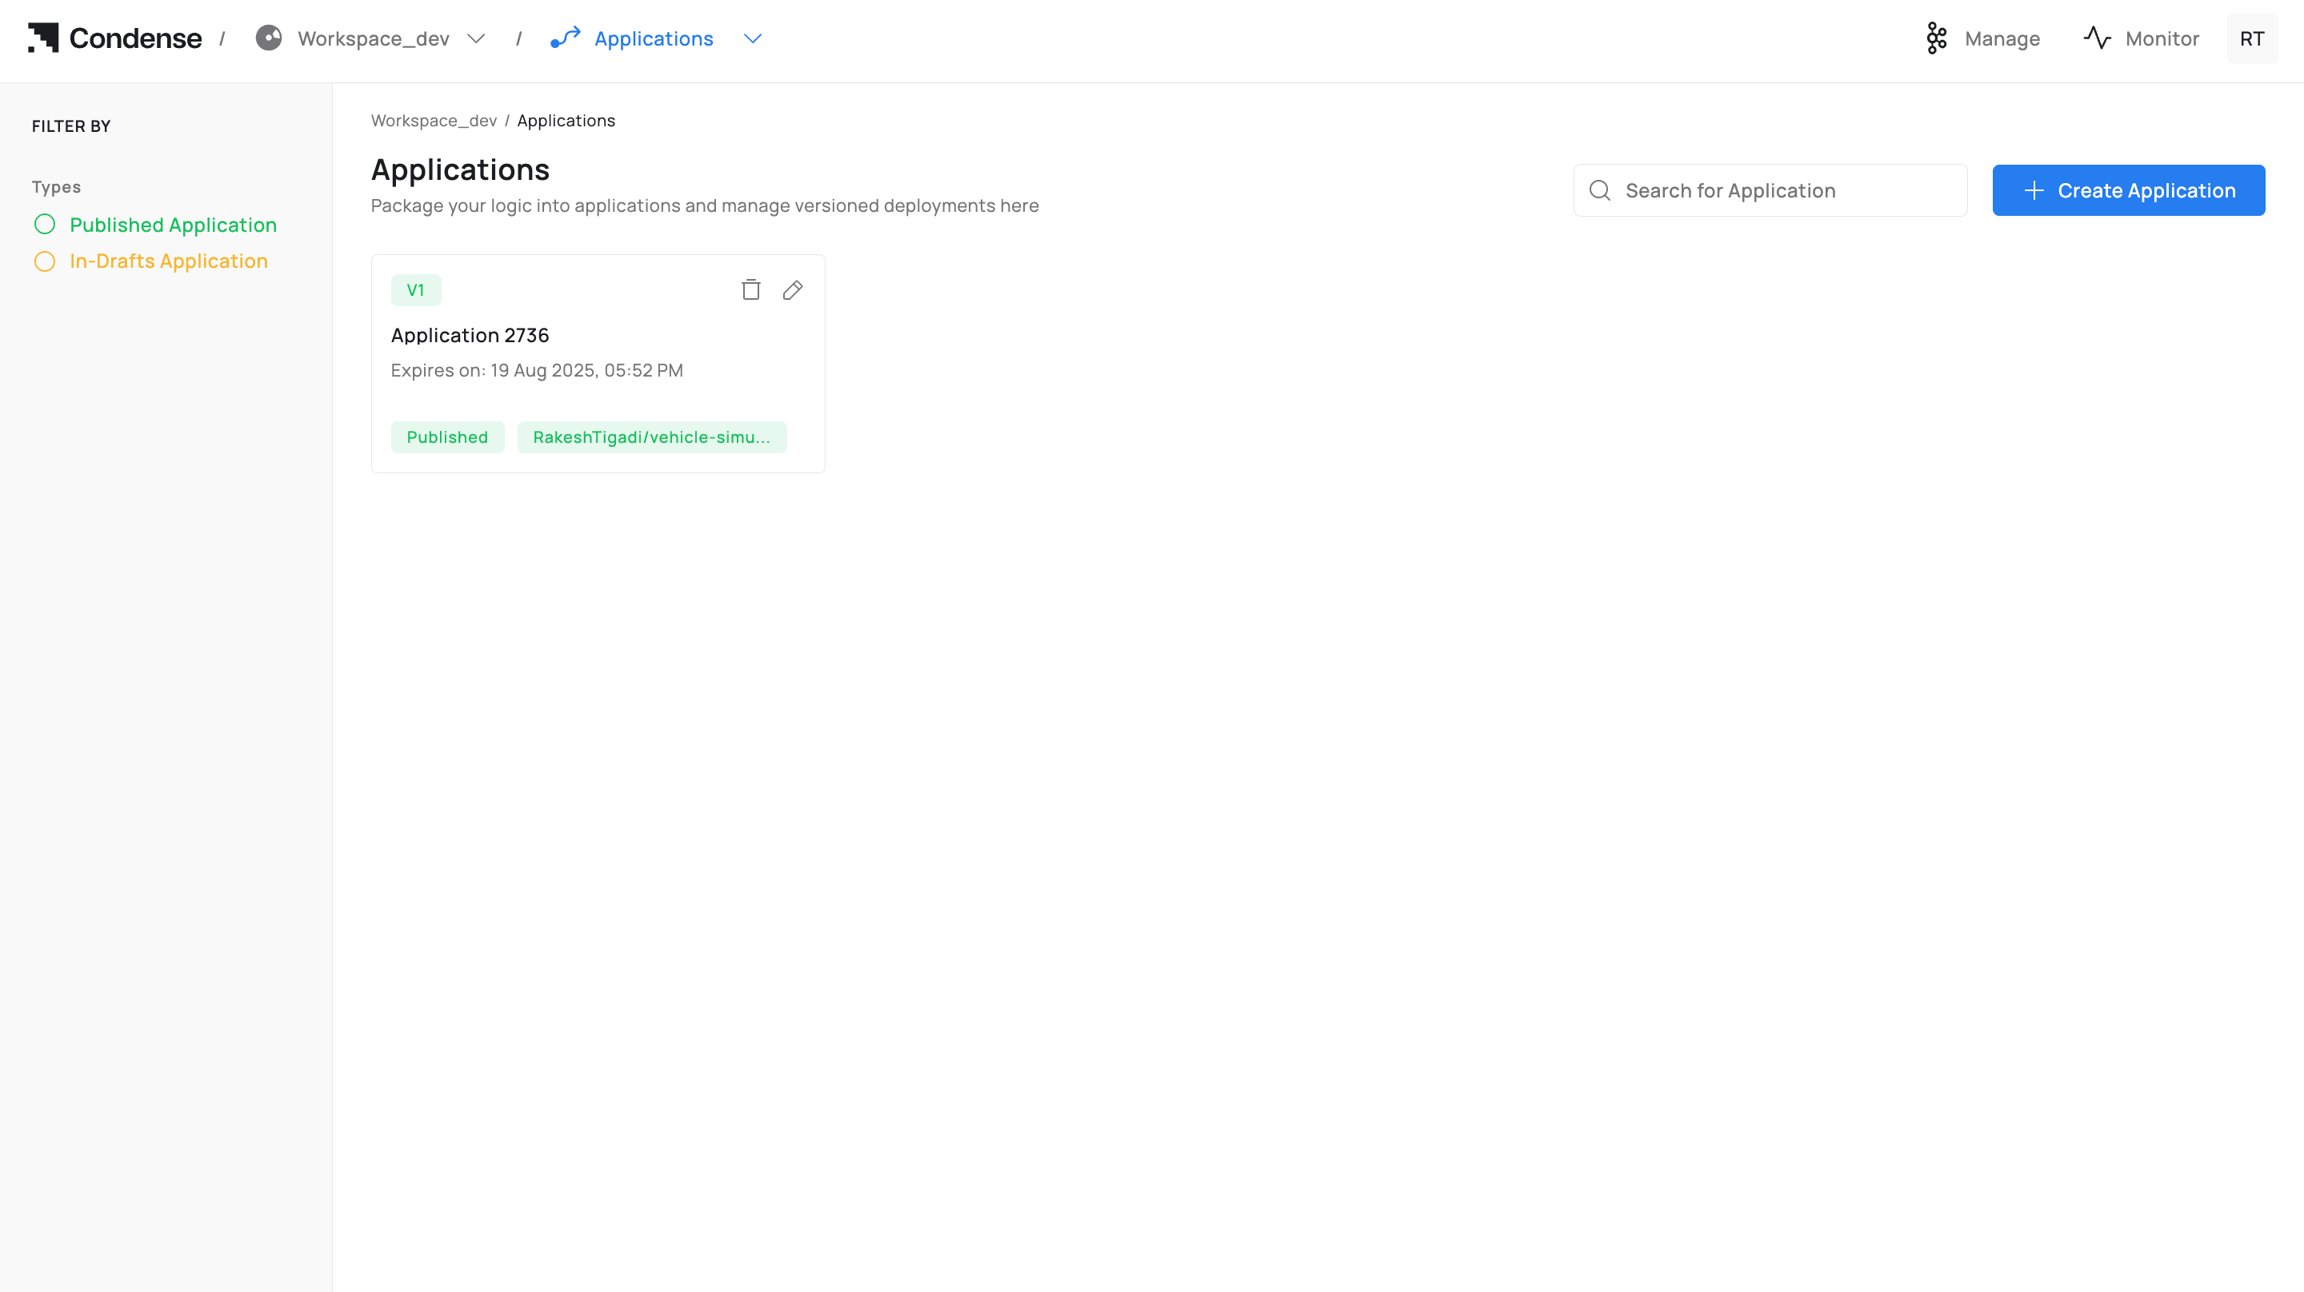
To change logic, update code in Applications, rebuild, and publish a new version. In the deployed transform/connector, switch the Version to the new release (or choose an older one to roll back). Editing deployed parameters happens in the pipeline/connector UI. Editing logic requires a new publish from Applications.Edit application
Adding the new version
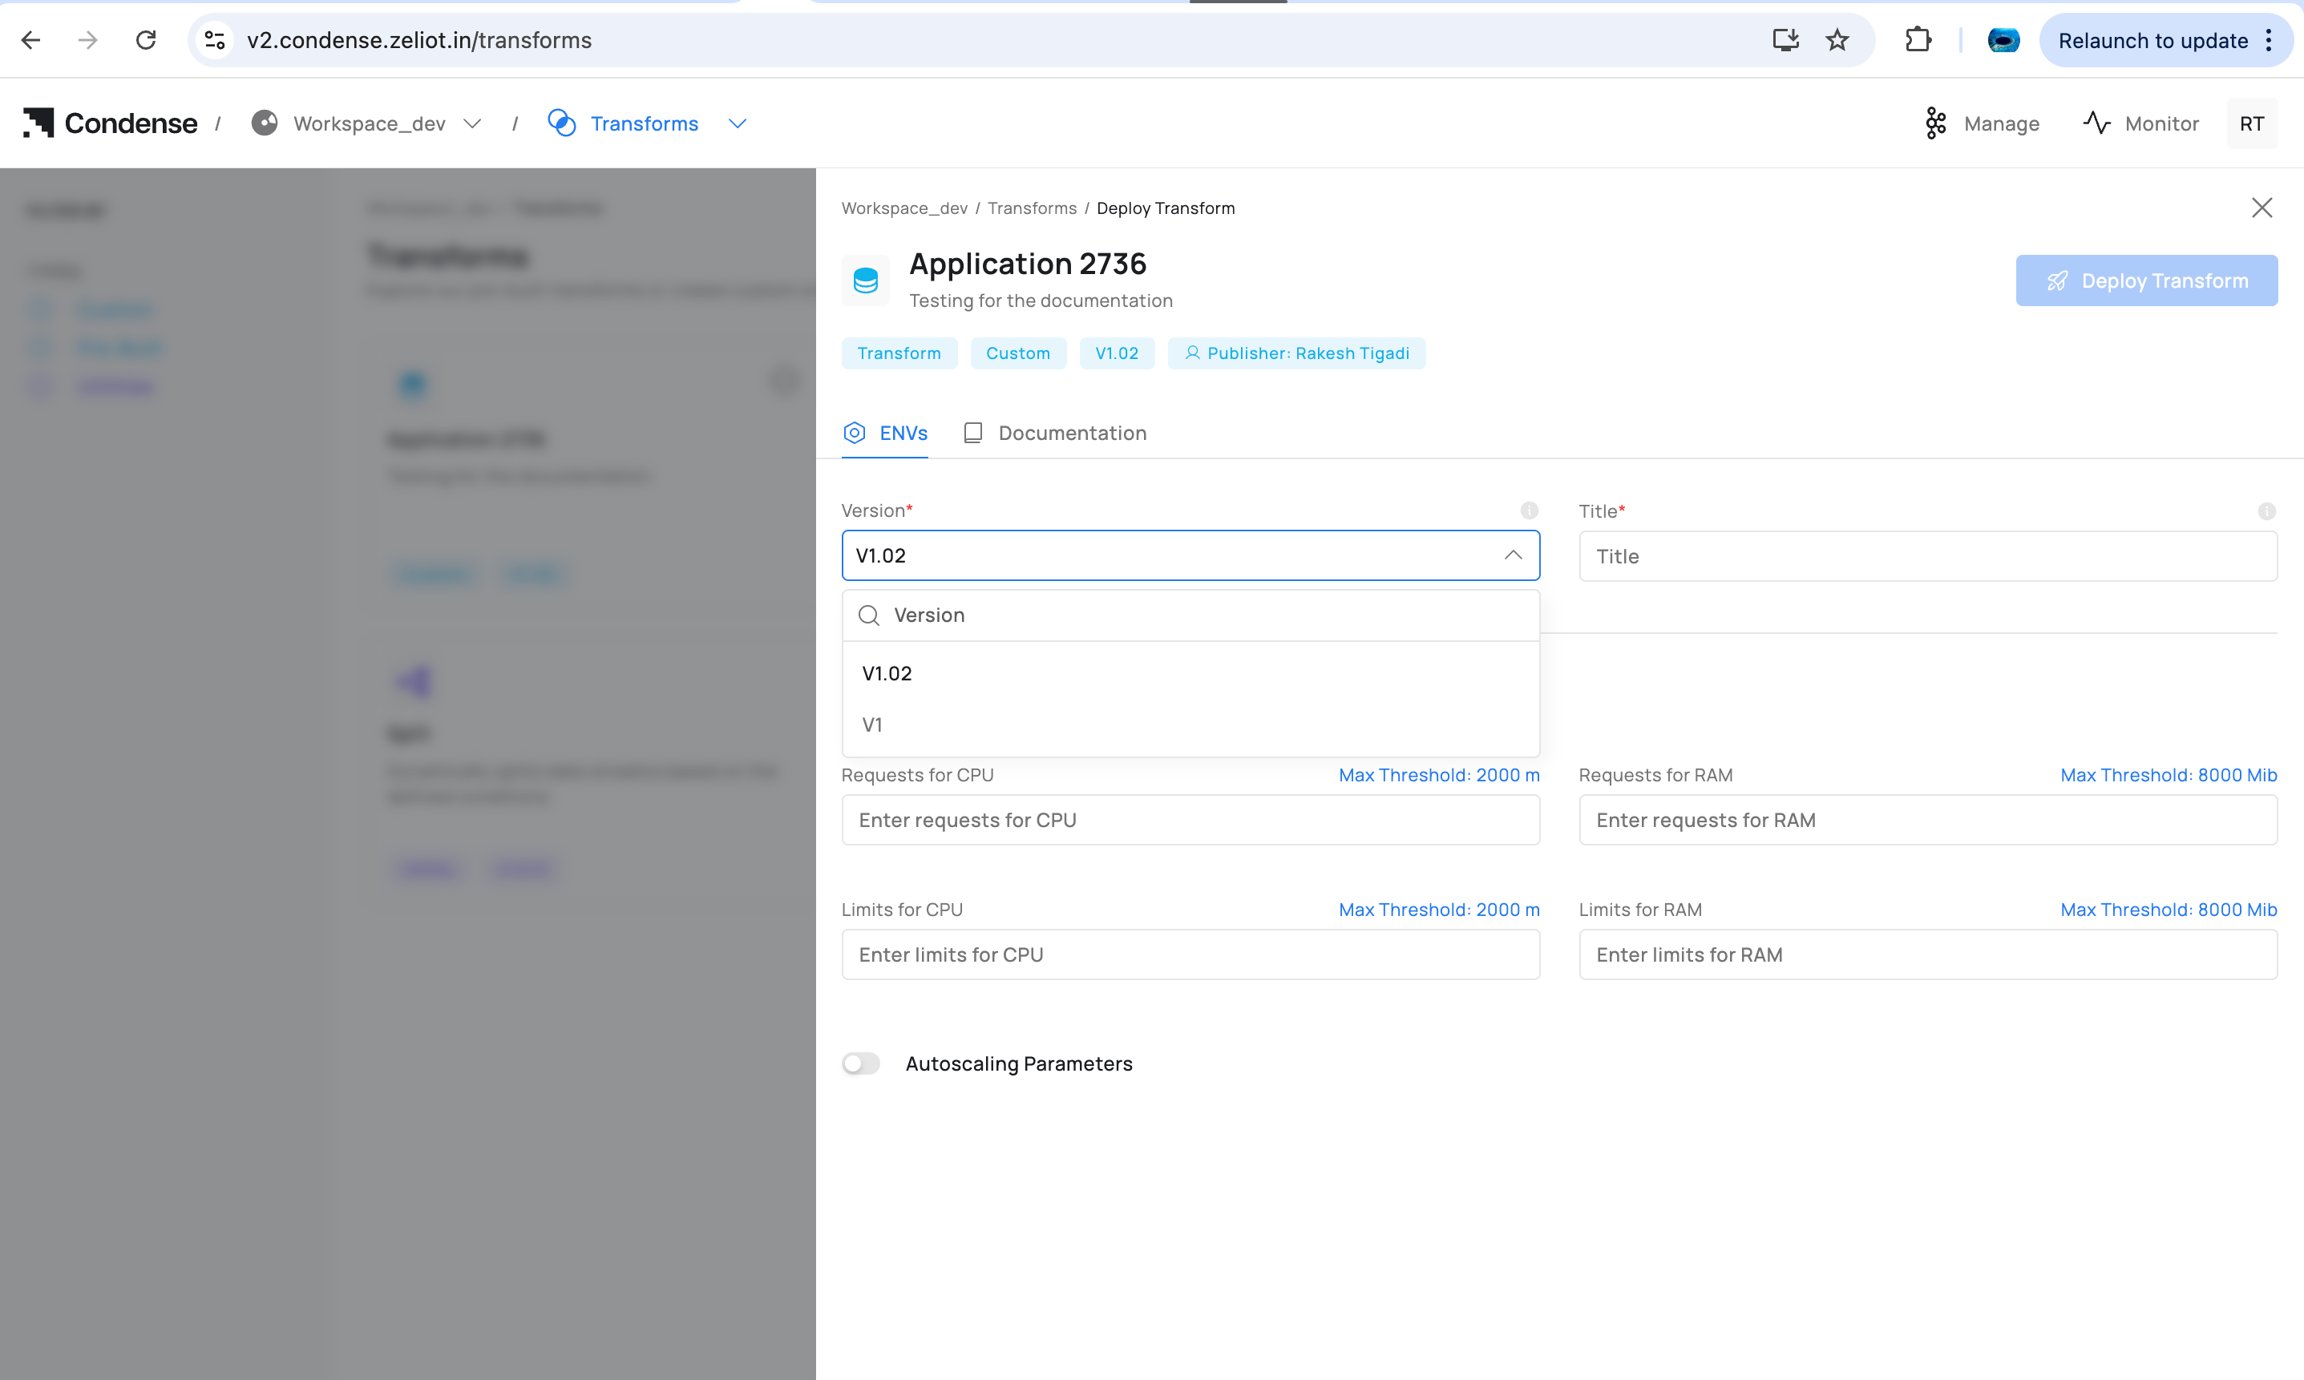
7) Deleting an Application
Who can delete: Admins (and Maintainers if policy allows)Warning: Deletion is irreversible. If a published Application is referenced by a transform/connector in a pipeline, update or remove that deployment first to avoid runtime errors.
Naming Rules
- Allowed: only letters in lowercase
- Length: 3–63 characters.
- Must be unique within the workspace.
Editing an Application
Who can edit: Admins, Maintainers, Developers Editable (drafts):- Source code in the IDE
- ENVs (environment variables)
- Expose HTTP(s)/TCP server toggles
- Description, icon, and version (for drafts)
- Repository/branch (until the first build against a commit)
- Application ID
- Creation timestamp
IDE Structure
- File Explorer (left): navigate and manage files
- Code Editor (center): code, linting, errors
- ENVs panel (side): runtime configuration, secrets masked
- Test Your Application: Publish and Subscribe testers
- Build Application: opens image name/tag dialogue
Building an Application
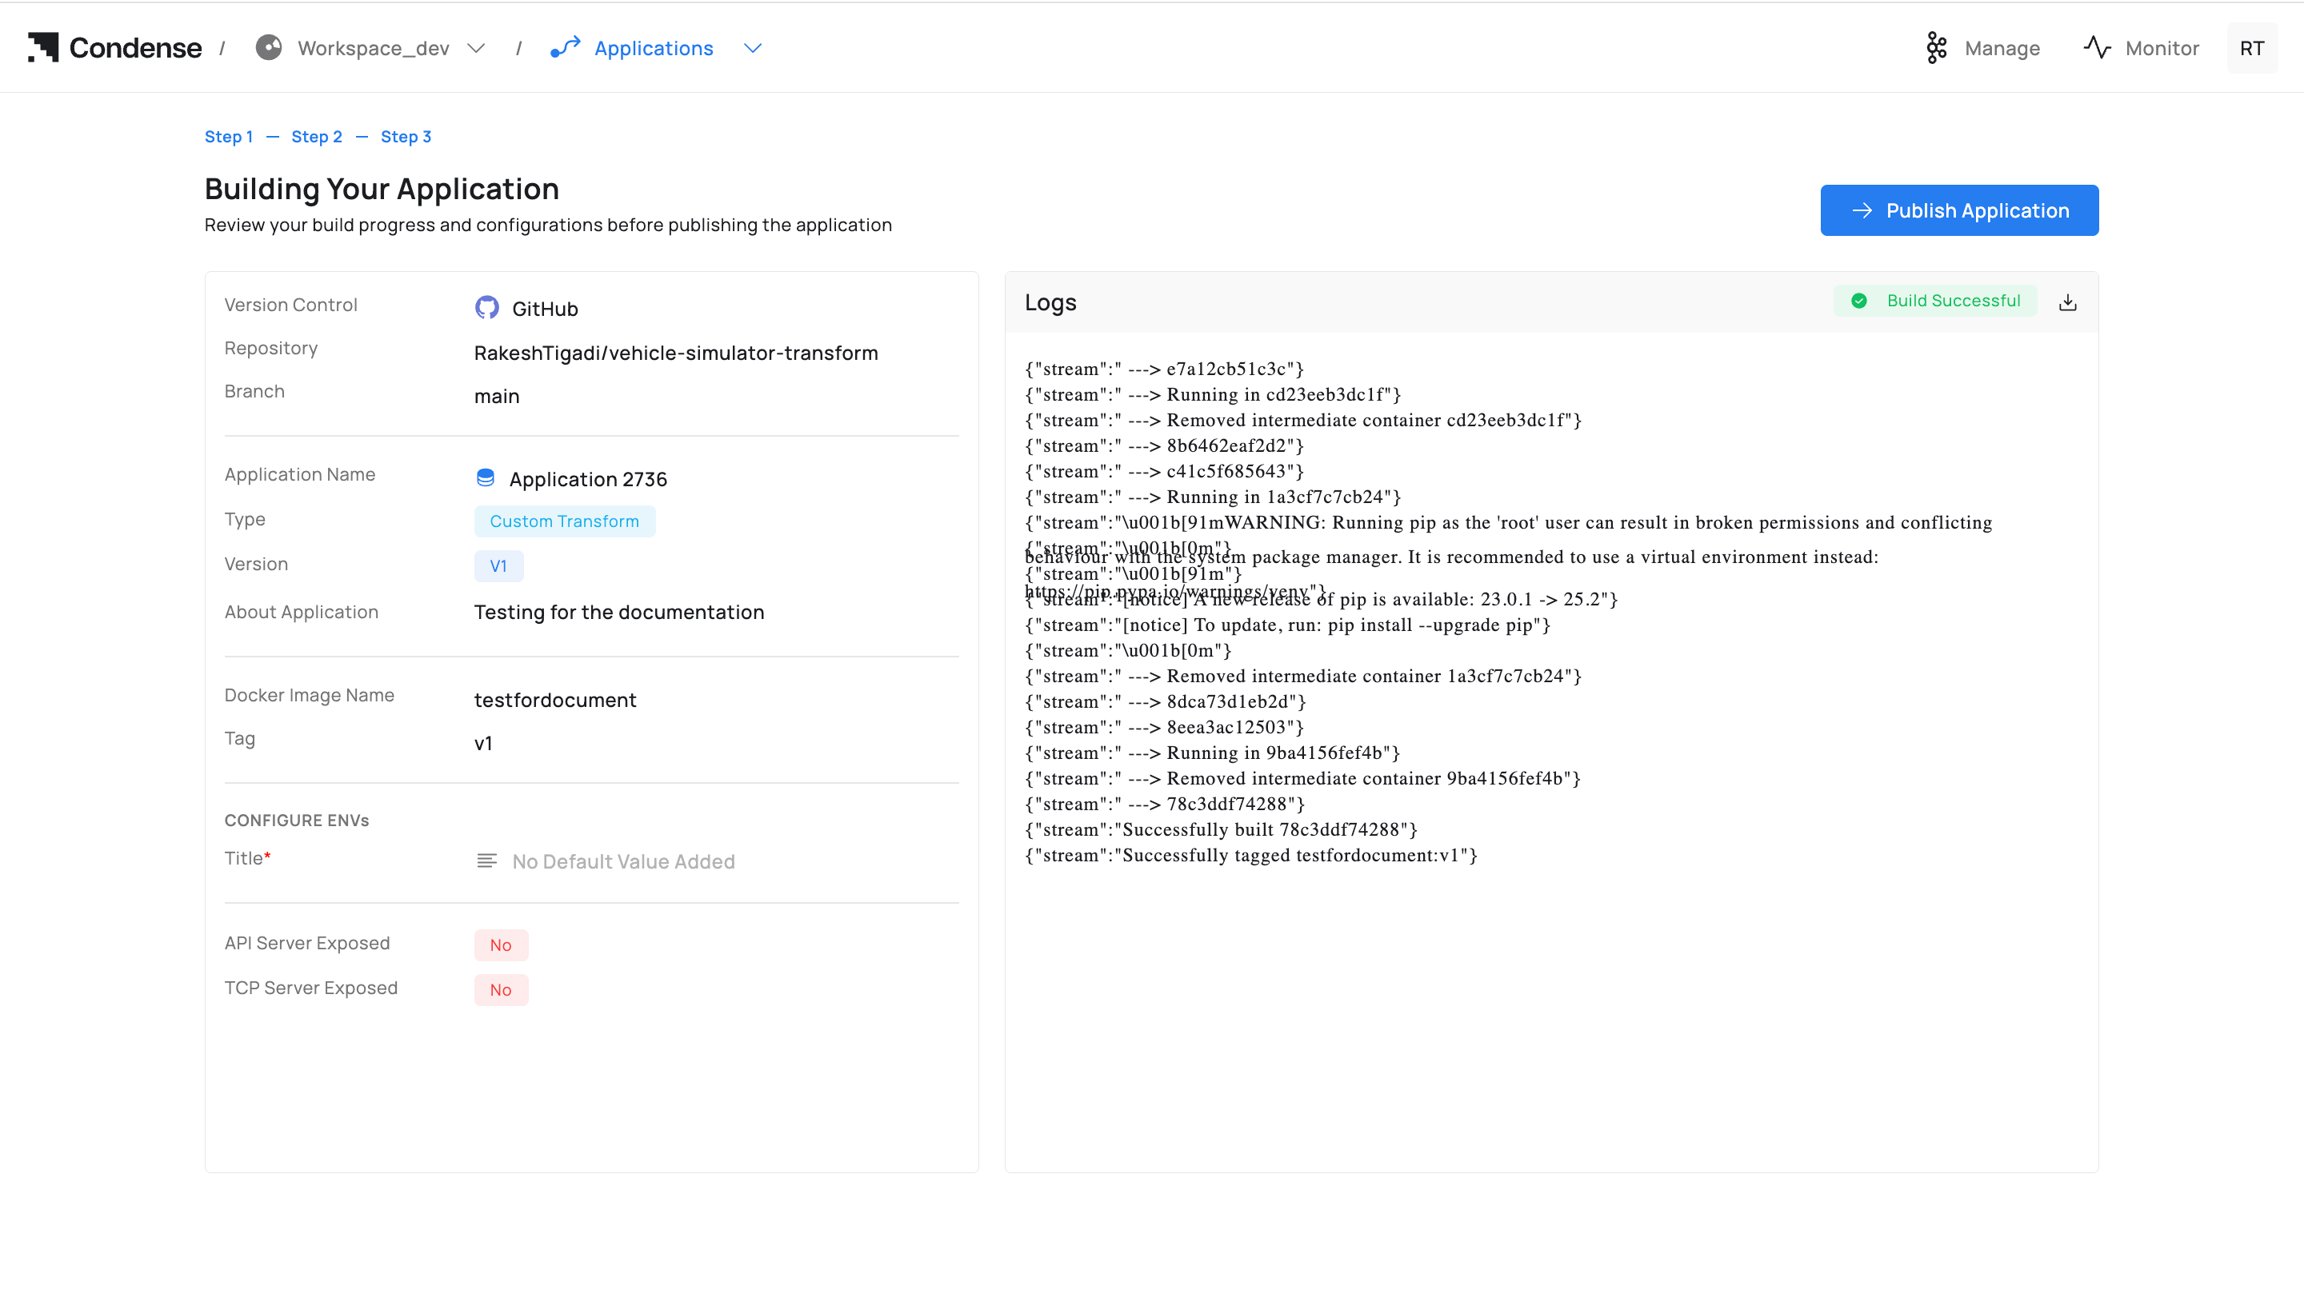
Who can build: Admins, Maintainers, Developers Steps to build an application:- Build Application → enter Docker Image Name and Tag.
- Monitor Build Logs; on failure, review errors, fix code/ENVs/Dockerfile, and rebuild.
Notes
- Use a fully qualified image name for external registries.
- Some registries enforce lowercase tags; prefer lowercase alphanumerics, dots, and dashes.
- Pass secrets via ENVs; do not bake them into the image.
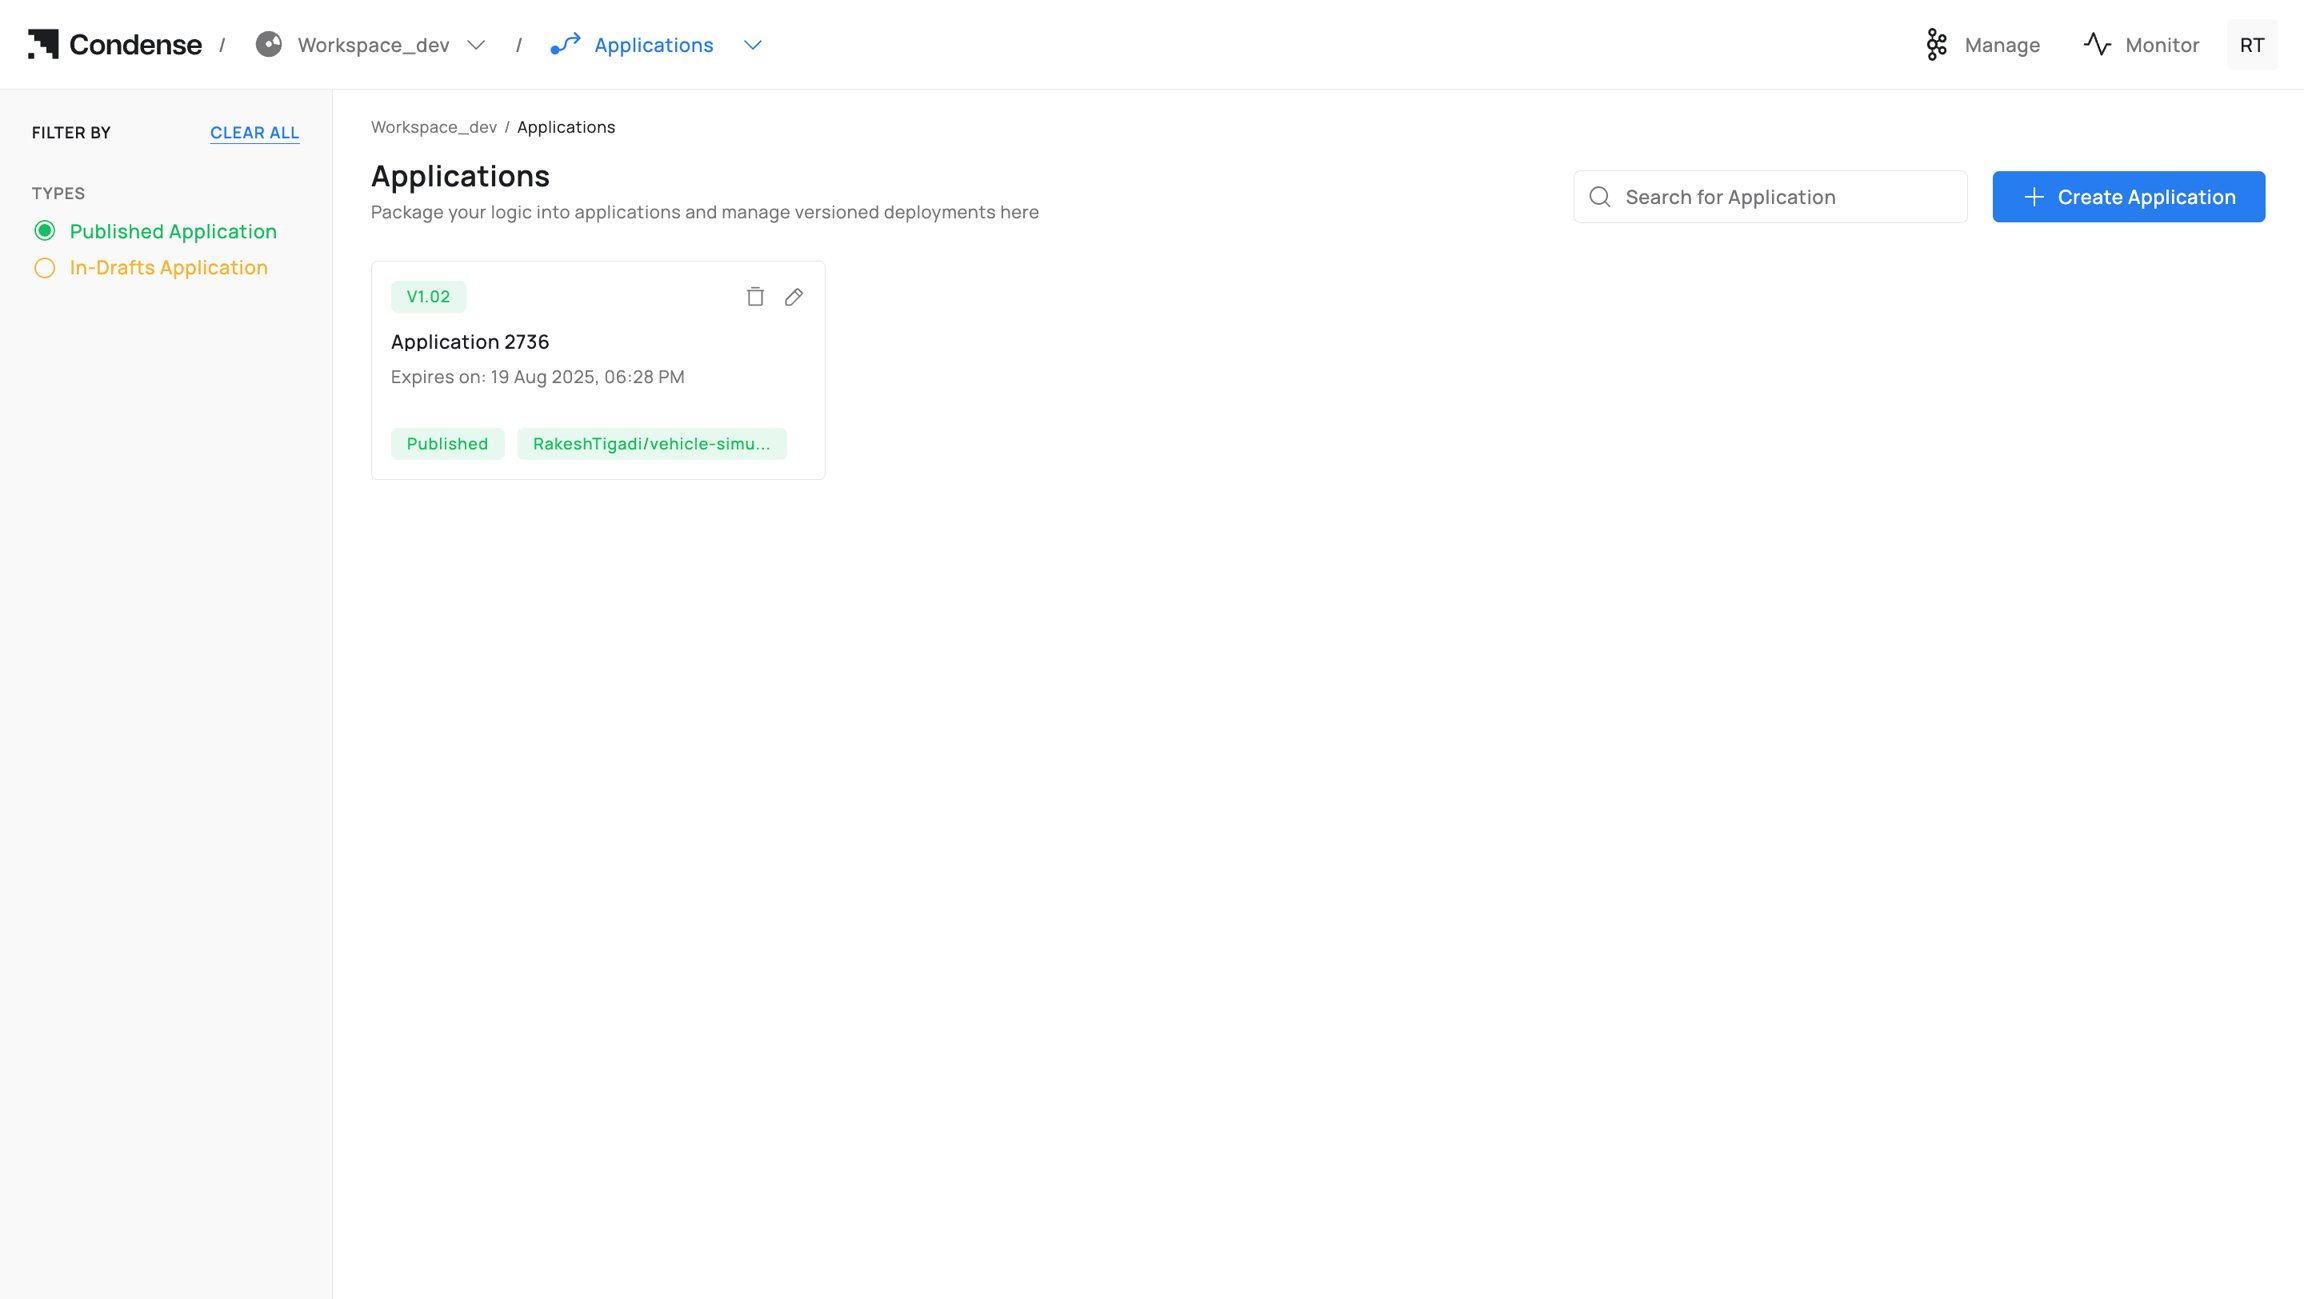
Publishing an Application
Who can publish: Admins, Maintainers Publish Targets- Custom Transform: listed under Transforms → Custom for pipeline use.
- Custom Connector (Input/Output): listed under Connectors → Custom according to your implementation.
- Published versions are immutable.
- To change logic, edit → build → publish a new version.
- Deployed components can be switched to a new version from their configuration.
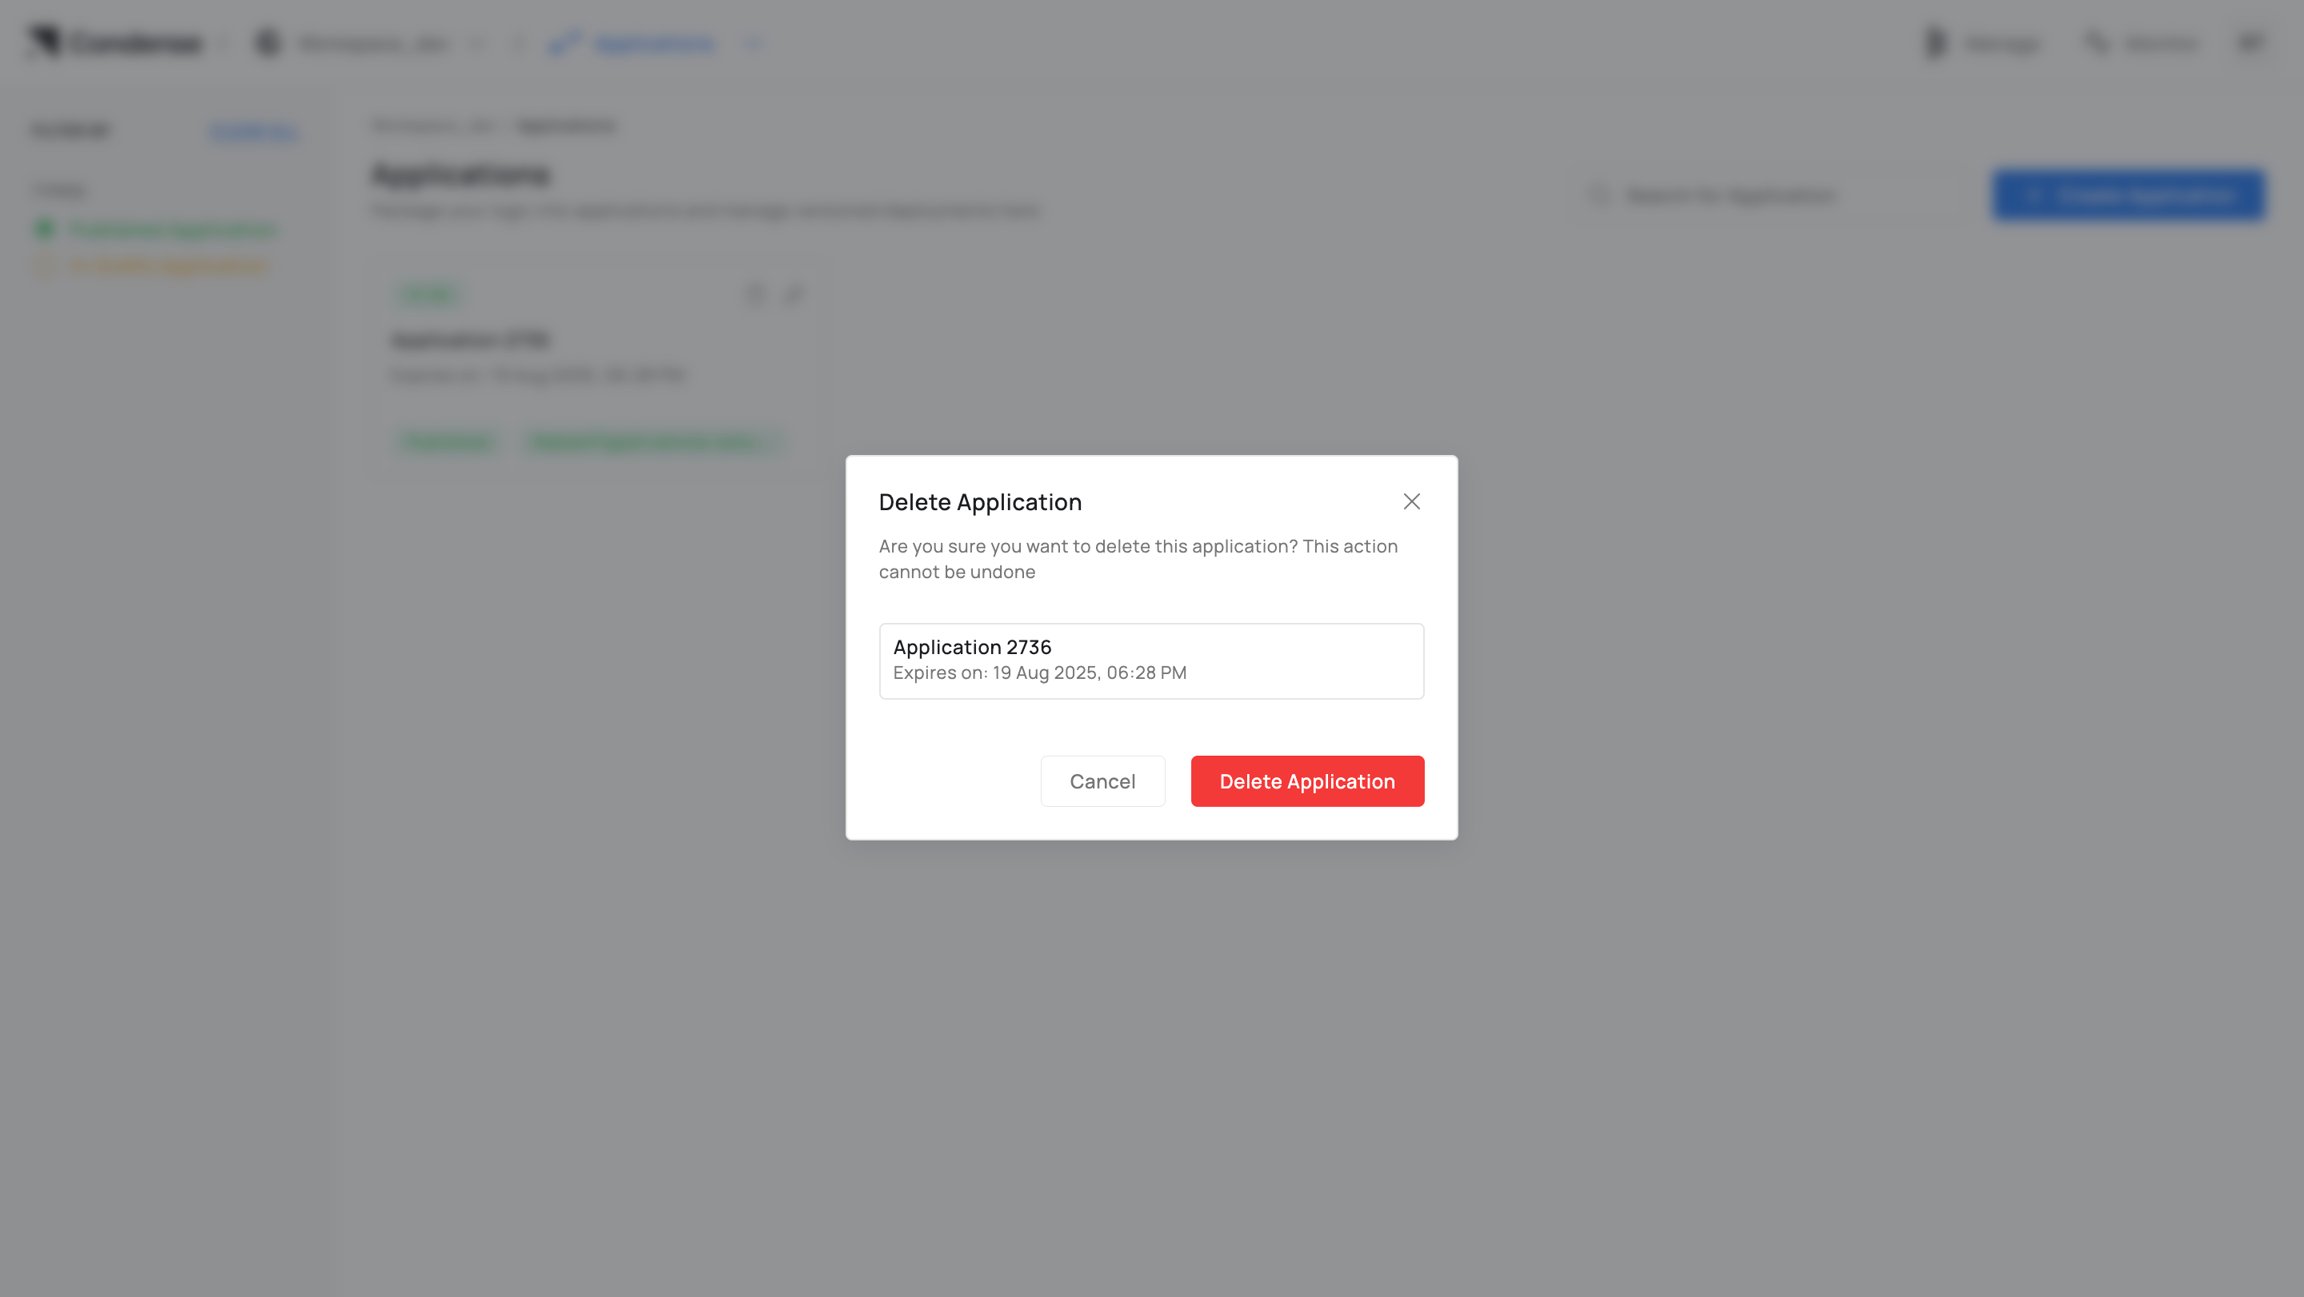
Deleting an Application
Who can delete: Admins (Maintainers if your policy allows) Warning- Irreversible in Condense.
- If referenced by any deployment, update/remove those deployments first.
Configuration Parameters
A. Creation| Field | Description | Required | Notes |
|---|---|---|---|
| Application Name | Unique identifier in workspace | Yes | 3–63 chars; letters, numbers, -, _ |
| Publish as a custom | Publish target at release | Yes | Transform / Input Connector / Output Connector |
| Version | Human‑readable version label | Yes | e.g., v1, v1.1.2 |
| Expiry | Draft retention period | Yes | Draft artifacts auto‑cleaned after expiry |
| About | Description for operators | No | Shown in details and summaries |
| Git Provider | Authenticated provider | Yes | GitHub / GitLab / Bitbucket |
| Repository | Repository path | Yes | Selected from provider after auth |
| Branch | Source branch | Yes | Changeable until first build |
B. Development (Step 2: IDE)
C. Build (Step 3)
Summary Pane (left): provider, repo, branch; detected language/runtime; app name/type (Transform/Connector); version; About; configured ENVs (masked); flags for exposed servers.
D. Publish
Roles and Permissions (Applications)
* Maintainer deletion depends on your organization’s policy.
Role descriptions
- Admin: Full lifecycle control and governance.
- Maintainer: Operates lifecycle (develop/build/publish) but not workspace settings.
- Developer: Develops and builds; cannot publish or delete.
- Viewer: Read‑only.
Monitoring and Audit
- Build Logs: full build output with success/failure indicators.
- Runtime Logs (when deployed): stdout/stderr available via Logger/observability stack.
- Version History: immutable publish records (version, author, timestamp).
- Activity Log: who created, edited, built, published, or deleted the Application.
Best Practices
- Single responsibility: keep each Application focused for simpler testing and review.
- ENVs over hardcoding: configure ports, credentials, and endpoints via environment variables.
- Stable branches: map branches to stages (dev, staging, main).
- Tag discipline: align Version, image tag, and Git tag/commit for traceability.
- Test early: use Publish/Subscribe testers before builds to catch schema/mapping issues.
- Minimize image size: prefer slim base images for faster builds and deploys.
Common Pitfalls and How to Avoid Them
- Published artefact not visible for deployment
Cause: Wrong publication as a custom choice.
Avoidance: Confirm the Transform vs Input/Output Connector before publishing. - Unreachable HTTP/TCP during testing
Cause: Server not exposed or wrong port binding.
Avoidance: Enable the correct toggle and match the port ENV in code. - “No messages yet” in Subscribe
Cause: Topic/partition/offset mismatch or too small a fetch window.
Avoidance: Use First/Last/Size presets and verify topic + partition. - Build failures due to missing dependencies
Cause: Dependencies not in project config.
Avoidance: Add to dependency file (e.g., requirements.txt) and rebuild. - Deleting an Application still referenced by deployments
Cause: Active transform/connector points to this Application.
Avoidance: Update or remove dependent deployments first.